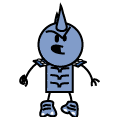
Step 1: Setting It Up
Create a new document in Adobe Illustrator, and set its size to 117 by 117 pixels . When creating a new document, you'll see a window come up in which you can name the document. You'll also see a section titled "Artboard Setup." Set the "Units" drop down to pixels, and enter 117 in both the Width and Height boxes. When you set the image size in Illustrator, all that really means is that it gives you a guide box to draw in.
Step 2: Drawing Your Avatar:
The pencil tool is the best tool to use, it can be used for making make your own shapes or to correct shapes made with their respective tools. I reccomend not using the pen tool, the fill tool, or the erasers, the pencil and the select tools are the best for doing what you need to do. Be sure to use two pixel lines when making your avatars, line weight can be modified in the Brush/Swatch/etc window. The shape tools are also good for making perfect shapes, if you want to make a head for your avatar, when you select the circle tool you can set the size of the circle you want. 44 by 44 pixels is a good size for the head.
Step 3: Coloring Your Avatar:
All the lines that you make have two color properties: line color and fill color. There are a number of ways to change these, but the most obvious way is on the tool bar. There are two color blocks, one is fill color and the other is line color.
Step 4: Using the Arrow Tool
The arrow tool is the other most useful tool you have. Use it to select shapes you make, it can delete them, move them, alter their size, and rotate them. To delete a shape or line you make, just select it, go to the edit menu, and press clear. The select tool (rectangle or lasso) selects multiple shapes.
Step 5: Finishing Up With Illustrator
Now that your avatar is finished, click 'Save For Web' and save the file as a .GIF. This will make the background of your pic transparent instead of white. When you save it as a .GIF, the program automatically resizes it to fit the drawing. If your avatar is too big, doing this will cut off parts of the avatar.
Step 6: Fixing the Size of your Avatar
After you're done in Illustrator, open up your avatar in Adobe PhotoShop. Once there, select your avatar, go to the menu and click Image > Canvas Size. From there you set the size to 117 by 117 pixels, or 1.625 by 1.625 inches. There is no way to make it stay at 117x117 without stretching the image while within Illustrator, so you need to do it in Photoshop. In most cases, the resize in Photoshop just adds blank space, if your picture is too small however, it will chop off parts. Actually, I had found out a while ago there was an alternative to this, I just forgot to add it. In Illustrator when you Save For Web, select Clip to Artboard and your picture will remain inside the box with just blank space added.
Step 7: Getting your Avatar on the Internet
If you have your own website you can host your pics there, but if you dont Photobucket is a good, free site to host your pics on. Simply sign up according to their instructions, then when you sign in you should be given an option to Browse your computer for an image file. Once you find it and submit it to upload, just get the URL and then you can link to it from elsewhere.
To post a picture in the forums, you copy the URL, type [IMG] and paste the URL in, then close the code.
View Single Post
-
2005-05-08, 05:11 PM (ISO 8601)Barbarian in the Playground


- Join Date
- Mar 2005
- Location
- NY
- Gender

 Guide to Making Avatars with Adobe Illustrator

