
Results 1 to 30 of 163
-
2022-04-20, 08:37 AM (ISO 8601)Ettin in the Playground


- Join Date
- May 2009
- Location
- Perth, West Australia
- Gender

 The (New) 3.5 Red Hand of Doom Handbook for DMs - Major Spoilers! - PEACH!
The Red Handbook of Doom
The (New) 3.5 Red Hand of Doom Handbook for DMs - Major Spoilers! - PEACH!
The Red Handbook of Doom
A 3.5 DM's Handbook for running The Red Hand of Doom
 Redder, handier, and now with 100% less pbucket
Introduction
The Red Hand of Doom is generally accepted as one of the best published modules for third edition; it seems every few weeks someone is either starting a campaign journal about it or asking how to handle issues with it. (This is even across editions thanks to the Matt Colvilles of the world, requests to adapt the module are frequent!) Still, it has its flaws and adapting it to different milieu or parties can be kind of complicated. Thats where this Handbook/Resource/FAQ/Thread comes into it. If youre looking for help on how to better run the game, some fill-ins for some of the background fluff, some better mechanics, or some good licks that DMs have tried, this is where well try to provide the answers.
Yes, it's a Handbook, but always under construction, so please contribute!
If youve run Red Hand of Doom (abbreviated as RHOD from here on in for sanitys sake) and have some good advice for DMs, wed love you to share it. This thread will be the subject of rolling updates, so feel free to share content, resources, maps, tips, etc. for running RHOD. Really good stuff (depending on how much space I can squeeze out of a post) will then get edited back into this original handbook.
But Saintheart, youve already created a RHOD Handbook!
That I did. You can still read it here. However, people were so generous with their time, ideas and posting in there that after 12 years of posts, the thread finally hit GITPs capacity limit, and so had to be locked off from further replies. I still heartily commend that thread to the reader, all 50 pages of it, because it contains a lot of useful material and ideas. But it also meant I had to create this one.
Wait, are you adding more advice here or just rehashing the old one?
Most of the original handbook is reproduced below, subject to some revisions and simplifications. I made some mild changes based on things I learned over the years. It may well change more over time. But as said, the links to the old RHOD Handbook will remain intact so that thread can be consulted for the original advice on modding the RHOD.
Table of Contents
- Post 2: Overview of the campaign
- Post 3: Adaptation to other settings
- Post 4: Drellins Ferry through to Skull Gorge Bridge
- Post 5: The Blackfens and Rhest
- Post 6: The Ghostlords Lair
- Post 7: Before the Battle of Brindol
- Post 8: The Battle of Brindol
- Post 9: The Fane of Tiamat
- Post 10: Other Resources, Links, and Campaign Journals
Thanks once again in advance to all of you, but I'd also like to thank once more AslanCross, Saph, and Kjones since they did the trailbreaking for this handbook via their excellent RHOD campaign journals. They inspired this handbook, are linked to in the resources section, and are still well worth a read for themselves.
I would also like to add a very special thanks to Lightwarden, who originally mentored me through RHOD and taught me most of what I know about D&D 3.5. Many thanks, Light.
Last edited by Saintheart; 2022-04-20 at 09:14 AM.
-
2022-04-20, 08:38 AM (ISO 8601)Ettin in the Playground
- Join Date
- May 2009
- Location
- Perth, West Australia
- Gender
Re: The 3.5 Red Hand of Doom Handbook for DMs - Major Spoilers! - PEACH!
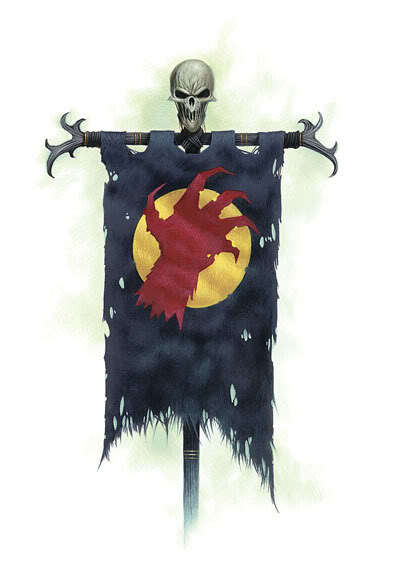
Overview of the campaign, who to run it for, and common considerations and issues that arise
 Always a good idea to be prepared.
How many players can be run in RHOD?
SpoilerKjones, who wrote one of the campaign journals referenced below, says Âthe Red Hand of Doom is balanced for a party of four core-only PCs - specifically, a meatshield, skillmonkey, healbot, and blaster. With more than four, action advantage against single foes becomes a problem, though these kinds of battles are relatively uncommon. The solution to this is relatively simple; you can toss in an extra couple of monsters into most battles without too much trouble.Â
If you go above 6 players, though, the sheer weight of PC numbers dictates serious reworks to most encounters. A couple of extra monsters at the same level doesn't really cut it.
Can you run it for 8? Yes, but on my personal experience, I donÂt recommend it if you want to portray the party as being under serious threat much. The partyÂs collective firepower is going to stand up to most challenges that the adventure throws at it (and then some). For the 8-man party, all NPCs intended as allies can be relegated to noncombatant guides. And at this level encounters become a balancing act between cakewalk and total party kills because the party's aggregate abilities turn fights very swingy.
A quick and dirty way to redress the balance with 8 players is to double the saving throws and hitpoints of every "default" opponent, which notionally makes every encounter an overwhelming one for a party of 4 and therefore presumably able to be handled by a party of 8.
Another alternative is to start them off at level 4 rather than level 5, although again you need to just keep an eye on the fights to avoid TPKs. The XP progression should hold up; even with 8 players they're not likely to fall well behind the notional level progression of the campaign.
However, the same rule doesn't apply in the other direction -- i.e. I don't recommend trying to run RHOD with 3 or less players. Levelling the party up to 6 isn't going to cut it because action economy still works against them at 3 characters or less. Maybe gestalting makes it viable  I canÂt say personally.
The first couple of hostile encounters in the game should be used as a gauge for the party's capabilities. If they get heavily rolled in "Marauder Attack" it's probably going to be tough going for them in the remainder of the campaign.
Kjones goes on to say ÂThe second issue is more problematic. Any group deviating from this "default" configuration [of the Âfour pillars of D&D parties] will find many of the encounters to be unchallenging and unfun if run as written. This, too, can be rectified without too much trouble. NPC spell selections should be completely reworked, in light of the fact that many NPC casters have save DCs that are too low to be considered threatening.Â
What levels of party can RHOD be run for?
SpoilerThe module recommends players start at level 5, expecting to top out at level 10. This is good advice. (In the book's funniest sidebar, James and Rich contemplate a party that can defeat the entire Hand  giants, multiple dragons, Kharn, mages, everyone -- by itself. In such a scenario, they soberly suggest that Âyou might not be running the adventure for the right character levels. Understatement FTW!)
A level 6 start means 5th level spells will likely be online at or before the Battle of Brindol. This has  implications. Starting at level 7 and above, most of the fights are going to be cakewalks. Even at level 5, hobgoblin squaddies (which the partyÂs likely to face for 75% of the adventure) are credible threats only in large numbers and backed by spellcasting support. Unless youÂre aiming for a power level and feel where the characters are superheroes compared to the opposition, donÂt run the unaltered adventure starting higher than level 6.
Remember, the strongest spellcaster opponent in the entire adventure is Azarr Kul at level 11 (apart from the Ghostlord, over whom there should be a blinking sign reading "DO NOT FIGHT"). The highest-level spellcaster in Elsir Vale is Aragathos, a Sorcerer 10/Dragon Disciple 2 in Dennovar, who is meant to be Sir-Not-Appearing-In-This-Film. The PCs are eventually going to wind up equal to or greater than most of the ValeÂs spellslingers and warriors even assuming a level 5 start.
In terms of the frequency of levelling, RHOD DMs often institute automatic level up points, which makes PC power much more predictable. These level up points are, in essence, anytime the party kills a dragon ... or a half-dragon behir ... they gain a level. It provides a nice, predictable gradient of power which works okay with RHOD's narrative-based structure and does make it easier to judge encounter difficulty.
How much reworking does RHOD need?
SpoilerRHOD is built for a group of four casual players whose character choices don't deviate away from the classic four. It works reasonably well for that. Keeping that in mind, changing the campaign becomes a much simpler exercise since RHOD's problems aren't that hard to fix, in most cases they just need a bit more oomph. ItÂs a framework to be built upon. Most of what follows is needed if your partyÂs well-experienced or optimised, this handbook does not make essential fixes or suggest RHODÂs broken as written.
But, per kjones: ÂNPC spell selections should be completely reworked, in light of the fact that many NPC casters have save DCs that are too low to be considered threatening. I did not re-stat the rank-and-file horde members, but given the opportunity to re-run this module, I probably would have done so ... all major NPCs should be given items, spells, and abilities to prevent an anti-climactic demise. Potions of lesser restoration are a good place to start, as are luck feats from Complete Scoundrel. Â even if the NPCs in the module were more usable, I'd still recommend tweaking them to meet the specific nature of your party.
Finally, note that these recommendations are not based merely on the relatively low power of the builds presented in the module. Even if your party is unoptimized, many of the NPCs in the module are fairly uninteresting, and can be made more so without making them strictly more "powerful". For example, some of the rank-and-file have Alertness as a feat. This will probably never be useful in any significant way. Of course, you could swap it out for Power Attack or Martial Study... but depending on what you want them to do, you could also give them Improved Initiative, and watch as they get the drop on the PCs again and again. (Or something like that. The details are up to you. Framework, remember?)Â
Alterations needed depend heavily on PC numbers, tactical experience, and level of optimisation. It's all about the number of actions they can take in a round and their control of the action economy. There's also PbP vs. FtF to factor in. PbP is primed for tactical thought since the "decision time" is theoretically unlimited -- a guy could go away for a day thinking about the current round and come up with a brilliant strategem, while the same player at the table might not be able to think of it on the hop.
Difficulty can be tweaked by making Red Hand troops a little more genre-savvy. Unaltered, the HandÂs tactics make little sense in a world populated by wandering adventurers and very potent casters. Most Hand patrols don't have instructions to target casters or focus their fire. Even allowing for most of the Red Hand being cannon fodder, this is inexcusable for an army whose threat to the Vale is principally because it hasn't been brought together as one force before.
It might sound like a lot of messing around, but it isnÂt really -- particularly if youÂre running things in PbP, where youÂve got a lot of time to get prepared and rewrite encounters.
In summary, tune the adventure to suit the party, not the party to suit the adventure. Even targeted at a very 'classical' D&D party run by inexperienced players, RHOD's very flexible for accommodating alternatives - but will need some work to do so.
Timing in the campaign
SpoilerOne issue that frequently crops up is that the Hand army moves too slowly on the default timeline. The Âcountdown to Brindol is RHODÂs best tool for pushing the narrative forward, but the Red Hand's itinerary is actually pretty generous. Based on the experience from the various threads we've seen, youÂre more likely than not to have your party back at Brindol well ahead of the Hand, it's not likely to go 'down to the wire'.
Koth's notes say it'll take 35 days for the Red Hand to march from Cinder Hill to Brindol, burning every town on the way there. This 35 becomes maximum 41 days if the party kills Koth, recruits Warklegnaw, and destroys Skull Gorge Bridge. Assuming a party on foot at 30 feet per round making 3 miles per hour, at 8 hours per day, a party can cover 840 miles in 35 days (and 984 miles in 41). To give it scale: Drellin's Ferry is only about 80-90 miles from Brindol. Absent wild sidetrips, most parties will meet that deadline and then some. This deadline gets even easier if the party secures giant owls from the Tiri Kitor in the Blackfens. RHOD suggests giant owls can make 56 miles per day, assuming 8 hours of travel per day at 7 miles per hour. That hugely increases the distance they can cover in the month or so of the Red Hand's march. Also, if the partyÂs scooting around the countryside on owlback, it makes suspension of disbelief tougher when assassination squads start jumping out of nowhere to ambush the party. And if the party wizard hits level 9 and picks "Teleport" as one of his spells, then that's at least 900 miles of travel per spell.
Dealing with a party back at Brindol Âearly entails: sidequests from Brindol; have the Red Hand move faster right from the get-go by altering Koth's notes to reflect a shorter timeframe; allow the party to just rest up and prep for battle; or have the Hand move at the speed of plot. Of these, options 1, 2, and 3 are going to suspend disbelief a lot easier than option 4. There isn't a lot of time to craft items across the rest of the campaign, so depending on how much time they've got this may be a convenient moment. Also consider letting the party help prepare for the battle by boosting defenders capabilities, which weÂll discuss later.
Another, proactive measure is to lean harder on the early parts of the campaign, encouraging the party to sidequest into the villages of Elsir Vale before getting Âback on track  warning towns and villages, looking into interesting side ruins, and so on. The players may not figure out early on how imminent the HandÂs arrival is or overestimate the amount of time theyÂve got. Or just alter Koth's notes and speed up the Red Hand's march by a few days at least.
Parties who are Âlate on the timeline are comprehensively dealt with in the RHOD book, so nothing more need be said on that topic.
Notes on Victory Points
SpoilerThe Victory Points total RHOD imposes to see if you've done "enough" to destroy the Hand looks pretty formidable. It isn't: of a total possible 74 VP, the players only need 40 VP at Brindol. No railroading is needed even if the party misses an entire encounter area. The points from various tasks are atomised such that if you miss some you can easily make them up elsewhere. And the party gets two chances at some VPs -- missed Red Hand leaders show up again at the Battle of Brindol.
Of the 40 VP, players earn a guaranteed 20 from the combat encounters in the Battle, or really a guaranteed 32 VP since any missed Wyrmlords show up again here. PCs might withdraw from these encounters thus depriving themselves of the VP, but in practice PCs seem to prefer death or glory, which obviates the count: if they lose they're generally all dead, in which case the VP count is the least of their worries.
The biggest single loss of VP is if the players skip Rhest entirely. ThereÂs no backup plot marker to get them out to the GhostlordÂs lair, leading to them missing 14 VP (18, but Saarvith and Ulwai will show up again at Brindol anyway). Even then, it's nowhere near a fatal blow. YouÂd be looking at a real Fail Party to have to start massaging the adventure to save the PCs from themselves.
Two issues that a lot of DMs get confused on with VPs:
(a) Does getting more than 40 VP = automatic victory in the Battle of Brindol?
(b) Do you tell the players about the VP or give them a running count of how many they have?
The answer is No to the first; Maybe to the second.
On the first question: you tally up Victory Points if (and only if) Kharn is killed during the Battle of Brindol. Kharn is the linchpin of the army, but if he dies and the Hand hasn't been dealt enough 'deaths by a thousand cuts' from the party's earlier victories, someone else will rise to take his place. If Kharn dies and you don't have a total of 40 VPs within the next 1d4 hours, the Red Hand regroups and launches a second, more determined attack which smashes what's left of Brindol; even if Kharn dies, Brindol has basically 'shot its bolt' defending the first assault and won't have the strength to hold back a second - the remainder of Brindol's forces withdraws to Dennovar.
On the second question: there's arguments both ways. The middle course is to suggest that a certain event or events gave an extra X number of VP, but don't tell players the number they're trying to hit. Since the players can't win before the Battle of Brindol anyway, and if you're playing with a seasoned group of D&D players you're already going to contend with a goal-oriented attitude of "Adventuring! Kill them, take their stuff, and find out what you next have to do to acquire the Macguffin." Don't shoot yourself in the foot by telling the players what number they have to meet -- just give the impression that their actions count in some way.
Having said all that, it is very possible - if not advisable - to do more with the Victory Points count than RHOD does. You can shift how Brindol plays out, provide different levels of victory, add, subtract, or game-ify the whole hunt for VPs if you know what you're doing. We've put a good guide on how to do it right here.
Any particular gamebreakers to watch for?
SpoilerOptimised parties are always going to be harder to challenge than unoptimised ones. Most DMs already know this. Here weÂre only looking at particular character options which cause serious headaches for RHOD itself - options which reliably turn a lot of fights into annoying timewasters because of what the option does, together with explanations for why the option sucks for RHOD in particular.
So, in no particular order, I give you the RHOD DM's list of headaches:
- Fifth-level spells start to come online around the highpoint of the campaign - the Battle of Brindol. It's basically inevitable, but fifth level spells bring a quantum leap in PC capability: Teleport, Mind Fog, Cloudkill, Dismissal, Overland Flight, Polymorph, Scrying, Flame Strike, Commune, Contact Other Plane, Raise Dead, Righteous Might ... and that's just from the SRD. The opposition during the battle is melee-focused and heavy with opponents that don't have great saving throws; there's no dedicated spellcaster that the party faces as an encounter, even the dragon is a bruiser and burner, not a caster. Be warned, then, that PCs can turn the Battle into a practical demonstration of the potency of Tier One classes. This will depend on how seasoned the players are, and how much time they've got to think - if you've got only one spellcaster PC it's going to be harder for him/her to clown every encounter, but this should be borne in mind nonetheless.
- Mindsight from Lords of Madness. ItÂs potentially a gamebreaker in general, but moreso in RHOD because virtually all the dungeons in the game are less than 100 feet across. A Mindsight-endowed character can give complete intel on virtually all monsters locations  even undead, i.e. at the GhostlordÂs lair  just by standing near the entrance to a dungeon for a round. IMHO it also makes an underwater assault on Rhest very easy, makes ambushes on the party non-ambushes, and makes the sniper attack at Brindol almost a nonevent. You could start dishing out Mind Blank scrolls to some enemies, but itÂs easier just to disallow it altogether.
- Monsters' Will saves are a gamebreaker -- many are very average. Confusion, Ray of Stupidity, and, Gygax help us, Mind Fog are all encounter-enders against the majority of the Hand forces. Conviction or Mass Conviction spells help with these issues. Halfway optimised beguilers tend to have perhaps inappropriate levels of godmode with RHOD, particularly when by the time you reach the Blackfens a beguiler can attain enough spells, Bluff and Disguise to fool Regiarix that he's a hobgoblin (personal experience on that.)
- The spell Downdraft (Spell Compendium) is a potential headache for the first couple of dragons in the campaign. It's one of the few 'save or be screwed, save and potentially be screwed anyway' spells I've seen which works well against a dragon. (Well, it worked against Ozzy, anyway...) Also watch for Ray of Dizziness, which imposes basically the effects of Slow and has no saving throw. Spell Resistance does apply ... but unfortunately for your dragons, none of them have Spell Resistance due to their youth.
- Look carefully at the Dread Necromancer class before allowing it. There's a few locations where dead bodies can be accessed with impunity, not to mention that the Battle of Brindol is going to give a DN an ever-increasing supply of fresh corpses to play with.
Improving the Red Hand forces generally across the entire campaign
SpoilerRather than repeat the same advice through five different sections, letÂs talk about general improvements that can be made to recurring opponents in the RHOD campaign.
A note of caution, though. In my entirely personal and less-than-humble view, it isnÂt wise to turn every soldier in the Hand into an elite trip-attacking fighter who can take several partymembers all by himself. These guys are meant to be a threat to the good folk of the Vale only because Kul's leading them; even the piddling town guard of DrellinÂs Ferry successfully sees off hobgoblins raiders. Rank and file Hand members  the regulars and possibly the veterans  therefore shouldnÂt be given lots of extra levels. The HandÂs upper ranks are meant to be challenging, but they still have a lot of cannon fodder.
ItÂs worth just stepping back for a moment and taking a fresh look at things if you find yourself getting caught up in what I call the RHOD Arms Race  turning your hobgoblin rank and file into seriously competent builds who can beat the hell out of party members. This encourages players to seek out ever-stronger character optimisation strategies and (shudder) the 15-minute adventuring day. This isnÂt to say you canÂt have the elite death squad that eventually comes after the party  or adjusting Battle of Brindol encounters to have crack troops -- just donÂt make every Hand squaddie that way.
Onto the suggestions common across the campaign--
The Hobgoblin Regulars
Walking chunks of hitpoints, one and all. One feat each, which is Alertness. Boring and ineffective. Replacing that feat really depends on what you want your rank and file to do, but hereÂs some suggestions for replacements and other refinements:
Spoiler
- Power Attack, if you want them thumping ineffectively away at the party.
- Improved Initiative, if you want them to get the drop on the party a decent amount of the time.
- Shieldmate (Miniatures Handbook, p. 28) for a +1 AC to an adjacent opponent who wants to wield his weapon two-handed rather than use a shield.
- Phalanx Fighting (CW, p. 103) if youÂre prepared to have the regulars wield shortspears or short swords rather than longswords.
PHB 2 Teamwork Benefits: if you get your patrol leader to put 5 ranks in Balance, and 1 rank to the regulars, you could get the hobgoblin patrols to access Massed Charge, which gives you an attack bonus equal to the number of team members participating in the massed charge. On RAW this could nicely stomp a single member of the party if you get the right moment for it: although the BenefitÂs training requires you charge together, the use of it doesnÂt require that team members all come from one direction. They can converge on one point from multiple directions. You get, say, four hobgoblin regulars and their leader all charging at once, and their charge attacks each get a +5 on top of the +2 from a successful charge.
Not so cocky about mere mooks now, are we?
And thatÂs before we start incorporating ToB charge-helping maneuvers like Battle Leaders Charge, Leading the Attack, or Leading the Charge.
Even if more vulnerable to Area of Effect, it makes them act more like their RHOD character hook describing them as Âconditioned to follow orders; accustomed to cruelty and harsh disciplineÂ.
Hobgoblin veterans can be worked with a little more, obviously, because they've got more feats. Basically, rather than just one of the above options, take two or more. Veterans are harder troops, but they're not leaders, just a bit better at hitting things.
Hobgoblin Bladebearers and Hobgoblin Sergeants
In summary: for these guys, Tome of Battle is your friend.
The consensus among most DMs is that the Bladebearers are more effective and interesting rebuilt as Warblades of the same or slightly higher level. Go and Do It! Do it Naow!
The main reason is because it gives them just a bit more oomph in combat and more interesting things to do with them. And once you've built one, creating another unique individual Warblade is as easy as switching maneuvers and weapons around. I've also heard good things about switching all hobgoblin sergeants to Crusader 3, too, which certainly makes them a bit more durable if not respectable.
As an example, Uth-lar, who would otherwise be a hobgoblin bladebearer and leader during the Marauder Attack at the start of the adventure becomes as follows:
Spoiler: Uth-Lar, Hobgoblin BladebearerWarblade 4,
32 HP (4 HD), AC 17 (10 + Masterwork Armor 3 + 3 DEX +1 Two-Weapon Defense
BAB +4, +9 attack with his two +1 shortswords or +7/+7 if he uses Two-Weapon Fighting. Damage = 1d6+6/19-20
Str 16 (+3), Dex 16 (+3), Con 15 (+2), Int 10 (+0), Wis 12(+1), Cha 8 (-1)
Fort +6 Ref +4 Will +2
Feats: Two-Weapon Defense(B), Weapon Focus (short sword), Two-Weapon Fighting (B), Weapon Specialisation (short sword)(B).
SQ: Uncanny Dodge, Battle Ardor, Battle Clarity
Maneuvers:
Battle LeaderÂs Charge  no AoOs while charging, +10 damage on hit.
Emerald Razor  melee attack becomes touch attack
Leading the Attack  allies gain +4 on attacks against foe you strike
Sudden Leap  Jump as a swift action
Wolf Fang Strike -- attack with two weapons.
Stances:
Blood in the Water -- +1 to attack and damage with each critical hit.
Leading the Charge  allies deal +4 on charge attacks.
Our guy has three bonus feats given by RHOD, preserved intact here. Toughness is gone, sure, but I contend the maneuvers and stances make him far more interesting as an opponent and far better a booster of his fellow troops.
This template can be used for every other hobgoblin bladebearer in the campaign. The maneuvers at least are solid enough choices for hobgoblin patrol leaders.
A variation is Warblade 1/Fighter 2/Warblade +1, utilizing RAW to get more feats and maneuvers for the same levels.
If you donÂt have ToB, youneed your head examined but are entitled to your opinionstill are well advised to make the builds a bit better. Alertness and Toughness are just wasted feats, and Weapon Focus + Weapon Specialisation = suckitude for fighters by comparison with other options out there, even at these low levels.
If youÂre sticking to flat fighters, you could easily get away with an extra level on the bladebearers, and certainly another fighter level on the sergeants. If youÂre going to that trouble, the bladebearer should be redesigned away from two-weapon fighting: itÂs a trap with no rogue levels, even with the fighterÂs surfeit of feats. ThereÂs plenty of good fighter handbooks discussing what feats to put on vanilla fighters. But if youÂre going defensive, at least consider Phalanx Fighting and have the hobgoblins work as a team  and if youÂre going aggressive, charging builds, then consider Dungeoncrasher if only in its 2nd level form.
Monster Manual V variant hobgoblin possibilities:
If you've got access to this book, some variants synergise well with the Hand's composition as an army of raving hobgoblins:
- Warcasters, even with an extra level of wizard or two, as replacements for the Hobgoblin War Adepts.
- Spellscourges as replacements for Bladebearers, albeit 1 CR higher.
- Hobgoblin Duskblades: AslanCross has only good things to say about these guys, possibly as replacements for Hobgoblin Veterans, and certainly as extra firepower for the assassination attempt on the PCs.
- Hobgoblin Warsoul: possibly replace one of the hobgoblin clerics in the GhostlordÂs lair with one of these guys ... or even replace Koth, particularly given the Cult of Power extraordinary ability.
Hellhounds:
These guys are generally seen as underwhelming. Suggestions for replacements range from Dire Wolves to Rage Drakes. Greyfell proposes giving the hellhounds the draconic template and switching out feats for Multiattack and Clinging Breath from the Draconomicon. Napalm hellhounds FTW! And it does make sense since most of the summoned creatures in the campaign are coming from Tiamat's home plane, so one would expect some draconic influence there.
Equipment loadouts: In what is probably a misprint, hobgoblin soldiers get 3 potions of Cure Moderate Wounds. Leaving aside this invites your squirrely players to store up healing potions, most hobgoblin soldiers probably aren't going to last more than a round or two to consume said 3 potions.
One solution -- and indeed across the campaign, not just for hobgoblin soldiers -- is to substitute or outright give Potions of Conviction, or have the Hand's clerics cast Mass versions of it. This at least gives the Hand forces some chance they can stand up to encounter-ending spells like Glitterdust.
Improving the dragons across the campaign
SpoilerWeÂll talk more specifically about the various dragons as we go, but the consensus is that Ozyrrandion and Regiarix need upgrades to the next size and age category, Abithriax only does if the partyÂs optimized, and Tyrgarun does not.
For all dragons, feats like Alertness, Weapon Focus, and Improved Critical should be swapped out. Dragons are most effective when theyÂre making strafing runs using their breath weapons because they can hit multiple targets in one strike, or when they're making full attacks; you should be using their standard actions (when they get them) either to breathe or cast, not for single attacks. Decide whether you think the dragon's going to mostly be in the air or on the ground and build accordingly.
Remember dragons flight speed (150 feet = 300 feet at double move) and give them some regard for their own hides. Regiarix has encountered adventuring parties before, so if hit with a serious fusillade he should head for the hills ASAP. Ozyrrandion has a simple escape hatch: fold wings and drop like a rock into Skull Gorge, then level out and get lost.
Every dragon should know and cast Mage Armor and Shield. Scintillating Scales makes them much tougher against magic. The spell Wings of Cover is a dragon spell and a great lolnope against magic as well. For full attacking dragons, Blood Wind.
(Varanthian as the fifthBeatleÂdragon of the adventure is a bit of a poser. See the spoilertag devoted to her for further discussion.)
They caught a Wyrmlord, damn it ...
SpoilerObviously the subject of prisoners is a well-worn one for D&D parties, but chances are the PCs will capture at least one Wyrmlord during the adventure, so it pays to be ready for it. Some suggestionsÂ
Koth: ride him back to DrellinÂs Ferry, put him in the Old Toll House. If he isnÂt rescued (see further on) he goes with a detachment of SorannaÂs soldiers to Brindol, though I personally reckon you then give him a 50/50 chance of escaping somewhere along the way. With adventurers escorting him, no chance. At Brindol IÂd presume he says nothing more than he already knows, and is locked away in a nice quiet dungeon beneath Brindol Keep to await a summary trial and execution.
Saarvith: if heÂs captured, he could point out to the party that heÂs nothing without Regiarix, and that Kharn isnÂt going to be very happy with him upon reporting back  in fact he might rightly conclude his time with the Hand is over as soon as Regiarix bites the dust. Releasing him at Rhest is an option, though I reckon thereÂs good odds the Tiri Kitor hunt him down themselves. If heÂs taken back to Starsong Hill, itÂs more direct: thereÂs every chance the elves will execute him for the misery his razorfiends have inflicted upon them. If the party really wants to cart him all the way back to civilization, I suppose thereÂs a chance he can be persuaded to help the Vale, but again itÂll take a unique party and unique set of circumstances to do that.
Ulwai: UlwaiÂs information can upend a campaign, since on the RHOD text she knows exactly where the Fane is, how to get in, and that Azarr Kul is right there, giving players a nigh-irresistible chance to cut off the snake at its head. Really callous parties might leave her to the GhostlordÂs tender mercies, but again, itÂs probably back to Brindol with her, where IÂd say her knack for diplomacy at least convinces Jarmaath to let her go after the HandÂs destroyed.Last edited by Saintheart; 2024-02-27 at 02:01 AM.
-
2022-04-20, 08:41 AM (ISO 8601)Ettin in the Playground
- Join Date
- May 2009
- Location
- Perth, West Australia
- Gender
Re: The 3.5 Red Hand of Doom Handbook for DMs - Major Spoilers! - PEACH!
Fixing the fluff: adapting RHOD for various D&D settings.

This is not really the kind of adaptation we meant.
Running RHOD in the Forgotten Realms
SpoilerOn the RHOD text you can drop Elsir Vale in between the Forest of Amtar and the Misty Vale "seamlessly". Its not a seamless fit, though. The various landmarks only liberally gel with the big map of the Realms, and not quite with the closer maps from Shining South (pp.155-158). You could work round this by suggesting the closer map from RHOD is a better fit to Elsir Vale from local surveys rather than try and explain why it doesnt fit.
A very generous player named Antariuk produced a map of Elsir Vale converted to Forgotten Realms standards, which you can find at this link. Under a full conversion of Elsir Vale to the Forgotten Realms:
- Brindol becomes the city of Rethmar.
- The Westdeep becomes the Misty Vale.
- The Wyrmsmoke Mountains become the Wyrmbones.
- The Witchwood becomes Shaareach Forest.
- The Elsir River becomes the River Talar.
- Lake Rhestin becomes Lake Lhespen, and Rhest itself becomes Lhesper.
- The Stonewash becomes the River Shaar.
- Mentions of Rhestilor should become Lhespenar (yes, I know it sounds like Cespenar from Baldurs Gate. Give me a break.)
- The Blackfens become the Lhespenbog.
- The Giantshield becomes the Rathgaunt Hills.
- The Endless Plains become the Shaar.
- Marth Forest becomes the Channathwood.
- Dennovar becomes Channathgate.
- The Golden Plains become the Swagdar (the Outlaw Wastes).
- The Wyvernwatch Mountains become the northernmost end of The (Halruaan) North Wall.
- The Thornwaste becomes the northeastern end of the Bandit Wastes, and avoided by said bandits because of the Ghostlords presence.
If youre determined to follow canon descriptions of the Vale, Ed Greenwood (yep, that Ed Greenwood) did an unofficial writeup of Rethmar a couple years back. You can find it here. Its interesting but gives us more work because it turns Rethmar into a rathole ruled by a merchant council, not a single lord in Jarmaath.
Erase the city of Kormul from existence or turn it into a treasureless ruin; it doesnt exist on the RHOD map of Elsir Vale. Theres also no sign of the Old Rhest Trail in any Realms source, so play that road as having fallen into disuse.
Whatever your choice, remember the partys well off the beaten track. Youre in southeastern Faerun; it aint the standard medieval setting, mostly because of the climate. RHOD happens in summer, and thats pretty much what its like all year round in this part of the Realms. Shining South describes the Misty Vale, Shaareach Forest, and Channathwood as stifling, steamy, jungles. If your PCs are wearing full plate armour without an enchantment of Easy Travel or Endure Elements they should be feeling it hard. (This is a good thing; it brings resource management back into the picture.)
There are ethnic differences: not many pale Illuskans here, its predominantly Durpari or Arkaiun, with a smattering of Halruuan. Merchant caravans from Calimshan are a possibility, too. Indeed you could perform a whole conversion to something more like Arabian Nights or Central America.
The Tiri Kitor become a tribe of exiles from the Misty Vale (most elves in this part of Faerun are insular and xenophobic). Perhaps they were exiled because they wanted contact with the outside world, which gives them a reason to talk before shooting when the party enters the Blackfens/Lhespenbog. Or maybe a religious difference: the Tiri Kitor honour Corellon Larethian, not more primal' gods like Rillifane or Fenmarel Mestarine.
Adapting other gods is straightforward: Lathander for Pelor, Kelemvor for Wee Jas. The Ghostlord becomes a druid of Nobanion seduced by Malar, forming the lion cult that plagues the Vale until the coming of Lhespenars kings to displace him into the Bandit Wastes, then cursed by Malar to blighterdom when he kills a lion cub.
Consider Jarrett Nurth (the serial-killing shopkeeper of Drellin's Ferry) as a Strifeleader of Cyric, or a cleric/rogue of Cyric this makes for a great little side scare in town.
Another thought is to introduce a fifth column among the Red Hand: covert clerics of Maglubiyet or Nomog-Geaya, the patron gods of goblinoids and hobgoblins said god/s being none too pleased about Tiamat stealing away a slab of their people.
The players get sent north on the (feeble) excuse that the blockade on the Old Rhest Trail must be broken to get reinforcements from Shaarmid, several weeks away. You might make a point of how unprepared for war the Vale is, given its buying light cavalry from literally hundreds of miles away.
Genre savvy players might ask: how does the Vale continue to exist, lodged as it is between a bunch of exiled Netheril mages to the south (Halruaa) and a half-drow neutral evil nation to the east (Dambrath)? In short: because Halruaa and Dambrath are snobs. Halruaa is holed up behind three mountain ranges; Dambrath has surprisingly nonaggressive (Shining South) attitudes towards its neighbours. Or maybe the Vale doesnt have any resources worth plundering. Or maybe its just too damn hot to fight. Either way, there are in-universe rationalisations for why Rethmar hasnt been made a smoking hole in the ground by more enlightened civilizations.
Possibly the biggest question: given Tiamat has a well-established church in Unther, why does she feel the need to start a war in a backwater on the doorstep of Halruaa, a country with enough resident magical power to blast the Vale off the face of the Realms if provoked? One answer could be that Tiamats got a precognitive gleam of the impending Spellplague. She has a good idea of whats likely to happen to Unther and Halruaa (the phrase "smoking cinder" pretty much summing it up.) And so is trying to diversify her holdings against this catastrophe. The war in Elsir Vale is her seed for the future.
But these are mostly flavor considerations. Setting RHOD in the Forgotten Realms is a homecoming for some beasties here -- Abishai and Spawn of Tiamat originate from the Realms or have specific notes in the Monster Manuals for how to adapt them for Faerun.
Ive seen the odd campaign journal which attempts to set RHOD in more conventional parts of Faerun; this is just the most straightforward conversion the authors themselves put forward. Really it's more the narrative structure than the window dressing that is the selling point of RHOD.
Running RHOD in Eberron
Courtesy of the ever-helpful and devastatingly handsome AslanCross!
SpoilerThe Red Hand of Doom is written for a fairly generic D&D setting (and as such, is easy enough to incorporate into "vanilla" settings like Forgotten Realms and Greyhawk, which primarily use default fluff). However, this excellent module also works very well in Eberron, but adapting it will take slightly more work .
On the Nature of Tiamat
Black candles burning/Announce her comeback
The reign is awaiting/The Queen of the Dead
--Queen of the Dark Horizons, by Rhapsody of Fire
Tiamat in Eberron is significantly different from her incarnation in other settings in that she is not a goddess. The gods in Eberron are distant and have never walked the surface of the Material Plane in the flesh as far as mortals know. Tiamat, however, has.
Tiamat is a demon Overlord, the daughter of Khyber himself. She was born of the Dragon Below and had has the power to corrupt and enslave all dragons, metallic or chromatic (though chromatics are especially vulnerable).
During the Age of Demons, the dragons who fought against the Overlords feared her the most, for she could turn them against each other. It took the power of the Couatls to imprison Tiamat in the Pit of Five Sorrows in Argonnessen, but even then they feared her return. By tracing her symbol in the skies, the dragons gave Tiamat her own apotheosis, hoping to forever banish her from Eberron.
Now, the Pit of Five Sorrows is the most heavily-guarded fortification in all of Eberron, considering that it is guarded by the entire Light of Siberys (the dragon army of Argonnessen). Even a horde of ten thousand hobgoblins and a few, relatively young dragons cannot do much to bring down the a single Glorious Flame of the Light of Siberys, who would likely be a Great Wyrm with Prestige Class levels, let alone an entire crusading army of them.
This does not mean that her cult is inactive. Tiamat's clerics: twisted dragons (some of them fiendish, blessed with fell energy), rakshasas (some of them draconic, blessed with the might of the dragon), and others have attempted to bring her back, and continue to do so.
As such, the Red Hand Cult should be primarily concerned with setting Tiamat free. How they do so depends on how she is kept imprisoned, and this depends on the DM. For my purposes, I had the PCs discover that the Fane of Tiamat was not actually a temple, but one of the dimensional foci of the great planar seal that powered the Pit of Five Sorrows. The planar seal, a continent-sized pentagram, was drawn using epic magic across the land and sea, and anchored on five fanes. The Elsir Fane, which is where Azarr Kul hides out, is the easiest to access. The others are much more difficult to access (they are either deep underwater or hidden in dense jungle).
Most chilling here is that if the dragons perceive a threat (and Tiamat is indeed the most significant threat they have faced since), they have a tendency to mobilize en masse and destroy whatever is in the way. If they catch wind of Azarr Kul's plan, they might probably invade Khorvaire and unleash destruction on the already war-torn continent.
The Wyrmlords and the Talons of Tiamat
It is certainly well within the realm of possibility that none of the Wyrmlords are actually goblinoids. Since the high cult of Tiamat is often made up of Rakshasas, it is not a stretch to make the Wyrmlords themselves Rakshasas in disguise (or not in disguise at all).
- I. Azarr Kul: Half-blue dragon Ak'Chazar Rakshasa. On the really high end of the optimization scale, but you could give him gishy spell picks. As an outsider, he has racial proficiency with martial weapons and will do well as a superpowered gish.
- II. Kharn: Half-red dragon Zakya Rakshasa (no ToB) or draconic (red) Naityan Rakshasa with Swordsage levels (with ToB). Or you could do both and make him a Zakya Rakshasa with Warblade or Crusader levels.
- III. Ulwai: Bog-standard Rakshasa. Although relatively weak as a full caster enemy (CL 7th for a CR 10 enemy), you could give her martial weaponry and make her a gish instead.
- IV. Saarvith: As an archer build, he doesn't work too well as a rakshasa. Keeping him as written is fine.
- V. Koth: Keeping him the same is fine. Warlock or Hexblade could make him a challenging boss if you play it right.
You could also go the way I went, which is to add extra rakshasa bosses. I introduced a large-sized, half-bronze dragon Naityan Rakshasa with Swordsage levels as Azarr Kul's true right hand man.
Remember that half-dragons are considered abominations in Eberron, but Rakshasas easily get around this by participating in a ritual that, if successful, gives them draconic might in addition to their existing powers.
The Mighty Ones
We goblinoids are just like you humans, except our empire lasted eleven thousand years.
--Lhesh Haruuc (Races of Eberron)
Another interesting piece of lore: Eberron's goblinoids, unlike the relatively lowly and reviled mook creatures in other settings, actually once ruled all of Khorvaire in an empire that lasted ten thousand years. They slowly crumbled after a catastrophic war with the Daelkyr and their aberrant hordes. Numerous ruins still dot the landscape of Khorvaire, testament to the fallen glory of the Dhakaani Empire. The goblins call themselves Golin'Dar, or "The quick and shrewd ones" (in fact, "goblin" is a human corruption of the term), the hobgoblins call themselves the Ghaal'Dar (the mighty ones; specifically connoting battle prowess), and the bugbears are the Guul'Dar or "the strong ones" (connoting physical strength). Collectively, the goblinoids call themselves "the Dar" or "the People." Most of them are not happy with their current lot in life, treated as "savages" by the "more civilized" human-dominated Five Nations. There is a lot of inherent racial pride.
Furthermore, while hobgoblins have a sovereign nation (Darguun), Darguul mercenaries were hired by many sides during the Last War (mostly Breland, however), so it's easy to explain why a large group of thousands of goblinoids is operating independently of the Lhesh Haruuc in Darguun.
The Giants
In Eberron, giants are not native to Khorvaire. They mostly inhabit the fallen empire of Xen'Drik, another continent to the southwest of Khorvaire. Since setting RHOD makes most sense in Khorvaire, it makes very little sense for a DM to have Warklegnaw's tribe of Forest Giants in the area.
Here are some ideas:
- I personally used Lycanthropes. Purged to near extinction by the Church of the Silver Flame in the past, isolated enclaves could still be discovered by the PCs. If the PCs are working for the Silver Flame, this might even be a chance to offer reconciliation. For irony, I made Amery Vraath a former Silver Flame paladin who got turned into a lycanthrope himself.
- Trolls: While the main issue with trolls is that they're not intelligent, it might make a lot of sense for them to not want to let the Red Hand Horde pass. They also live in forests.
- Ogres: Most ogres in Khorvaire are mercenaries from Droaam. In the Last War, many of them were conscripted for various nations, but after the war ended there could be any number of them hiding out in forests and other secluded areas.
The Elsir Vale
"If you want to escape the Last War, move to the Elsir Vale."
--Beggar Dane
RHOD describes the Elsir Vale as a very isolated and backwater area.
One major issue here is that in Eberron, long-range transportation is relatively easy to come by (the Lightning Rail and Airships contribute a lot to this). As such, it is more difficult to isolate the Elsir Vale. Thankfully, there are still large stretches of land that are not accessible by lightning rail, and airships are relatively expensive to charter at the PCs' level.
Another is that the highly-charged political climate left by the Last War makes large massed military movements very sensitive events; this actually helps the DM explain why neither the formidable armies of the rich, technologically-advanced Breland, nor the zealous paladins and crusaders of Thrane, nor the arcane knights of Aundair, nor the undead legions of Karrnath can be bothered to deal with the Red Hand threat. They might be aware of it, but moving large armies close to any borders (three out of the four suggested locations are very close to international borders) might spark the Last War all over again.
Eberron is a very large setting, and even on the densely-populated continent of Khorvaire, there are many isolated and deserted areas that the game can be set in. The map shows an area about 320 x 240 miles, which can be easily wedged into the following suggested locations:
The Western Eldeen Reaches
This is probably the most isolated part of the Eldeen Reaches, being wedged in between the Shadowcrags and the Byeshk mountains.
Pros:
-Pretty much the middle of nowhere.
-This is the best place to explain the elves.
Cons:
-Too far from any populated hobgoblin areas.
-Mostly dense forest, although some rolling plains are available. The geography of the adventure assumes a very open vale with mountainous areas.
Karrnathi-Talenta Plains Border
Another isolated area.
Pros:
-There is nothing much here; the Giantshield Mountains can fit neatly into the map as part of the Ironroot range.
-There is enough space to fit in Brindol without overwriting or deleting any town.
-Irontown can replace Dennovar.
Cons:
-The Wyvernwatch and Wyrmsmoke Mountains don't seem to fit in well with the Talenta Plains.
The New Cyre Periphery in Breland
This is where I personally inserted the Elsir Vale, as the area is mostly featureless. It's also very close to the Mournland, which could explain why it's so isolated.
Pros:
-Isolation, distance from capital ensures difficulty in calling for military support. Close to traditional goblinoid land (Darguun).
-Vathirond can replace Dennovar.
Cons:
-It takes some map rotation to fit properly. I ended up having the compass slightly tilted to the right on the main Elsir Vale map.
Southwestern Thrane
Personally, this might be either the easiest or most difficult area to adapt.
Pros:
-Thrane's strong militant Church of the Silver Flame could be a good employer for the PCs
-It is possible to do away with the RHOD map entirely and simply use the map of Thrane; while Thrane is the smallest of the Five Nations, it is not really the weakest, and in this case the Red Hand horde could possibly threaten even Flamekeep, the capital, directly.
Cons:
-Southwestern Thrane borders Breland and Aundair. Any massed military movements to fortresses on the border (such as Fort Light) might be difficult to explain away politics-wise, as Aundair is closest to Fort Light, and relations between Aundair and Thrane are not at all pleasant. Breland might be more tolerant, but it also has large fortifications on the border (such as Sword Keep), making this an unpleasant political situation. Perhaps if this were the case, it would be good to insert a political angle, adding to the pressure of solving the Red Hand problem before all three nations fall right back into another war.
-If you want to keep the RHOD map, it might have to be completely inverted. However, this presents its own difficulties:
- Lake Rhestin is replaced by the much large Lake Brey; Lake Brey is on the border between Breland and Thrane.
- There are no mountains in this area; the closest are the rather distant Blackcaps in Breland.
- There is simply no space for the Thornwaste or the Wyvernwatch mountains.
As such, if you want a Thrane campaign, I propose the following:
-The PCs could be dispatched to a small border town (Fort Light) to halt the hobgoblins raiding out of the
-Azarr Kul's objective is Flamekeep itself! He could plan to free the demon lord imprisoned within the Silver Flame. With the power of a Rakshasa Rajah (feel free to fluff the Rajah as a minion of Tiamat, it would be much easier for A.K. to free Tiamat as he prepares an assault on Argonnessen).
Conversion suggestions:
- Instead of the Wyrmsmokes, the Fane of Tiamat could instead be in Khyber deep under the Greenhaunt across the border in Breland. (The border troubles will also make for a lot of political intrigue as the PCs try to deal with Brelish and Aundairian diplomatic/military pressure.)
- Because of this, the Red Hand's movement will be in a northeasterly direction instead of south, then east, as in the module.
- Skull Creek could run across the border between Breland and Thrane, and the bridge crosses the road between Sword Keep and Fort Light.
- Replace Drellin's Ferry with Fort Light. This could make it a great deal more fortified and defensible, but in this case you could have an overwhelmingly large force of hobgoblins coming. The primary difficulty the PCs might have in the module by RAW is persuading an indecisive Norro Wiston--in this case it could be dissuading an overzealous Norro Wiston from making a stand.
- Replace the Witchwood with the Imstil Forest. You will have to spread the Imstil Forest some more to cover the highway that leads into Breland.
- Replace Terrelton with Rellekor.
- Replace Talar with Tellyn.
- Replace Brindol with Sigilstar. Of course, the Cathedral of Pelor will be a Cathedral of the Silver Flame instead.
- The ultimate destination for Azarr Kul will actually be Flamekeep in Northern Thrane, but since Sigilstar is in the dead center of the nation, it is a great position to start spreading out.
Recommendations Per Chapter
I. The Witchwood
a. NPCs:i. Change all references to Pelor to Dol Arrah. As the goddess of the sun and war, Dol Arrah's clerics will be a bit tougher, although they will be fewer. Most of the priests will be experts.ii. Soranna can be a Deneith Dragonmarked heir, giving her a great deal more importance to the people.iii. I had Delora Zann as a House Vadalis excoriate.iv. Kellin Shadowbanks, as a inn owner, could very likely be a House Ghallanda representative.v. Avarthel could be a reclusive Orc Gatekeeper druid, or perhaps a civilization-friendly Warden of the Wood.vi. Jarret Nurth: As a "red herring" NPC, she could easily be a cleric of the Mockery.b. Setting:II. The Ruins of Rhesti. If you use Lycanthropes in place of Forest Giants, you could have Vraath Keep littered with the skeletons of wereboars and werebears instead.
a. Setting:i. Rhest will most likely be an ancient Dhakaani ruin. It could be sunk in the marshes on the edge of Lake Brey (if you chose the Thrane option) or any other large body of water.ii. The Tiri Kitor encampment: Since elves aren't tree-loving hippies in Eberron, making this group an encampment of shifters instead works well. I still kept them elves (Wardens of the Wood), but shifters thematically fit this perfectly. They will be fierce, independent, and possibly difficult to recruit.b. NPCs:i. Miha Serani: A changeling with sorcerer (or psion!) levels works well, and so does a rakshasa (though this makes her stronger and possibly an encounter for much later in the game)ii. Killiar Arrowswift: Being a shifter will explain his rather gruff initial attitude. Also, I recommend that their names be changed. Honestly, I found their naming conventions very WoW-ish. Look up Night Elf NPCs in Warcraft and you'll see what I mean.iii. Sellyria Starsinger: A shifter Moonspeaker druid might work well here. Also, she has a pet croc, right? If she's a shifter, you could make her a longtooth/beasthide shifter---descended from a werecrocodile.iv. Trellara Nightshadow: Not sure what to do with her. You could keep her as a shifter bard with an unusually high charisma, or simply perhaps make her an emotionally unstable Wilder (see Races of Eberron's Shifter Wilder substitution levels).v. Illian Snowmantle: Balinor works well as a substitute for Corellon.c. Encounters:i. Dirty Rotten Looters: If you played up the "border troubles" angle, these guys could be an actual Silver Flame Inquisitor/Dark Lanterns/Royal Eyes of Aundair/Cyran Avenger/Order of the Emerald Claw hit squad instead of a pathetic bunch of amoral goons.III. The Ghostlord's Lairii. The Lizardfolk: Considering that the MM3 Lizardfolk (Poison dusks and blackscales) figure well in Eberron's canon, a group of these guys could have been brought in by Saarvith and Regiarix and bred for war.
a. NPCs.i. The Ghostlord: The heart and soul of this chapter. I wrote him up as an ancient Dhakaani (hobgoblin) Gatekeeper druid who was driven insane by the Daelkyr invasion. He invented the bonedrinkers, inspired by the Daelkyr's often tentacled aberrations.ii. Wyrmlord Ulwai: No real suggestions here, apart from [i]please use another depiction of her. I can't stand her "80s dominatrix catgirl" look in the book. She's supposed to be hot.b. Setting.IV. Enemy at the Gatesi. I fluffed the entire Thornwaste as a barren and blasted land stripped of natural life by the Daelkyr invasion, and it's still like that. Most of the animals that live here are aberrant at best and half-farspawn horrors at worst.
a. NPCsi. Jarmaath will definitely be a war hero from the Last War, although not quite as strong as he used to be. He could be a lot less noble (perhaps desiring a vainglorious end as he makes a final stand against the Red Hand), however, presenting the PCs with a complex moral dilemma: Do they support the rightful lord of the land and sacrifice the people, or subvert him and side with Lady Kaal, whose methods are reprehensible, yet truly wants to save Brindol?ii. Lady Kaal could be a potential primary villain here: She could actually be a foreign sleeper agent, planted to undermine local sovereignty by spreading crime, or to simply be a spy. As such, she might work best as a member of the Royal Eyes of Aundair, or perhaps a Brelish Dark Lantern. Alternatively, she could be secretly a member of House Tarkanan and possess a hidden aberrant dragonmark.iii. Tredora Goldenbrow: Aasimar are very rare in Eberron, but she is most likely going to be a cleric of either Dol Arrah or the Silver Flame.iv. Lars Ulverth: He could easily be Soranna Anitah's House Deneith superior, or a war hero, or both.v. Immerstal the Red: Artificer would work as well as Wizard.b. The Siege of Brindol:i. Bombardment: I used homebrewed Warforged Titan variants, since giants, as mentioned above, aren't native to Khorvaire. Skullcrusher ogres work well, though. Alternatively, traditional siege engines could work.V. The Fane of Tiamatii. Kharn's Retinue: Again, scrap the giants. Skullcrusher ogres with class levels work well, as do Spawn of Tiamat (Redspawn Berserkers [Dragon Magic], or Whitespawn Berserkers [MMIV] could work well).
a. Setting:i. The Wyrmsmokes: I went ahead and just plopped down the Wyrmsmokes in the middle of Eastern Breland, but this could be more difficult in more constrained areas (namely Southwestern Thrane). Regardless, as a volcanic area, it is quite likely that it could be a Fernia manifest zone and as such have a lot of diabolic interlopers.ii. Khyber: The alternative is to bury the Fane deep underground. It could be rather eerie for the PCs to travel for days in pitch-dark tunnels, only to see an immense, yawning abyss beneath them, and the vast, dimly-lit Tiamat sculpture stretching from deep below.iii. What the Fane of Tiamat Really Is: This is up to you, but I had the PCs discover that the Fane is actually a part of Tiamat's vast prison (or at least its support system). Since Tiamat isn't trapped in the Nine Hells (which don't exist in Eberron), she has no strong ties to devils and extraplanar enemies. Instead, I had Azarr Kul attempting to manipulate the Planes to slow or stop them, causing Tiamat's prison in Argonnessen to catastrophically fail.iv. To this end, Azarr Kul was using a large eldritch engine---a planar orrery---to stop the planar orbits.b. Encounters:i. Tyrgarun: If he's fought in Khyber, this encounter is going to be a lot more interesting. He can see much farther than any of the PCs, and can potentially fight in complete darkness (thanks to Blindsight).ii. Laryssa: If you're like me and absolutely hated the "lol Azarr Kul has a cannibalistic night hag cook" encounter, feel free to swap her out with another Rakshasa encounter. In this case I threw a Naztharune Rakshasa with one Swordsage level at them.iii. The Fane is Ancient Dragontech: To play up this angle, I had some traps that were part of the original structure. Azarr Kul's forces have found fighting them not worth the trouble, and so have left them in place as barely-controllable guard systems. As such, I had the original dragon constructors leaving a dragon-like iron golem in the main corridor, as well as a Spell Turret.iv. Devils: Devils have no true strong relationship with Tiamat, so I fluffed them as fiends who got through the portal as Azarr Kul weakened the planar boundaries.v. The Barracks: Instead of having just one dragon, I had several young dragons hanging dismembered and disemboweled here. They were the children of the original guardian of the Fane, a great wyrm bronze dragon tasked to maintain the Inner Sanctum's power systems. The dragon has since died, and it was unable to pass on the true nature of the Fane to its children. The children were overwhelmed by Tyrgarun and thrown to the devil army as food.vi. Azarr Kul: There are many suggestions to fix this encounter, but I think that if AK manages to get his buff spells up, the PCs have a full-power Clericzilla on their hands. Whatever the case, when AK dies, I made it so that he uses the last of his strength to shift the planar orrery to directly breach Tiamat's prison, with just enough energy for her to project an Aspect through.vii. Aspect of Tiamat: If you really want the aspect to be tough, give her cleric casting equal to her HD.c. Conclusion:i. If the Aspect of Tiamat breaks free and the PCs don't kill it, she could prove to be a very devastating "optional boss" monster, ravaging the countryside.ii. If the border troubles escalate into full-blown diplomatic hostility, you could easily have a reignited Last War.iii. If Azarr Kul completes his objective, congratulations. You now have an Elder Evil campaign. The Dragons of Argonnessen mobilize to attack Azarr Kul, likely razing all of Khorvaire to the ground in the process. Thrane Paladins mounted on wyverns will dogfight with dragons in the skies over Flamekeep as the Fiend in the Flame awakens. Flights of great wyrm dragons will airdrop Seren Barbarians onto Sharn. The Fiend in the Flame strides across the ocean to Argonnessen, swatting aside Light of Siberys crusader dragons as he marches. When he reaches the Pit of Five Sorrows, the Current Age will end, and a new Age of Demons will begin.
As another Eberron-themed adaptation, consider making the module all about the Lord of Blades rather than Azarr Kul.
Running RHOD in Greyhawk
Courtesy of the dedicated and possibly even more devastatingly handsome Elder Basilisk!
SpoilerThis is where I get to rant and rave about how the character limit of these posts is way too small for all the good resources we get from this thread. But because the character limit is too small, let me sum up instead.
Elder_Basilisk has done a very thorough rundown of how to run RHOD in Greyhawk, right down to converted maps. It's right here in this very thread, and can be found starting right here.
For those of you who want single posts to work from, the following posts should be read: 923, 924, 927, 928, 929, 942, 945, and 947.
My omitting the full text should not be regarded as me thinking it's unworthy of inclusion. The simple fact is there just isn't enough character space to put it in here, and the other conversions we have are not replicated in the thread.
Running RHOD in Rokugan/Oriental Adventures
SpoilerThis can be a bit of a controversial subject since Rokugan's setting is fundamentally different on so many levels it makes it tricky to set RHOD 'as is' within it. But one general rundown on how to do it is contained in this contribution from SleepyShadow:
I ran this in the Oriental Adventures setting of Rokugan with some pretty solid success. The hobgoblins were members of the Spider Clan, and Tiamat was replaced with Fu Leng the Shadow Dragon (essentially the evil dragon god of the setting). I turned the blade-bearers and sergeants into OA samurai, which went a long way toward solving their usual will save issues. The hobgoblin invasion largely took place in Crab clan territory, except for the part with the Tiri-Kitor who got turned into members of the neighboring Unicorn clan. The Ghostlord got reworked as an outcast Kuni shugenja, which fixed a lot of the flavor issue of an undead druid. At the very least, he was able to put up more of a fight than a blighter would have. The dragons, by and large, just got refluffed as their wingless Rokugan equivalents, and several of the more boring members of the Red Hand (ogres, lizardfolk, etc.) got replaced with Shadowlands oni of various types. Instead of the battle taking place at a Brindol replacement, I upped the scale of the invasion and had it take place along the entire Carpenter Wall to bring home the fact that if the party failed, it wasn't just one city that would be lost. It would be all of Rokugan. Wyrmlord Azarr Kul also got refluffed as a member of the Diagotsu family, and the Avatar of Tiamat/Fu Leng only needed some cosmetic changes to work out fine.
Running RHOD under Pathfinder
SpoilerGlyphstone has been conducting a Pathfinder campaign using RHOD; you can find the journal here.
Without going through it, though, in summary, Glyphstone makes these observations:
- Pathfinder base classes are roughly 0.5-1 ECL higher than their 3.5 equivalents, and a 6-person party is about the same. So, when the characters are level 6, they've got the damage output, and more importantly, the action economy, of a level 7-8 party.
- Hobgoblin Veterans are horribly, horribly outclassed - they're fishing for 20's against the frontline warriors, and of the rest of the group, only the squishy types will have an AC lower than 20. Fights may do better with more emphasis on the monsters and 'special' creatures, with the troopers using Aid Another actions or forming Shield Walls with tower shields to cover archers.
- On the other hand, Miha Serani becomes interesting. To start with, Pathfinder Araneas are 5th level casters instead of 3rd level, and with roughly 50% more innate HP. Slap 4 Sorcerer levels on her, she'll be CR 9, sporting 4th level spells - a good combat encounter, but not so much on the spy-and-infiltrate role she plays in the story. One possibility is to make her a Rogue 3/Arcane Trickster 3 - CR10 nominally, with the casting output of an 8th level Sorcerer instead and a bit more durability.
Antariuk has also been working on a Pathfinder conversion for RHOD: you can find his work-in-progress here.
Running RHOD in Equestria (yes. Yes you can. And it is glorious.)
SpoilerFull credit to MandibleBones on this one. Taking his notes verbatim from the thread...)
On Setting Adaptation:
1. Where is the Elsir Vale? I put it at the westernmost edge of Equestria, fiat-ed the plains of Zebrica to replace the Endless Plains, made everyting west of the Old North Road and south of The Endless Plains Zebrica Dragon Lands (including the Thornwaste), and made a note that the Wyvernwatch Mountains are home to the southern griffon tribes. The city of Brindle becomes Bridle, the city of Dennovar becomes Stalliongrad, and the rest of the towns keep their names.
2. The ponies of the vale are used to dragons existing, but they never seem to come down from the Wyrmsmokes (until the events of Red Hand of Doom). These hobgoblins are totally new to them, however: creatures out of myth and legend from pre-Discordian times.
3. My party was starting out from Bridle (Brindol), so they were a little more familiar with it to start with. Some of them lived in the city prior to the events of the Red Hand, so they know the basics of the citizenry. I use a wiki to keep track of things; it helps my players as well.
On Statistics
1. Initially made the mistake of taking the cover at face value; all my PCs start at 6, and there are 6 of them. Adaptation is obviously required.
2. I wanted to see how the PCs handled combat together before tweaking too much. Uth-Larr got boosted to be a Spellscourge (MMV), and the cleric remained a cleric, though I gave Zarr level 6 and the Law and Trickery. I took the advice from this thread, made the hell hounds draconic, and swapped out some feat to make them Napalm Hounds. The regulars got to be Fighter 1s instead of Warrior 2s; I gave them max HP. Two of them got Point-Blank Shot and Precise Shot and did some fairly decent damage with their longbow (one of them critted); the other four got Power Attack and Weapon Focus: Longsword.
- The melee hobs got killed / knocked out pretty quickly; the archers were further back and managed to retreat behind Uth-Larr once he came out. Napalm Hounds got to deal some damage before getting cut to ribbons by the barbarian. Zarr managed to hit the NG Magical Girl and the CG Barbarian with a scroll-based Word of Law from under Invisibility, which wasn't terribly fun for them.
- Turns out my party is also fairly optimized, and while it was a good fight, the party won it pretty handily despite it being EL8.
- Because the party has a Magical Girl, they took one of the regulars and Uth-Larr alive. I've been having a great deal of fun running Kerak (the name I gave the regular) and fanatic Uth-Larr as Shining Hope tries to make friends with them. It's not going so well, but at least they're locked up in Drellin's Ferry now.
3. On the Witchwood: I'ma give that hydra more heads. Hydras love heads. Action-economy being what it is, I figure aiming for a higher CR is better than a lower one, so an 8-10-headed cryohydra is headed the party's way. I actually think this is going to be a ridiculous challenge. Edit: Actually, a cryohydra would kill them outright. A 24d6 (reflex half) breath weapon as a CR9? Really? But an 8-headed hydra is... underwhelming without the scary breath weapon, even with Fast Healing and regenerating heads. A ten-headed is an attack for everybody and two for four of them, so this should go well.
For further details, watch the thread. Bones also notes that Equestria does materially change stuff because suddenly a good portion of yourpartyponies will be flying combatants from the get-go.
Running RHOD under E6
SpoilerWhile I've yet to hear reports back from anyone running RHOD in E6, we've had the odd query about how this would pan out. Here's my thoughts on the subject:
Looking at the notes about how E6 functions, E6 RHOD would prrrrobably challenge the party on more or less even terms until late in the campaign, since E6 seems to contemplate that CR 7 - 10 can be handled by a level 6 party, and RHOD is meant to run from levels 5 - 11.
My guess is that E6 probably renders a lot of what I say in this guide as unnecessary. The handbook's built envisioning a party of semi-to-decent competence at optimisation, and most of the advice is built around improving the monsters to meet the ever-more-powerful party as it slowly levels up. But if E6 proposes basically no new spells, no BAB increase, no save increases and only extra feats from the point of level 6, which the party hits around Vraath Keep or Skull Gorge on my experience, then there's practically no need to change much else about RHOD given its monsters assume a slowly-improving party as the campaign goes on.
I suspect the Battle of Brindol probably becomes a lot more brutal and possibly needing a bit more DM support since it takes out the last shelter of the 15-minute adventuring day that the party still has available to it under E6. And the Fane probably becomes a lot scarier given you're sending basically level 6 math at level 10, 11 encounters.
Running RHOD in other settings
...Taking suggestions, people!
Running RHOD in ANY SETTING
Courtesy of ksbsnowowl:
SpoilerThe bones of the adventure are REALLY solid; Im sure many of us see it as the best D&D module ever written. The adventure all (except the Fane, perhaps) works really well. The story Baker and Jacobs wrote is good. But the story and the framework of the adventure are different halves of the whole. The story can be changed while leaving the solid framework intact. Strip away the window dressing of hobgoblins, dragons, and Tiamat, and youre left with a great starting point to craft your own adventure, flavored to taste.
Think of the adventure as a generalized flow chart.
Ambush on the road > semi-remote town > wilderness > Armys forward scouting base (Vraath Keep) > secondary forward base/choke point (bridge) > attack on remote town > Army raiding & pillaging/Party evacuating towns > army movement toward climactic battle location > investigate secondary, off-the-beaten-path location where Army is breeding monsters for the main assault > find blackmail item > meet/recruit potential allies > investigate tertiary location indicated on map, base of blackmailed Army ally > solve Big Bad Evil Ally blackmail situation > audience with the Lords > climactic battle > investigate Army home base > deal with fiendish interlopers and BBEG.
Treating it in this manner allows you to see more possibilities, and opens up how you can utilize the adventure. It can be adapted to a wildly-different campaign world/map very easily.
Last time I largely stuck to that flow chart. There were setting/flavor alterations that changed it up a bit, though. Some were just map-influenced differences (Rhest was now on something akin to the Svalbard archipelago; the party had to take a longship to get there), while others changed the framework structure a bit more.
The semi-remote town (Drellins Ferry) became two semi-remote towns about 3 days travel apart, separated by a ravine with a bridge. The partys home base (Drellins Ferry) was the smaller of the two towns, and the party was worried about slowing the army reaching the second, smaller town, figuring the first town was a lost cause, so evacuated what they could of the first town, then collapsed the bridge between them, then tried to put up resistance (cue Massacre at Drellins Ferry waves of bad guys).
Another big change was that this area of my world was peppered with menhir circles, much like the Forgotten Realms Yuirwood. I had incorporated the Master of the Yuirwood PrC as an ancient order in the region, as well as the Menhir portal rules (FRCS and UE). The trollish Tanarukk army made use of the malfunctioning portal activation aspect of the menhirs to their advantage to speed their travel somewhat. Most of the Red Hands movement occurs off-screen anyway; doing this added more tension if the PCs discovered it, and gave them one more opportunity to slow the army (assassinate the half-elf hostages the army is going to use to activate the menhirs?)
Those are the big changes to the framework I made to the first 3 chapters of the framework. Slight alterations to structure, lots of alternations to the flavor and window dressing, and it was a completely different-feeling campaign than RHoD as written.
This upcoming time the setting flavor will be a lot more similar to the published adventure than last time (though still different, being a chaotic horde of Beastmen), but Im going to make a lot more changes to the framework.
Im starting them at 7th level, regular, non-Gestalt characters. Im going to completely omit the Rhest and Ghostlord side-quests and storylines (thus, theyll still be ~9th level for the Battle of Brindol), just because thats all the time I want this campaign to run for this time (and it will help disguise the similarity when I do run RHoD as written in a few years). Skull Gorge Bridge will be split into a border fortification on the mountainous edge of the country the Party will be defending, with a separate (relatively nearby) mountain pass that the party will be able to block via an avalanche. Im planning that the party will clear out the Beastmen from the boarder fort, then help hold that fort as the massacre at Drellins Ferry encounter vignette. Then Im planning for their Drellins Ferry remote town location to be the location for the Battle of Brindol, but fully realizing they may chose to abandon it to pull back to Dennovar (which is the city theyre currently adventuring in, Brindinford from Speaker in Dreams). Basically Im just leaving the possibilities open.
As I mentioned before, Im taking a lot of inspiration from Warhammers Beastmen for this army horde. In that lore, basically there were Chaos meteors that crashed down and caused the mutation of humans into Beastmen within the regions that were struck. For my iteration, the Fane of Tiamat will be in the region that was recently struck by a meteor. It was a human mountain town that had a Svirfneblin community underneath it. The Fane will be the surviving halls and tunnels of the Svirfneblin settlement, now broken open and exposed by the crater from the meteor strike. I will be modeling much of it off the 2e Hellgate Keep adventure location. The party will have to assault it to learn the truth of the hordes origins, and stop them from rebuilding their numbers
This got longer than I intended, but I hope it illustrates how adaptable Red Hand of Doom can be. Adjust the framework a bit, and completely reskin the adventure, and you can rerun it with the same group, and theres a fair chance they wont even notice you are rerunning the same adventure.
SPECIAL MENTION: Running Red Hand of Doom in 5e
SpoilerIf you're looking to convert RHOD for use in Fifth Edition, I recommend starting at Draz's guide to doing just that!Last edited by Saintheart; 2022-08-05 at 05:43 AM.
-
2022-04-20, 08:41 AM (ISO 8601)Ettin in the Playground
- Join Date
- May 2009
- Location
- Perth, West Australia
- Gender
Re: The 3.5 Red Hand of Doom Handbook for DMs - Major Spoilers! - PEACH!
Part One: Drellin's Ferry to Skull Gorge Bridge
 The Bridges of Madison County of Death.
How to play Jorr Natherson
SpoilerThiagoMartell's post is the first and last advice on this subject:
My players met Jorr today. I RPed him like Clint Eastwood's character in Gran Torino.
"Get off my lawn"
They loved it.
Restatting Koth
SpoilerKoth is the first major spellcasting challenge the party faces. And even Koth, allegedly the weakest Wyrmlord in the Hand, can be made a lot more deadly than he first appears. Unlike most Wyrmlords, he shouldnt need a lot of alterations or increases in level simply because his potential is already there. Remember that unless your players are badly spamming roleplaying XP, they should still only be around level 5-6 when they first hit Vraath Keep. Having said that, some alternatives to the book build--
Leaving Koth as a Sorcerer: One thing a lot of DMs miss about Koths stats: although hes a Sorcerer 6, he has 9 HD. Can you say Practiced Spellcaster, children? I knew you could! Lose the Persuasive feat for this, if you make no other changes to him. After that its a matter of switching spells if youre inclined to do so, and all you really need do is change his Lightning Bolt spell to Fireball. This is a much more dangerous choice in the tight quarters of Vraath Keep, and flinging around 9d6 damage spells can toast even optimized fifth level parties.
If you need more feats, replace Lightning Reflexes and Iron Will. One Potion of Conviction does the same thing or better depending on the potion's CL.
Some insightful people have also pointed out that Koth has an empty class feature: no familiar. Seeing as a familiar is only going to be laughable at level 6 (as with Saarvith), the better route is to trade it out for the ACF Spell Shield from Dungeonscape and switch out his Move Silently skill for Concentration. This ACF then gives you a chance at enhancing Koth's survivability.
As for spells, Detect Thoughts serves very little in-game purpose, but other than that his selection is all right. And bear in mind hes not alone in fighting the PCs. If youre determined to hand the PCs butts to them, change his spell selections to debuffs that dont directly damage the party and just have him go invisible as long as possible. Maybe give him a couple of arcane scrolls like Haste, but thats about it.
Monster Manual 4 rebuild: if you want to cotton the PCs onto the existence of the Spawn of Tiamat early in the adventure, consider replacing Koth with a Redspawn Arcaniss from the MM 4, who is notionally a CR 6 (and doesnt even need class levels whacked onto him, so at least hes less work.) Given its statblock, it almost looks as if an Arcaniss was the original intended level boss for this part, but was reworked to become Koth. Me, personally I wouldnt since it takes away from the novelty and creepiness of the greenspawn razorfiends later in the adventure -- which I would guess is why Koth isn't a redspawn arcaniss -- but its up to you.
Koth as a Dragonfire Adept 6: Courtesy of Draz, who reckons from personal experience that this produces a nice, "close" fight for a four-man party. Less bookkeeping, harder to kill and with a nice battlefield controller feel:
SpoilerLE Medium Humanoid (goblinoid)
Bugbear Dragonfire Adept 6
* * *
Str 16 (+3); Dex 16 (+3); Con 16 (+3); Int 8 (-1); Wis 10 (+0); Cha 14 (+2)
Init +5; Fort +9; Ref +8; Will +8
HP 68 (9d8+28); AC 19, touch 13, flat-footed 16; BAB +5; Speed 30
Languages: Goblin, Common
* * *
Features: darkvision 60 feet; natural armor +3; Move Silently +4; breath weapon; invocations; dragonkin (+4 Diplomacy; resist frightful presence); DR 2/magic; proficient with simple weapons.
* * *
Feats: Entangling Exhalation, Draconic Aura (senses), Iron Will, Ability Focus (breath weapon)
* * *
Skills (24 points)
5 Hide (+8), 1 Move Silently (+8), 6 Listen (+9), 1 Know(arcana)(+0), 1 Spellcraft (+0), 5 Bluff (+13), 5 Intimidate (+13), 0 Diplomacy (+10)
armor check penalty: 0
* * *
Combat
Melee morningstar +9 (1d8+3)
* * *
Equipment
Wand of Magic Missile (CL 5)[15], mwk morningstar with wand chamber, Type I Bag of Holding, Scroll (Mount, CL 6), Elixir of Truth [2], mwk studded leather armor, 2980 sp
* * *
Combat "Spells"
Fire blast: 3d6 fire damage (Ref DC 18 half); 15-ft cone or 30-ft line.
Lightning blast: 3d6 electricity damage (Ref DC 18 half); 30-ft line.
Weakening curse: -6 Strength penalty for 4 rounds (Fort DC 18 half duration); 15-ft cone.
* * *
Invocations
Caster Level 6; Arcane Spell Failure 15%
Least: Beguiling Influence, Deafening Roar (Fort DC 14 neg.)
Lesser: Draconic Flight
The operative tactic here is to use Koth as a true support character: he flies around, breathes fire, and entangles the partymembers so the other mooks can get some shots in at him. It also requires Koth to get out of the barracks and into the air above the Keep, although for most versions of the Vraath Keep fight this is probably an essential anyway. The only downside to it is originality: Koth thereby becomes a de facto dragon, and you've already got at least four of 'em in this campaign to begin with. On the other hand, it is dragon-themed, and the reasoning becomes stronger for why Koth, a mere bugbear sorcerer, is a Wyrmlord: because he's a dragonfire adept.
Other thoughts:As a serious challenge to a fifth level party, make Koth a Hobgoblin Warsoul (Monster Manual 5). No added levels needed here, it's fairly deadly at CR 9 or 10.
The Chimaera, the Raid, and PbP campaigns
SpoilerI dont know many people whove had a lot to say about the two other major Red Hand encounters in this part of the adventure, mostly because theyre the sort of encounter that doesnt really inspire a lot of thought one way or the other. The Chimaera is an exercise in dragon-lite, and the Red Hand raid on the west bank of the Elsir is an exercise in dealing with mounted troops.
For PbP campaigns, Id recommend either skipping these encounters simply because of the length of the adventure. They dont add a hell of a lot to the story; theyre more like wandering monster encounters home delivered, designed to tell the party to hurry up if its cooling its heels in the Ferry.
Glyphstone made one very simple reuse of the encounter: bring on the chimaera if the party chooses to escort the Ferryfolk back to Brindol!
If the party manages to capture Koth, there is perhaps one use to be made of these two encounters. If Koth is captured, hed likely be kept at the Old Toll House for further interrogation or transport back to Brindol. The night this takes place, perhaps the Hand forces attempt a rescue, using the West Bank raid as a diversion while six hobgoblin regulars drift across the Elsir on fallen logs and the chimaera flies in as Koth's getaway car. The players get warned of a raid on the West Bank but just as theyre about to board the Ferry, someone with a decent Spot check sees the hobgoblins floating in close to the Old Toll House. Its a nice roleplaying dilemma: help the West Bank, or stop Koth from escaping? I even got my players to split the party on that one.
Restatting Red Hand operatives
Spoiler
Karkilan: At Vraath Keep, consider giving Karkilan (the minotaur, Koths general) a single level in Boar Totem Barbarian which drops his speed by 10 feet (its fairly close quarters in Vraath Keep, remember) but gives him Diehard as feat. Add Extend Rage, Great Fortitude, et cetera, et cetera as the King of Siam says. Being a single melee type outgunned on action economy with large parties, the focus needs to be on him doing some major damage in the one or two rounds he'll probably live. Combined with Haste and maybe a potion of Bulls Strength or Resist Energy this makes him dangerous to a fifth level party: a minotaur that goes on rage, charges, and then starts wailing into people with one massive axe and just wont go down even as he hits 0 hitpoints.
One effective alternative: Wolf Totem Barbarian 2, armed with a guisarme, and taking Improved Trip. This gives him three AoOs. Rather than wailing in with a greataxe, he concentrates on simple trip tactics.
Another simple alternative Mineral Warrior template and done.
Everyone else: The manticore is fine; the hydras fine; the hobgoblin troops can be improved as per general advice above; the two worg riders are just sucky and aren't likely to get a hell of a lot better at their levels of competence.
For large (8 player) parties, a couple of redspawn arcaniss added to Koth's entourage makes for a seriously challenging fight.
Skull Gorge troops: The troops can be restatted according to the general guides above, but consider adding a low level bard into the mix who plays his music on a set of war drums inside one of the tents on the far side of the Gorge. The gorge itself allows an echo effect which gives the rest of the hobgoblins the capacity to draw off the morale-boosting effect, but it also forces the party to make Listen checks at substantial negatives to figure out where the music is coming from.
To make things interesting, I assumed that because of the summer heat, the Witchwood south of the Gorge is dry tinder. First thing the hobgoblin archers on the towers did was to light up their arrows and then set the forest on fire behind the party. No retreat for you! I also gave each of the hobgoblin archers a potion of Feather Fall so they could jump off the towers and get to the bottom of the bridge a lot faster.
Restatting Ozyrrandion
SpoilerOzzie is the youngest and the least powerful of the RHOD dragons, but he still can be deadly at these levels, particularly if hes beefed up using the general suggestions at the front of the thread. The level of alteration depends on the level of optimization of your party: accounts of the Skull Gorge battle range from one-round takedowns of Ozzie to multiple PC deaths at his talons. Using him effectively involves using the terrain: RHOD says the Skull Gorge battle really favours archers, but what it actually favours is Ozzy in flight he doesnt have to ascend to get to a good striking altitude, and the terrain favours strafing runs followed by quick flights back to the far side of the gorge to let his breath recharge.
I personally tended towards the metabreath feats Lingering Breath and Clinging Breath as battlefield control against my players, and Ozzie certainly lasted longer than Reggie did later on. :) Of all the dragons, hes the most vulnerable to dogpiling by the party in melee, and should be using the standard breathe-and-retreat tactic the Gorge is built for.
In case it werent specific he needs to be upgraded from Young to Juvenile, if for no other reason than that he becomes a caster when he does. This gives him many more options. The authors know full well hes underpowered since they throw him a CON-boosting amulet to increase his hitpoints, but none of this needs to be removed in the size upgrade.
Moving the party on from Part One to Part Two
SpoilerThe hook for PCs to head in the direction of Rhest is Teyani Suras arrival and the indication that theres a roadblock to the north which needs to be broken if reinforcements are due to come from "somewhere" in the north.
Many DMs find this hook unsatisfactory. It's the kind of thing youd expect a well-armed monarch's force to do themselves. And it doesnt give the party a need to go into the Blackfens at all. The blockade is on the Old Rhest Trail, and on the maps as drawn the Trail isnt in the swamp; it takes, shall we say, a considerable deal of choo-chooing for the party to encounter the razorfiend.
Its also a bit odd that Norro Wiston, a village mayor, is able to speak for regional autocrat Jarmaath (kinda out of his league, one would have thought). Not to mention that its odd that Teyani Sura is out riding a hundred miles west of Brindol to tell villages the road north of Brindol is blocked.
So how do you fix it? Some suggestions:
Have Jarmaath send them out there. If the party wants to convince Jarmaath of the Red Hands threat, consider obliging them. Doing so consumes a useful few days on the timeline and allows Jarmaath to personally dispatch the PCs out to break up the blockade. This then meshes nicely with Jarmaath being overly welcoming of the characters when they get back for the Battle of Brindol, because hes met them before.
But theres still the issue of the razorfiend encounter happening in the swamp, not on the Trail. One solution is to extend the swamp. When the party gets north of Witchcross, they find the Rhest Trail passes through the Blackfens rather than along its eastern edge. When the players start looking confused and pointing to the handout map of Elsir Vale theyve probably acquired from you by then, you can ask them if they know how old the map is. And then tell them the map is, in fact, a good hundred years old or more and therefore out of date. The swamp has continued to spread over the years since anyone got out that way to survey it. This isnt perhaps the most elegant of solutions, but it does give you swampy surrounds within which to launch the razorfiend attack.
Get Norro to suggest they go looking for a Macguffin in the swamp. For this approach, Teyani Sura describes how she and her people were attacked on the Rhest Trail by a party of hobgoblins and ogres, but doesnt describe a blockade as such. This event should be triggered after the party realizes the Hands intent on smashing the hell out of the Vale and has told Norro of it. When Norro hears about the attack, he jumps to the (mistaken) conclusion that the Hand "must be looking for Cromar" (or any name you choose to dream up.)
Norro explains "Cromar" is a notable, powerful, but retired mage who chooses to live in solitude in the marsh. Norro thinks the Hand must be looking for him because hes a powerful spellcaster stronger than Immerstal the Red. He was very prominent when Witchcross saw off the last serious hobgoblin raiding about fifteen years ago. Theyd remember that.
Norro knows the rough location of Cromars home and can describe it to the party. He begs the company to go and find him and bring him back to safety in the Vale, or at least try: He was like a father to me. He was strong fifteen years ago, but hes getting old; I dont know if hes got enough power to hold off the type of forces you say youve been dealing with for long at all.
This is largely moot. Cromar was a powerful spellcaster, but has been dead for several weeks, a victim of the razorfiend that the party encounters later in the swamp. Cromars (shabby) home is in the swamp its the ruined wizards tower where the party finds its reward treasure for killing the razorfiend, since the razorfiend has holed up there. These clues can be discerned by an inspection of Cromars semi-ruined tower, which has nothing really to tell the party otherwise. The encounter with the razorfiend can either take place at this ruined tower or in the swamp nearby its the razorfiends lair, and it therefore isnt found far from there.
Under this hook, the party will probably need some other way of being told Cromar is dead and told about the roadblocks; the rest of the information will come from the Tiri Kitor instead.
Have Jarmaath send the party to the Blackfens specifically to recruit the Tiri Kitor. This obviously takes the surprise out of the first encounter with the Tiri Kitor, but it might be a stronger hook for the party than breaking up roadblocks. Or you could make it a straight request from Norro (or someone like Lady Kaal) since he understands the threat and knows theyll need every bow they can get. Or perhaps the party can be asked to carry a message to Sellyria asking for her help.
Have some NPC point out its the next logical thing for the Red Hand to do, and then confirm it via Teyani Sura. This is a somewhat more subtle method but also doesnt suffer from Teyani Sura just handing over the next plot marker on a platter. Right after Drellins Ferry decides to evacuate or fight, Norro Wiston sends riders up the Dawn Way to raise the alarm. In the meantime, Delora Zann (a former adventurer and one of the elders of Drellins Ferry) and/or Soranna Anitah muse that the next thing theyd do in the Red Hands shoes would be to block the Rhest Trail, since its the only practical direction from which reinforcements can come. As the PCs head towards Brindol to sell stuff or otherwise look for plot hooks, they run into Teyani Sura on the way who confirms this guess is correct, and asks the party to investigate on Jarmaaths behalf.
Change the relationship of Drellins Ferry to Brindol. The towns and villages of Elsir Vale are more or less independent from Brindol. If the relationships are implied as much closer and direct e.g. Norro Wiston becomes a direct vassal of Lord Jarmaath, or is someone lower in a direct hierarchy with Jarmaath at the top then Norro speaking for Jarmaath becomes more plausible and Norros familiarity with strategic considerations for the whole Vale becomes more believable. Or maybe Norro has some sort of past relationship with Jarmaath, e.g. he was a former quartermaster or major-domo.
Rejigging treasures
SpoilerWhile kjones was running RHOD, he noted that the treasure loadout in the first few chapters of RHOD was a bit wiggy if you had other than the default "fighter+cleric+rogue+mage" party ... which most DMs do. For reference you can find the full thread here, but I do propose to unmercifully repeat the guts of the discussion here and most (if not all) of kjones' thoughts simply because I like people to be lazy.
Basically, the issue is there's too little value for what the characters should be getting at their current level. The biggest treasure in this section of the game is a +1 frost bastard sword which is intended for the party tank, and it puts said tank well ahead on wealth by level.
The treasures of Chapter One also appear somewhat hampered by RHOD staying core in terms of treasure unless shoehorning something interesting onto an NPC. On the other hand, were told explicitly on the RHOD text that the heavy loading of treasure early on is intentional as they're trying to squeeze the party a little by the time they get to Brindol.
So: what are some suggestions for a somewhat fairer or more workable load of treasures, i.e. replacements or modifications to the treasures of Chapter one?
Marauder Attack: There's some gold in a burned-out farmhouse nearby. The party may be in need of hard coin to spend in town, so I'd leave this as is.
If your party knows what's what, they'll loot the bodies - this will be the first of many times in which they will end up with what is commonly referred to as "vendor trash". Sigh.
Blackwater Causeway: The infamous hydra. In the mud, there's a +1 mithral breastplate. 9th level (!) This is a really good item for a bard, along with a barbarian or any other front-liner who values movement or can't wear heavy armor - but it's a lot of treasure to give to one character this early on. You can swap it out for 2 x 7th-level items - consider an adamantine weapon (useful for destroying the bridge) or a lesser metamagic rod (useful for pretty much everything).
Vraath Keep: This is a biggie. The manticore has some gold and trade goods - leave it, it's what a manticore would have.
Koth has a bag of holding. You want the players to get this, if at all possible. Bags of holding enable all sorts of creative possibilities.
In the vault:
Staff of Life
Huge Spiked Gauntlet +1
Gauntlets of Ogre Power 8th level
+1 frost bastard sword 11th level
and the equivalent of 3,550 gp.
I would recommend leaving in the staff of life, as your players will not have access to resurrections for most of the campaign - this allows them the chance to make a mistake. Once.
Very important note: If you've got smart players, restat the Staff of Life so it can't do Heal spells. The Ghostlord is a lich. In the right hands a Heal can one-shot him.
(Saintheart's note: in my 8-player campaign, we opted for a slight variant on the staff's composition: it can cast raise dead once, revivify about 3 times, and heal once or twice - can't remember the exact makeup. That was mostly because action advantage meant if a character bit the dust the odds were decent someone would be able to get over to him in time. I also went for lesser armor and/or weapon crystals to even the haul out for people, too.)
Similarly, the spiked gauntlet is important for plot reasons.
The problem with the sword is that it's a type of weapon that most characters can't use, and it's too powerful. You'll be giving the fighter-type a massive boost and leaving everyone else in the lurch. My suggestion is to break it down into two 7th-level items (approximately +1 weapons or +2 armor) and a 9th-level item (an immovable rod is great for this). To keep the +1 weapons from being boring, throw in some weapon crystals - least truedeath will come in very useful, a sort of Chekov's Gun if you will.
Alternately, if you're interested in using legacy weapon rules (I know - but there are some real masochists out there) this is an excellent place to introduce such a weapon.
Turn the 8th-level item into a wand with 10 charges of some 3rd-level spell that your party lacks, and put the rest of the treasure towards whoever still doesn't have anything.
When choosing treasure here, try to figure out items that will make the battle for Skull Gorge Bridge more interesting. I gave out a ring of feather falling, with excellent results.
Skull Gorge Bridge: All the notable treasure here is equipment of either Ozyrrandion or the hobgoblins. Leave it as it is, but if you feel like you sold the players short in the vault at Vraath's Keep, you can put a "mini-hoard" on the far side of the bridge. If they take out the bridge before searching the tower, they'll have fun finding this stash...
Saintheart Note: if you feel you're still short on arcane caster items, consider leaving some treasures with Jarrett Nurth, the serial killer in Drellin's Ferry - make her a cleric/rogue of some random evil god who has no connection with the Hand at all. You could easily provide a Lesser Rod of Metamagic Extend here and/or a Pearl of Power (1st), mostly because that's what we did. Last edited by Saintheart; 2022-05-10 at 10:48 AM.
-
2022-04-20, 08:42 AM (ISO 8601)Ettin in the Playground
- Join Date
- May 2009
- Location
- Perth, West Australia
- Gender
Re: The 3.5 Red Hand of Doom Handbook for DMs - Major Spoilers! - PEACH!
Part Two: The Blackfens and Rhest
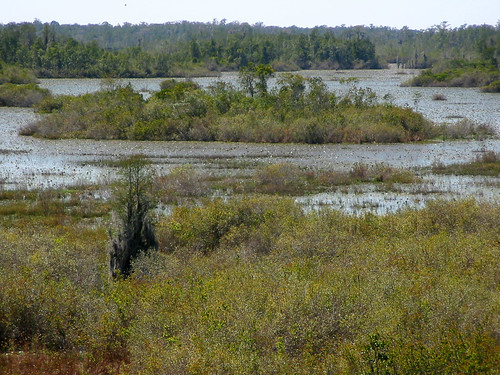 "That one burned down, fell over, then sank into the swamp!"
The Roadblock/s
SpoilerFor PbP campaigns Id recommend just having one roadblock on the Rhest Trail rather than dragging the characters through the second one as well. Tabletop campaigns might also warrant the omission of the second roadblock unless you really want to slow the characters down by a day or so. The issue with the roadblock is that there's nothing that really triggers the party to trudge west from the first roadblock to the second. The plot crumb that brings the party to Rhest only speaks of a single roadblock on the Rhest Trail, not a second roadblock over on the far side of the lake.
Indeed the second roadblock is a bit illogical: it's placed on the Old North Road, but any reinforcements coming from that direction have to follow the Dawn Way and fight the entire Red Hand to get to Brindol. So: skip it. Just remember to give the PCs 2 VP for breaking the one blockade so they aren't disadvantaged by the omission. Alternatively, stick a plot crumb in the roadblock in the way of a convenient map showing the location of the second roadblock and a dodgy trail through the swamps to reach it (thus setting off the greenspawn razorfiends somewhere down that road), but you'd still have to come up with an answer for why the second roadblock exists at all.
Some campaign journals recommend using Skullcrusher Ogres (MM 3) in place of the regular ogres at the blockade to turn it into a more challenging match. I heartily agree. This is a roadblock to stop armed troops coming down it, it deserves a pair of the most elite ogres in the Hand. (Indeed - Skullcrusher Ogre replacements across the board in RHOD might well be to your liking, and not the party's ).
).
The Razorfiend Encounter
SpoilerFor my campaign I upgraded this to two razorfiends and upgunned the monsters themselves by about 2 HD each. I also had the encounter happen in the ruined manor where the small group of treasures is found. I upped the horror aspect of the encounter by having the PCs stay in the ruined manor to camp for the night, and allowed them to discover the encounters treasures ahead of the actual fight. Night attacks, of course, adding illumination issues to everything else.
I managed to get the drop on the PCs, and critical hits meant I killed one PC outright and sent the other within 1 hitpoint of death. Even with those advantages, the ugly little buggers didnt last more than two rounds; Glitterdust appears to be their weak spot, unfortunately.
Greenspawn razorfiends out of the box with surprise against unoptimised parties are dangerous until the party gets its bearings. The threat they pose should be driven home to the party: if one greenspawn razorfiend can maul a party of level 6 adventurers, how much damage is a full platoon of the little buggers going to do to the city of Brindol?
Expeditious Dodge, Elusive Target, and Bounding Assault are all worth consideration on them.
And for awesome, here's a lovely Wizard's Mansion that someone built for their party...
SpoilerWell, I designed the Wizard's Mansion to not only be an interesting and lively encounter, but also to be a didactic encounter; I wanted to force my PC's to start responding to threats. Because every single time they find something they don't understand the capabilities of, they end up running around like headless chickens and get wiped.
So, I'm endeavouring to make them do a few things; I want them to, once they realise they're under attack by the Razorfiend, fight it; but not just fight it, fight it smart.
When they, walking through the Marsh, encounter the Wizard's Mansion (they are aware of it, since they'd been sent into the Marsh to try to gain the Wizard's aid against the Red Hand), I described it as being very eccentric; it was painted bright blue and it looked, for lack of a better word, like it had melted slightly. The dimensions of the House didn't look right, and bits were bulging out; it didn't seem like the structure should be able to support itself. It was all twisted up and was covered in protrusions. When they walked up to the door, the doorknob opened its eyes and talked to them, telling them that "The Master is out, but he will surely be back soon". It was a pre-recorded message, as was all that the doorknob was able to say.
The inside of the house was likewise peculiar and esoteric. Unseen Servants, marked with blue bow-ties, floated through the air cleaning things. Two comfortable couches sat across the room from each other, one next to a Bookcase and the other next to a sea-chest. The bookcase couch also had two wooden stools next to it. Across one wall was a long table, with a stack of clean plates on one end, a box of cutlery in the middle and three empty tureens where food would be placed on the end. There was a glass with two flowers in it, also on the table. Finally, on the floor was a clearly visible Trapdoor. When opened, it was revealed that it opened to... floor.
Inside the sea-chest was an Assassin Vine. Its the sort of thing I'd expect a Wizard to keep in his chest of drawers.
The room was 10ft from floor to ceiling.
The second floor was a long corridor. You could enter a room to the left of the corridor which contained a very deep swimming pool. At the far end of the corridor was a ladder, leading upwards.
If you were to jump into the pool and swim down, you would realise that the dimensions of the pool were impossible compared to the dimensions of this floor; it goes down 30ft. You can easily push through the bottom of the pool... which allows you to pop up where the Trapdoor is on the first floor. There is also a highly visible hole in the floor of the corridor, which would allow someone to jump down to a spot in front of the wooden stools back on floor one.
This floor was 30ft from floor to ceiling.
The third floor was where the Wizard's bedroom was, and a separate area contained a Gelatinous Cube held captive in a glass container (it had a few hamster skeletons floating inside of it). Next to it was a black space that would magically remove any material tossed into it.
Like the previous floor, there was a hole that a character could jump down, which would allow them to get into the pool.
This floor was 60ft from floor to ceiling.
Finally, there was an open-topped study at the top of the tower that could only be accessed by creatures with the capacity to fly, since the house-side entrance required a character to get up 60ft with no handholds, and the outside side entrance is 120ft up. The effects of the weather were staved off by a magical barrier which covered the top of the tower.
I designed the House with these four levels to set up a fairly simple principle; each level you go up, makes the fight against the Razorfiend easier.
The Ground Floor was fairly boxy, and the whole place is really clumped and covered in furniture, obscuring charge vectors. It also has two entrances that weren't easily guarded against; a hole in the roof that the Razorfiend can attack down from (which it did to open the combat, insta-gibbing a friendly NPC) and the one-way trapdoor that you can magically get to from the pool. Furthermore, The Razorfiend is fast enough and can jump well enough to dart down from the stairs, hit someone close by, and the retreat back up the stairs.
Staying down there puts the party in a killing box. They can't get out through the door; it has locked itself, telling the party that all doors are locked past sundown. Bashing the door down is all but impossible, it being Magically Treated Reinforced Iron Walls (Break DC60, HP360, Hardness 20, Energy Resistance (All) 30), so they're forced to stay in the Wizard's pad and deal with their problem.
If they go up a floor, they suddenly can't be attacked unaware as easily. It can't get at them from the roof (too far away) and it can't attack from the trapdoor.
They go up to floor three? The Razorfiend is going to get ruined. It can't attack from the walls or ceiling, it doesn't have the AC to engage in a protracted fight. They get it up there, and keep it up there, and the players win.
Rainbow Six approaches to Rhest
SpoilerFrontal assaults on Rhest seem to be where most RHOD TPKs happen. The monsters arent anything to sniff at taken on at once, particularly if you remember theres still another 6 hobgoblins in the belltower. (And if you really want to be a bastard, have the hobgoblins let out the caged razorfiend when things get desperate).
The authors dont comprehensively brief DMs about handling the underwater approach to Rhest -- curiously, since it's a satisfying and stealthy way to complete this section of the campaign. Youd think savvy parties will consider it: Water Breathing lasts about ten times as long as Water Walking and the RHOD text all but says its a guaranteed quiet approach. More ways of entry are more choices, and more choices for the party are good. Pathfinding underwater probably comes down to Survival checks; it's hard to say whether random checks to see if a partymember trips on a fish add much to the experience, but random encounters with giant crocodiles might add some sauce to the experience.
Anyway, Water Breathing combined with casting Silence on someone allows the PCs to get the drop on the occupants of the bell tower at the very least, thus preventing an alarm from being raised at the town hall. If you're into TPKs, you'll need a way of circumventing this.
Its worth fiating that the ruined town hall has an open entrance into the waterlogged bottom level: the former front door, now well below the waterline. Its not sealed up because dragons with only one way out of their lairs are usually dead dragons, and anyway, Reggie does have a swim speed. (Also provides an opportunity to cue up the "Jaws" theme on the media player if the party decides to enter underwater before checking if Reggie's gone out). And more entrances mean more player choices, which is good.
Similar comments apply to the bell tower: while the bell tower has wooden platforms running around it, its submerged floor very likely has a doorway whose wood has rotted away. Getting the characters onto the tower's second floor (i.e. at water level) might be an interesting exercise since any wooden (or indeed metal) stairwells would have decayed away in the previous few centuries.
Restatting Saarvith
SpoilerSaarvith in his original Ranger 7 form is rather unexciting, like most ranged attackers, especially given hes set up to fight from dragonback.
So, a couple of suggested builds--
Scout 6/Ranger 2. This build adds one level to Saarvith and abandons Saarvith being mounted on a dragon, making him an independent combatant. To make this work, apply the feats Swift Hunter, Shot on the Run, Improved Skirmish, and Expeditious Dodge (youll probably need a flaw or trait to make this work.) In terms of equipment, give him a couple of potions of Fly and a Ring of Entropic Deflection. Saarvith under this build starts off on dragonback, but then jumps off and starts skirmishing from the air, diving in, shooting, and then retreating so melee types cant hit him and ranged types have immense difficulty doing so. Dispel Magic is obviously the Achilles Heel here, which is why hes got more than one Fly potion on him. This build focuses on damage on one attack per round more than spamming attacks as such. Just to give you a sense of what his AC and damage will be like--
Spoiler
AC: 10 + 6 [Mithral Chain Shirt+2] + 5 [Dex bonus] = 21
(NB: When skirmishing and moved at least 10 feet, AC 23 and 20% concealment chance from Ring of Entropic Deflection)
(NBB: When skirmishing and moved at least 20 feet, AC 25 and 20% concealment chance from Ring of Entropic Deflection)
(NBBB: When skirmishing and moved at least 40 feet, AC 27 and 20% concealment chance from Ring of Entropic Deflection)
Touch AC: 15
Flat-Footed AC: 20 (Uncanny Dodge)
Damage: Longbow +1: 1d6+1/19-20
If shot taken at less than 30 feet of range: 1d6+2/19-20
If moved at least 10 feet during the round: 1d6+1/19-20 +2d6 (Skirmish damage).
If moved at least 10 feet during the round and shot at less than 30 feet: 1d6+2/19-20 +2d6 (Skirmish damage)
If moved at least 20 feet during the round and shot at less than 30 feet: 1d6+2/19-20 +4d6 (Skirmish damage)
NB: 10 Elf bane arrows: Versus elves, add +2 to attack rolls and a further +2d6 to damage.
NBB: If elf is the target, add a further +4 to damage (favored enemy 1)
NBBB: If human is the target, add a further +2 to damage (favored enemy 2)
If Saarvith gets the opportunity to get into the air and keeps moving, he actually makes ranged attacks look credible, especially against elves with (noncritical) damage of 1d6+2 +4d6 skirmish +4 +2d6 (Elf bane arrows) = 7d6+6 per shot if he gets closer than 30 feet and then swoops back out the same round. Against humans, his maximum damage is 5d6+2, which is still respectable. On top of that, if hes taken that shot and kept moving, youre unlikely to hit him in melee with an AC of 27 and 20% concealment chance as well to get over.
Ranger 6/Fighter 2. This build focuses on the mounted-on-a-dragon aspect of Saarviths character, and assumes Regiarix is in the air for strafing runs; if Saarvith is on the ground, hes screwed. The basic mechanic is to full attack while Regiarix does the moving for him. By level 8, Saarvith has Mounted Combat, Mounted Archery, and Improved Mounted Archery from character feats, Rapid Shot and Manyshot from the rangers Combat Style, and Point Blank Shot via trading off his spellcasting ability through the ACF Champion of the Wild from Complete Champion. His two fighter bonus feats should be spent on any two of the following three feats: Underfoot Combat, Woodland Archer, or Improved Rapid Shot.
Underfoot Combat works via low-fat cheese: Saarvith is Small, and while riding Regiarix is occupying the same space as a creature two size categories larger than him (assuming you upgrade Reggie from Medium to Large). By RAW, Saarvith gets the bonus of soft cover, an untyped +4 to AC. Alternatively, Expeditious Dodge gives him +2 AC while Regiarix is moving. Of Improved Rapid Shot and Woodland Archer I tend to prefer the former since it basically gives you more attacks for no penalty, which given youll be full attacking is strictly superior to a feat that only improves your chances of hitting following a miss against an opponent.
Lastly, max out his Ride skill and trade off his silly eagle companion for the ACF Distracting Shot, which allows your allies to treat a struck opponent as flanked an indirect buff for the ogres on the ground, and gold given how tight the quarters are around the town halls perimeter. This is the reverse to the Swift Hunter build above: it spams attacks in the hope of multiple hits via full attacks.
Mystic Ranger 8. (Dragon #336, p. 105) -- Because caster levels are king and Saarvith shouldn't really be engaging in melee anyway. This changes his focus to a support caster and sometime archer. This build has access to fourth-level ranger spells, which includes Summon Nature's Ally IV (Giant Crocodile, Huge Shark, anybody?), Swamp Stride, along with other cool stuff like Shadow Arrow or indeed Arrowsplit.
Other suggestions:
- Give Saarvith his own mount, so he's not being a liability to the dragon.
- Make Saarvith a Druid, mainly so his animal companion can be a mount.
- Houserule Ranger to give a full Druid animal companion, same reason.
- Have Saarvith take Wild Cohort, same reason.
- Targetteer from Dragon 310, for easy DEX to damage.
- Rune Magic from FRCS: give Saarvith runes of True Strike and Hunters Mercy, and make sure his arrowheads are made of Kaorti Resin.
Restatting Red Hand operatives
Spoiler
Nurklenak: Nurklenak only needs minor tweaking. I gave him Greater Spell Focus (enchantment), Shadow Weave Magic (FRCS), and Sounds of Silence (Complete Scoundrel) to make him a bit more interesting, but hes pretty weak and should be running support in any event. If you want a total reboot of the character, running a Beguiler with one level in Mindbender is a very strong combination.
Korkulan: As with hobgoblin patrol leaders, he works better using Tome of Battle. I rebuilt him into a Warblade 5, going for a hobgoblin samurai feel with EWP in katana and the following feats and maneuvers:
Spoiler
Feats: Exotic Weapon Proficiency (Katana - bastard sword), Adaptive Style, Weapon Focus (Katana), Blade Meditation (Diamond Mind): +1 to damage with katana (If using Diamond Mind maneuver)
Maneuvers:
Iron Heart Surge -- shrug off any effect with a duration of 1 round or more.
Emerald Razor melee attack becomes touch attack
Wall of Blades substitute attack roll for AC
Steel Wind attack two opponents you threaten.
Moment of Perfect Mind - Concentration check in place of single Will save.
Sapphire Nightmare Blade - Concentration check vs. a creature's AC. If succeeds, creature is flatfooted vs. attack, and you deal +1d6 damage.
Stances:
Absolute Steel Stance (Iron Heart 2): get +10 enhancement bonus to speed. If move 10 feet in a round, get a +2 dodge bonus to AC until start of next turn.
Punishing Stance (Iron Heart 1) -- +1d6 to damage, but at -2 to AC.
Restatting Regiarix
SpoilerIts not clear what Reggies intended role in battle is. Hes not a caster, hes weak at melee, and his breath attack isnt great. Something as mundane as a Tanglefoot Bag is enough to bring him down even at Large size. You should have little hesitation in upgrading him by one age category to Young Adult so he picks up Large size, Frightful Presence out to 120 feet, Spell Resistance 17, a caster level, and one more feat.
Really, Reggie only makes substantial contributions to combat if he's in the air. His underwater lair provides some potential challenges for the players -- a swimming dragon might be fun if the party isn't pimped up with Freedom of Movement -- but the town hall is a killing jar for him. That leaves us with aerial combat, which synergises with Saarviths intended purpose, i.e. riding Regiarix.
Swap out Improved Critical, Improved Natural Attack, Multiattack, and Hover. Take Recover Breath, Enlarge Breath, Flyby Attack, Flyby Breath (from the Dragonlance CS). Use the feat from increasing age category to take Entangling Exhalation from Races of the Dragon. (As a dragon, Reggie qualifies automatically for dragonblood feats, per RoTD).
With Enlarge Breath, Regiarixs Young Adult breath weapon is a 120 foot line. This is also the range of his Frightful Presence. Flyby Breath allows you to breathe as a free action so long as you dont do anything else but move this turn. Entangling Exhalation has the breath weapon do half damage but entangles (NO SAVE) anyone caught in its area of effect for 1d4 rounds. Circle the town hall at a distance like an AC-130 gunship and entangle PCs for Saarvith to shoot them. If the partys out on the walkways these are very nice options to have.
For magic, Wings of Cover and Scintillating Scales.
The Reactory Phylactery*
SpoilerThe phylactery, believe it or not, is a potential problem for a DM.
First: a party with anybody with a lawful and/or good disposition will be seriously tempted to destroy the phylactery on discovering it, if not any time before they confront the Ghostlord. Alternatively, the party might simply decide to hang onto the phylactery without either returning it or destroying it.
Second: a lich by RAW can't be permanently killed without destroying its phylactery, but nothing says a lich knows its phylactery has been destroyed, or anything about who destroyed it. RHOD's assurances that the destroyer of the phylactery will "earn the Ghostlord's undying enmity" ignore that identifying said destroyer relies entirely on the Red Hand -- since blighters don't get scrying as a spell.
So it's worth shoehorning in the following:
(1) The box containing the Ghostlord's phylactery is affected by a permanent spell of Obscure Object. Its on the bard and cleric lists and thus fits nicely with Ulwai being involved in the initial theft and the spell then made permanent by Azarr Kul later.
(2) The Ghostlord can cast scrying, whether by refitting him as a druid or giving some sort of custom magic item - the Pool of Rebirth could double as a limited-use scrying pool for this purpose, perhaps.
(3) The Ghostlord senses when his phylactery is destroyed (it being a part of him). The PCs should be told so if they identify the necklace as a phylactery -- so they have an inkling of the consequences upfront of destroying it then and there.
That said, some thoughts on possible developments:
If the party just keeps the phylactery:
SpoilerIn this scenario, the Ghostlord is fanatical about scrying on "the individual who has my phylactery." (This is possible since scrying allows for no knowledge of the subject.) Most of the time these attempts fail since Saarvith, Ulwai, or Regiarix don't "have" his phylactery, or alternatively Obscure Object makes the attempt autofail since the spell can't detect the phylactery that creates the connection. But once the party has it, the spell reveals that fact. From there he starts scrying extensively on the party. (Hopefully if your party isn't a bunch of paranoids who religiously cast Detect Scrying every morning.)
Let's say the party decides not to return the phylactery at all. In this scenario, one possibility is to have the Ghostlord contact the party via messenger, Sending, unsettling dream, whatever. He tells them where he is. In return for his phylactery, he offers the location of Azarr Kul, the Red Hands leader (having discovered this from scrying on Ulwai relentlessly). The players may well take this up since they gain a chance to cut off the head of the snake. The Ghostlord ending his involvement with the Red Hand is a given since the only hold Ulwai had on him was the phylactery.
It's the three things the Ghostlord doesn't say that are important:
First, he doesn't tell the players that Ulwais troops are at the stone lion.
Second, he doesn't tell Ulwais troops that the party's on its way.
Third, he never tells the party the password to enter the Fane of Tiamat.
It sets up the party to expect undead, run into hobgoblins, and spend some of its strength smashing Ulwai and Varanthian. You then bring out the Ghostlord and all his undead allies, and demand the phylactery's return (whilst still keeping his bargain). If the party fights and wins, well, as the writers say, "You might not be running the adventure for the right levels". For the Ghostlord, this is a win-win: best case scenario, he gets his phylactery back and the party moves on to futilely seek out Azarr Kul. Worst case scenario, he has to fight a weakened party of PCs he knows have his phylactery, and who have already removed the Red Hand's forces from his home.
If your players are still reluctant to take the bait, Plan C: the Red Hand comes looking for the phylactery, with Ulwai and/or Varanthian leading the effort to recover it. This has a nice synergy with the "Marked for Death" encounter giving the Red Hand a reason to pursue the PCs other than "Those Damn Kids Are Ruining Our Plans" -- the Red Hand has to recover the phylactery, or the Ghostlord will withdraw his support. It also gives the players the chance to earn a little VP from killing or neutralising Ulwai and/or Varanthian if they don't go after them at the stone lion.
If the party just destroys the phylactery:
SpoilerHere, one of two options.
Option one, the Ghostlord feels the pain of his phylactery being destroyed and scries on "the individual who destroyed my phylactery". Having identified them as allies of his ancient enemies, the people of Elsir Vale, the Ghostlord becomes a voluntary ally of the Red Hand and adds his troops to the assault on Brindol. From the mechanical point of view, this will mean the party loses 5 VP, faces a fourth wave in the "Streets of Blood" encounter, and faces the Ghostlord as well as Kharn in the final encounter. However, it also means Ulwai is in that battle as well, and Varanthian is available to the Red Hand -- possibly even met during the Battle of Brindol.
Option two, the Ghostlord doesn't feel the pain of the phylactery's destruction and the Red Hand eventually realises the hatchery at Rhest has been destroyed and the phylactery is gone. In this scenario, Ulwai bluffs the Ghostlord that they've still got the phylactery. The result, again, is the presence of more troops at Brindol as with option one, with the chance that if the party figures out Ulwai is bluffing the Ghostlord and tells him so, the Ghostlord might go nuclear against everyone at Brindol -- which might make for an interesting encounter.
* This is a terrible pun, and I am always taking requests for a better tag description Last edited by Saintheart; 2022-07-14 at 01:36 AM.
-
2022-04-20, 08:43 AM (ISO 8601)Ettin in the Playground
- Join Date
- May 2009
- Location
- Perth, West Australia
- Gender
Re: The 3.5 Red Hand of Doom Handbook for DMs - Major Spoilers! - PEACH!
Part Three: The Thornwaste and the Ghostlord's Lair
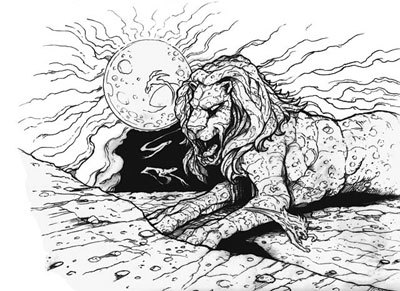 First one to say "Thundercats Ho" gets a critical hit to the face.
Overall map and terrain fixesSpoiler
I recommend using the Ghostlord's Lair map from RHOD on a different scale. Rather than every square representing a 5 x 5 foot area, rejig so each square represents a 10 x 10 area (4 squares to every one drawn on the map.)
There are two reasons for doing this:
1. Detail. Varanthian can't fit through doorways into her own lair; she's a Huge combatant and takes up a 3x3 space, when the opening of her den is only 10 feet across. Maybe she needs to cut back on the Cheerios.
2. Tactics, especially for large parties. A group of players 6+ in size will look faintly hilarious trying to squeeze into the small-sized rooms. More space also mitigates some of the Ghostlord's close-quarters problems if it comes to a fight. It also allows you to have Varanthian come to Ulwai's rescue up the secret passageway when the party thinks it's got that fight won.
I also recommend recasting the stone lion from being a statue on a ridge to being masterfully carved from the ridge. Doing so makes it more plausibly able to be the location of an evil node (see the spoiler'd section on rebuilding the Ghostlord to be truly effective for more details on this.)
Note the stone lion is subject to the 15-minute adventuring day like almost no other lair in the adventure. A retreat from Vraath Keep might draw a hobgoblin patrol. A retreat from Rhest will draw a visit from Regiarix. Here, the PCs can comfortably retreat to their camp a good half mile away from the statue without consequence. There are no defined patrols from the Ghostlord, and not enough Hand troops to plausibly send out patrols. There's only the wandering monster chance.
The lair's structure also allows the party to control the flow of opponents. At Rhest the players have to cast Water Breathing and Silence to avoid taking on the whole place at once. Here, the designers leave Varanthian alone in a killing jar, and hold Ulwais forces passively in their positions. As designed, Varanthian's purpose is to basically be a burglar alarm, which is faintly ridiculous given she's meant to be the "fifth dragon" of the adventure.
Note that even if the maps scaled up so every square represents a 10 x 10 area, a party can easily sprint from the lion's mouth down to Ulwai's area without sufficient time for the hobgoblins to prepare for them coming. There's not a trap in the place. I'd make recon harder (Hide from Undead is cleric 1; it has a decent chance of succeeding against the ghost dire lions) and drop caltrops at least just inside the first door into the lion's mouth (the hobgoblin monks' purpose being to tell legit visitors that they're there) and have the monks hurl a thunderstone at a wall to set off a warning.
With a well-optimised party, consider sending Varanthian and Ulwai's forces at the party at once, albeit delaying one group or the other by a round or two.
Rescuing the Ghostlord from Orcus On His Throne (and having to fight at all)Spoiler
Genre savvy players may ask: if the Ghostlords that powerful and hates Elsir Vale, why hasnt he trashed the place himself by now? Why hasnt he sought revenge? (This is particularly so if the party takes him on and loses -- some people will reason that he has to have so many levels on him that he makes Azarr Kul look like a rank amateur.)
The other question players may ask: what are his stats, and can we kick his butt? By the time the party hits the Ghostlords lair, most things not human will have been trying to kill them, which doesn't predispose them towards talking rather than fighting. And that's before you consider the likely response of a cleric or paladin with the word "Good" in his alignment to the idea of allowing a scion of Ultimate Undead Evil keep on existing when you've got him by the phylacteries.
The Ghostlords not meant to be a combat encounter; how do you get the players to understand that?
The nutcase: Use an archetype other than Standard Dark Lord. Play him as a sort of (evil) Dr. Jekyll/(eviller) Mr Hyde: solitary, tends to speak to spirits, doesnt like to take risks; like Jekyll, he's become enamoured of his own powers and works in secret to master them.
This fits the Ghostlord's behaviour: cooped up in his stone lion lair and not overly concerned with the outside world. Think mildly crazy evil hermit, not Darth Vader. Dont run the bold, imperious aggressor the RHOD book describes have him enter the room talking to himself, mumbling threats, but eyes blazing with anger all the while. Have him talk to people or even lion spirits that arent visible. In short: steal lines from Gollum rather than Sauron, and the Ghostlord will seem a lot more plausible. And hopefully more dangerous.
As Saph puts it: For roleplaying him, I went for a combination of Emperor Palpatine and Gollum. Ancient, very powerful, psychotically obsessed with his phylactery, and insane (but note that insane doesn't mean stupid). I had him talk a lot, but he'd only respond to the PCs when they said something that matched up with his skewed worldview - otherwise he'd just ramble to himself about revenge and torture and killing, before snapping suddenly back into focus and demanding why the PCs were there.
I also told the PCs at the beginning of the encounter with him that everything they said would be assumed to be in character unless specified otherwise. The idea is to keep it short and tense. Don't have the Ghostlord stick around and chat while the players talk OOC: it ruins the mood. The PCs should feel that they need to make a deal fast before the Ghostlord decides to kill first and ask questions later.
The good guy: Add a plot twist by making the Ghostlord a reformed lich with a Lawful Neutral alignment.
Here, Zarl has suffered and repented. He enjoyed being a lich at first, creating some of the undead that now inhabit the stone lion -- but came to regret it as the centuries passed and he realised what he'd lost, and what he'd done. The stone lion statue has become his fortress to secure and defend one thing: the Heart of the Lion, which Zarl knows will be used for great evil if it's removed.
Zarl here is the Heart of the Lion's guardian; it is his self-imposed atonement for his dark deeds. The undead he commands protect the artifact, not himself as such. He's become fairly addled (or has become romantically resolute): he will not allow evil clerics near the artifact, but neither will he allow a good or neutral cleric to attempt destroying it, because he is still serving his penitence. The party offering to destroy him also doesn't appeal since it would end his watch over the artifact prematurely. This might prevent a good-aligned party fighting him, since his purposes are noble and he is, in fact, a slave to the Red Hand by creating undead for them, not even a semi-willing participant.
Running the Ghostlord "as-is"
SpoilerEverything in this section assumes you've got a party of players who aren't very experienced or have at least one caster who's very experienced at dealing with, well, other casters.
Blighters are a crap prestige class, appropriately described as being to druids what blackguards are to paladins (i.e. nowhere near strong enough to justify taking the PrC even for the evulz.) The PrC takes some of the druid's best battle strategies (wading into melee as a dinosaur with a dinosaur buddy while summoning Greenbound dinosaurs) and gives you nothing back in return (seriously, an undead-themed druid who can't control undead until he can cast 6th level spells? What the hell?)
To top it off, the authors impose the lich template on this crappy PrC and thereby render it seriously vulnerable to clerics or anyone with the Use Magic Device skill.
Again, your best way of resolving the Ghostlord encounter, as Bruce Lee said, is to fight and win widdout fighting. Even so, prudence demands you assume the worst. A party comprised of halfway optimised characters (or halfway experienced players) is likely to trash the "book" Ghostlord by force of the action economy and the closed quarters of the lair. On a straw poll of campaigns I've seen here or read, most parties seem to wind up fighting the Ghostlord. So. How to fight?
You can, of course, rebuild the Ghostlord so hes a thoroughly optimized (and thus deadly) opponent. See the next spoiler'd section on that. On the other hand, if you do so, he arguably wouldnt be the Ghostlord, and his monastic existence requires even more suspension of disbelief.
So let's look at our problems. Hes outnumbered; he's at close quarters; hell be facing a buffed party; and he's vulnerable to positive energy. We need some options to mitigate those weaknesses.
- Prepare the ground. One option is an Unhallow spell, keyed to a Dispel Magic effect targeting any nonevil characters. This allows the Horde agents to still be hanging around inside the stone lion. The spell covers all the rooms of the Ghostlords quarters if cast at the foot of the undead lion statue in the central hall (though if you change the scale of the dungeon, the spell's area of effect will be halved, too). Blighters have access to this spell at the Ghostlords "book" level. It even gives the Ghostlord a couple of mild buffs since it counts as a Protection from Good, too. Players cant dispel the Unhallow effect, and probably won't have their own Hallow spell to neutralize it, either.
On the other hand, an Unhallow'ed Dispel Magic only affects a character once when they enter the Unhallow field, and once again when they leave and re-enter. Thus it'll hopefully take one buff off per character, but that's it. A solution is to have adjacent Unhallow fields all over the complex -- i.e. the characters leave one Unhallow field and then hit another, triggering another Dispel Magic effect.
A more brutal tactic is to layer the Ghostlord's intended battleground -- or indeed his entire complex -- with Forbiddance (a Blighter 5 spell). Odds are on the party's going to have a different alignment to him, and thus a minimum of 3d6 damage on entry to the spell's area. You can't have overlapping Forbiddance effects, but that doesn't stop you casting new Forbiddance effects five feet forward of the previous one, since the new Forbiddance effect stops at the boundary of the old one. You stand back behind four Forbiddance fields and watch as the party's melee'ers take 12-36d6 of untyped damage as they charge in to engage. And since Forbiddance prevents teleportation effects, scry-and-die and some Batman mage tactics like abrupt jaunt are prevented as well.
- Push back the steel. For all their suckitude, blighters get Antilife Shell as a 5th level spell. RHODs text deems the Ghostlords level 5 spell as already cast for the day, but hes been screwed over once by the Red Hand already and could plausibly have this available to cast before investigating who's messing with his lair. Cast this spell before the Ghostlord runs into the PCs and their meleers cant touch him.
- Choose the battleground. Don't fight the party in the small chamber called the Ghostlord's last redoubt. A 15 x 15 room with no cover and no allies is a killing jar. It's also a bit anticlimactic. Fight the party in the main central chamber -- the one that contains the six bonedrinkers. These little buggers get Pounce, remember, even if they're most likely to be one-shot kills. And they're undead, so they're not affected by the Ghostlord's Antilife Shell.
- Don't fight alone. Put one or more ghost dire lions in the same room as the Ghostlord. He's a sort-of-wacky druid, he deserves an animal companion. And this animal companion, if you read the text, reappears at its "old haunt" after it's been destroyed on a successful level check. That "old haunt", for a freshly-created ghost dire lion, would be right above the yellow pool in that chamber.
- Substitute three of his feats: Dodge, Mobility, and Natural Spell. (Mobility in particular is a necessary fix, since it requires Dex 13 and the Ghostlord as written only has Dex 12.) You lose a negligible 1 AC from Dodge, but hell be fighting under Antilife Shell (fingers crossed). Natural Spell goes even though it's 90% of a druid's tricks because, well, if he has to go to Undead Wild Shape he's screwed anyway. We're changing his focus from melee to blasting.
Take Fell Drain, Spell Focus (Evocation), and Metamagic School Focus (Evocation). Three of your prepared evocation spells -- Produce Flame, maybe Flame Strike if you get a second 5th level spell slot -- now drain levels off the PCs at half the metamagic cost. Fell Drain turns save-or-lose-more-hitpoints into save-and-suck-anyway, and at range, which means he doesnt have to go to melee and break the Antilife Shell. And as a bonus, it's thematically appropriate, given the fluff on how the Ghostlord makes undead.
Very important note: the authors of RHOD (unwittingly?) hand the party on a silver platter the one weapon that can just about kill him. In short: the Staff of Life.
Oh, yes it can. It casts Heal, remember? And the Ghostlord is undead. If you're going in with a "minimal changes" approach to this battle, you have to find a way to remove the Staff from the equation. Either you do this via removing its Heal functions when giving it to the party, having an NPC hold onto it, putting the Ghostlord in a situation where he can't be touched with it, make sure hes got Life Ward up, or just crossing your fingers and praying nobody in the party remembers positive energy damages undead.
- The first step in combat, and the only unknown element, will be neutralising anyone whos got Dispel Magic memorized. The rest of the fight becomes a beating down by your undead allies, followed by touch, paralyse, rinse, repeat when the Antilife Shell finally collapses. (Of course, if someone in the partys got Iron Heart Surge, you could have some problems, but then, thats another issue entirely.)
- Blighters also have access to Stinking Cloud as a spell, which is your primary denial-of-service on spellcasters. Its most effective in close quarters like the Ghostlord's lair and hobble spellcasters and melee types alike. It also doesn't work on undead, meaning your bonedrinkers and ghost lion/s can still get busy.
Rebuilding the Ghostlord to be truly effective
Spoiler
Making the Ghostlord effective in combat necessarily means fixing the blighter PrC altogether or finding some workaround for the PrC. Some suggestions for doing so:
(1) Druid build and tactics: Rebuild from a lich blighter to Evolved Undead, Lich Druid 12. Ditch Dodge, Mobility, Natural Spell, Craft Magic Arms and Armor.
By RAW nothing prevents an evil druid being undead -- but druids of all stripes despise undead, so this can get PHBs thrown at you. So change how the Ghostlord came to be undead. Rather than him wanting that result, run him as cursed by the nature gods because he killed a lion cub. Possibly this is was intended by James and Rich; it's never made explicit, but the carving of the dead lion cub in his lair is about as big a clue by four as you're going to get.
The Evolved Undead template is an excellent no-cost investment applicable at least once without being unbelievably cheesy. It's also one of the few templates that is explicitly said to stack with itself, and the "chance" comes up every hundred years or so -- Zarl is roughly four hundred years old or more. Confusion and Cloudkill (and indeed Haste for the summoning druid) as 1/day spell-like abilities projected from behind an Antilife Shell are likely to be devastating to an 8th or 9th level party, and remember, this encounter is meant to be a curbstomper if the party decides to fight.
From here, it's a matter of which course you choose: blasting, summoning, or melee (in that order of practicality).
Blasting:
SpoilerThis approach works best with node ab/use as described next section down. Otherwise, a lot of the damage comes from permanent spells already in place. In terms of feat selections: Fell Drain, Spell Focus (Evocation), Metamagic School Focus (Evocation), and anything that boosts ECL or flat CL.
Specific spell suggestions:
- Overlapping Forbiddance spells as indicated in the "as-is" section above, Fell Drained.
- Fire Seeds in the 'acorn bomb' variant placed around the battlefield, again, Fell Drained so you can quick-blast a level or two off the party before combat begins.
- Antilife Shell.
- Friendly Fire to defeat ranged attacks.
- Flame Strike, and indeed a selection of elemental damage spells, again, Fell Drained.
- Wall of Sand.
- Life Ward. No positive energy damage for you!
Here, your undead allies distract or hold the PCs back so you can just blast, blast, and blast again, draining levels as you go and keeping both melee and ranged attacks out. Freedom of Movement and Blindsight spells will mess with interdiction efforts like Wall of Sand, so have a couple of Dispel Magic iterations up and ready to go as well.
Summoning:
SpoilerNote summoning is rendered pointless by one first level spell -- Protection from Evil, (and its big brother Magic Circle Against Evil.) The Ghostlord, being evil, gives summoned creatures the [evil] descriptor, and Protection from Evil keeps out evil summoned beings without a save. If you think the party's going to use this sort of tactic, consider rebuilding for flat-out blasting and debuffing since your only combat allies will be the undead.
Take Greenbound Summoning, Rapid Spell, and Ashbound Summoning if you can fit it in somehow. Augment Summoning would be nice, but Ashbound Summoning largely supersedes it for attack purposes -- and greenbound at these levels are already fairly tough.
Basic strategy is: Antilife Shell, Greenbound summon, Wall of Sand (it's Druid 5) or spam Stinking Cloud (via Wand), Friendly Fire to keep out the ranged attacks, and away you go. Adding in a Lesser Metamagic Rod (Quicken) and then memorising a Summon Nature's Ally III makes for a very nice opening round: you can't metamagic spontaneously-cast spells, and summoned creatures act on the same round as you. Thus: use the Rod to Quicken a Greenbound Summoned lion, or whatever. Since it's Greenbound, it can cast Wall of Thorns 1/day as a spell-like ability, at CL 5 (i.e. 5 x 10 foot cubes of thornwall). Your own spell (Wall of Sand) then hits the party at about the same time as the Greenbound's Wall of Thorns spell.
Ouch.
The party is now blinded, deafened, taking damage from thorns, and can't get loose of either wall without a full round action of trying and making checks against both spells. That's more than enough time to then buff, get your undead buddies into position, and summon more greenbound.
Remember quickening past Summon Nature's Ally III won't work because of the lesser nature of the metamagic rod. Also bear in mind that Summon Nature's Ally VI, which is spontaneously available at Druid 12, is hobbled: you can summon a Huge Elemental, but it's 32 feet tall and thus won't fit into the Ghostlord's chambers. You're stuck with 1d4+1-odd lesser creatures, although if they're all Greenbound it's probably just as good. Also consider Pearls of Power.
While the Druid Handbook recommends the dire wolf as the ideal Greenbound animal at these levels, in this instance it's more effective (and thematically appropriate) to summon greenbound lions instead. Why? More attacks. Lions get Pounce, which includes two rakes. They also get Improved Grab and a rake on the same round -- and the Greenbound template raises Grapple modifiers by +4, before you add in STR increases which cumulate on that. The greenbound template raises all damage dice for natural attacks to 1d8 (lions are Large) and also adds a slam attack. Your Greenbound lion can charge, bite, 2 x claw, 2 x rake, and slam in the one round; more strikes means more crit chances. And that's all before you add in a Haste from the Evolved Undead template...
Lastly, you've also got free use of Entangle from the Greenbound. By RAW it makes "surrounding plants" grow to entangle the opposition, and greenbound changes the creature type to plant.
Melee:
SpoilerIf you're really determined to go to melee combat with the Ghostlord as a druid, well, it's going to get more complicated. Were assuming an Evolved Undead Lich Druid 12 chassis. But take the Druidic Avenger variant. The Ghostlord doesn't have an animal companion anyway, and his whole "rage against the heavens" thing fits nicely with the Rage feature of the class.
Natural Spell stays in this build. You're definitely going to want Rapid Spell and Greenbound Summoning. You'll be memorising several Summon Nature's Ally spells since Avengers can't cast spontaneously. (Not much of a loss: when raging you can't cast spells and can't use metamagic anyway.) You'll also need to add a Wilding Clasp to the Ghostlord's gear, too.
Your basic strategy will be to spam allies at the start of the fight with greenbound summoning to block the party from hitting you in the first round, Wild Shape to something puissant then buff and debuff using the Evolved Undead's spell-like abilities before switching on Rage and moving in to attack. When the party moves in to try and swarm you, you back off, come out of Rage and start blasting with direct damage spells.
As discussed, this build is badly vulnerable to touch attacks or cure spells, so your chosen Wild Shape when on the defensive needs Life Ward, high DEX, or at least a high touch AC. On the offensive, it needs Spring Attack and a good melee attack roll; as a lich, your paralysis attack is the most effective weapon you've got, but it only operates once per round, so unless you've got a Wild Shape that can smash a player into the ground in one pass, there is no point hanging around to make full attacks.
I don't propose to go through an analysis of the best Wild Shape to take for any given situation; the Druid Handbook does a sterling job at that. For defensive purposes, the Legendary Eagle with a touch AC of 21 jumps out at me since it's available at level 12. For offensive purposes, the Ironthorn doubles your paralysis attempts per round though it's not fast. Or indeed the Legendary Eagle itself since on offense your primary intent is to hit, paralyse and get the hell out of dodge.
(2) Nodezilla: If you have Champions of Ruin, Node Magic seriously augments the Ghostlord's effectiveness for less feats than the routes described above.
The stone lion (or the chamber in which the fight's going to happen) can be fiated as occupying the innermost layer of a Class 2 node or higher. With Node Spellcasting and Metanode Spell, your Fell Drain spells are cast out of their unaltered spell slots, as the node takes the increased spell level load that metamagic otherwise requires. You cast metamagic'd spells and don't have to use up your higher level slots. This is free metamagic.
(There's also Node Store -- it allows you to chuck two spells of any level you can store inside the node itself and draw on it in combat. Very useful stuff since a Druid 12 is short on Level 6 spells in particular.)
As if that weren't cool enough, nodes themselves also grant a number of spells equal to its class of that class's level or less. (e.g. a Class 4 node grants 4 spells of fourth level or lower.) The granted spells are "usually" tied by "theme", which in practice means you can chuck any spell of the node's class level or lower in there -- divine, arcane, you name it. These spells are added to the Ghostlord's spell list. Think about it, just with a class 2 node. Any two extra spells to the druid list of second level or lower: Glitterdust. Grease. Magic Missile. Blood Wind. Shield. Improvisation.
Taking this route obviously means changing from the feat combinations mentioned above for blasting/summoning, but being able to Fell Drain any of your damage-dealing spells at zero metamagic cost all day long is gold when you're fighting from a fixed position as the Ghostlord is. And these benefits scale exponentially the higher the class of the node.
The only drawback is that this will burn up 2 feats (Node Spellcasting and Metanode Spell). Odds are on you'll have to go to flaws to make this all work.
Some thoughts on metamagic feats:
- Fell Drain. Thematic and effective. Best used on save-for-less-damage spells rather than save-for-no-damage.
- Silent Spell. Silence effects are very pesky since you won't have much room to maneuver and the radius of the effect is big enough for a melee type to stand off outside your Antilife Shell and still deny you spellcasting.
- Rapid Spell, if you haven't already got it, is extremely useful for summoning spells.
- Sanctum Spell is a +1 DC to all spells. At the Ghostlord's character level the sanctum will be about 120 feet wide and high, which covers most of the stone lion's interior.
- Heighten Spell might be handy, Empower Spell is not. Node Magic allows you to boost the ECL of a spell by up to the class of the node on a successful Spellcraft check, which obviates the need for Empower Spell.
- Maximise Spell. +3 to spell level, in effect. Now consider putting the Ghostlord in the centre of a class 3 node, and making the Spellcraft check required to take a Flame Strike to its absolute maximum damage of 15d6. 90 damage against a level 8-9 party ought to impress someone. If nothing else, it's one hell of a way to end the encounter via self-immolation.
- Chain Spell. Another +3 to spell level in effect. Now consider having the node grant you Shivering Touch.
(3) Fixing the blighter: Change Blighter casting to add levels of existing casting, re-open the original Druid casting, and add Blighter spells to the list. This at least preserves a blighter feel, although mechanically you could do much the same thing with a couple of extra levels of Druid. Under this variant, build as druid, again skipping melee options due to the fact that although the Ghostlord is no longer a purist blighter, he's still a purist undead.
(4) Evolved Undead Druid 5/Ur-Priest 7: Arguably the quickest and deadliest build for a straight out blasting cleric type, mostly because an Ur-Priest 7 has access to seventh level spells (albeit few unless you pump WIS). Under this build, the Ghostlord abandons nature entirely when he kills the lion cub, and from there takes the path of the Ur-Priest, denying all the gods. Obviously he's not even druidic anymore, but his effectiveness as a curbstomper increases and arguably Ur-Priest fits the Ghostlord's "abandon nature, become undead, go insane" shtick better than a blighter does. Note that Practiced Spellcaster is required for this build so the Ghostlord can build a phylactery at all, or Magic Knack if you're playing in Pathfinder.
Restatting Ulwai
SpoilerThe quick and dirty way to make Ulwai better is to give her another level in bard, change a couple of her spells, and don't use her unique bardic abilities. Why in the name of Gygax is any bard wandering around the landscape without Glitterdust, for crying out loud? (For that matter, how the hell is an effective 9th level bard still putting out only a +1 to Inspire Courage?) A single level of bard and picking Confusion makes her a dangerous spellcaster.
Fixing her more thoroughly requires turning her into a straight class bard and optimising with Dragonfire Inspiration or Inspire Courage in mind. Stormsinger is flavourful, but at these levels it comes down to a very modest caster level boost and a single-target Lightning Bolt, neither of which are terribly inspiring to a level 9 party.
James and Rich mentioned they built Ulwai this way for the coolness factor of "Wow, I didn't know a bard could do that" ... which is admirable, but if you're playing with a seasoned party, probably won't impress quite as much. This "fix" will attract the argument that "she's not Ulwai anymore" -- but the Stormsinger PrC still alllows you to optimise IC and have the Thunderstrike. Alternatively, you could preserve the lightning theme by taking the right feats to make her Dragonfire Inspiration electricity themed, which would still be more effective than Thunderstrike.
If you're determined to preserve the Stormsinger flavour and you're against an optimised, seasoned, or large party, I recommend shoehorning in the Doomspeak feat from Champions of Ruin, fiated as a swift action (the action required is generally presumed as a standard action since it consumes a bardic music use, but the feat is silent on it by RAW.) Ulwai thereby becomes a lot more effective at least against melee types who try to punch her in the face because Doomspeak reduces their ability to hit her and resist her spells.
That said, theres an alternative, courtesy of Tiercel: take the "this bard is different" thing up to 11. Mistress of Shock and Awe.
1) Dump Inspire Courage. Instead, go with Dragon Magic's Inspire Awe (gosh, is this a draconic campaign? I think it is); PrCing out of bard keeps higher-level improvements to the ability from kicking in, but Inspire Awes DC still keys off her Perform check, as does her Thunderstrike ability.
2) Give her Intimidate by swapping out Diplomacy (as per PHB customization guidelines). No more Little Miss Nice Ulwai. Never Outnumbered skill trick, Fearsome armor and Imperious Command from Drow of the Underdark. If Ulwai ever gets surrounded, she fear-novas: maxed Intimidate against everyone within 10' as a move action then everyone saves vs DC: her Perform check; fear-stacking means anyone who fails both saves is cowering as long as she keeps singing. (Or a Harmonizing weapon she has does the job for her.) If she needs to be even more... metal... shall we say, give her a Pandemonic Silver weapon (Complete Warrior) with a Least Crystal of Return (MIC) to force even more fear checks (given that Ulwai can create wind effects, consider Quicken Spell Like Ability: gust of wind).
3) Give her one extra level of Stormsinger. Stormsinger 5 lets her bust out control winds at CL 13 (CL 15 if it's cold or there's a storm), which she can increase winds from zero to hurricane strength if you keep it chilly inside the stone lion, or if there ARE stormy conditions, hello tornado strength winds http://www.d20srd.org/srd/weather.htm#winds , all in a 520' (or 600') radius. Abithriax's rampage in Brindol could be seriously upstaged by a flying Ulwai if she winds up there and goes into Living Tornado mode, tearing up the city and scattering defenders like tenpins.
Also taking Ulwai to Bard caster level 10 means that 4th-level Bard spells come online, like fear (if you want to play her fear-stacking to the hilt) or dimension door (what BBEG wouldn't want it for escape options?).
4) Replace Bardic Knowledge with Loresong (Dungeonscape) instead: +4 insight to saves as an immediate action 3/day. Yes please. (It's usable for more than just saves, but that's the obvious survivability play.) Also, it's both thematic and more survival for Ulwai if she is a Savage Bard (UA, SRD), giving her good Fort saves her first 5 levels.
Fix up her spells (glitterdust is too useful, charm monster means Ulwai always has bruiser minionsbonus points if they can Intimidate as well for more fear-stacking, improvisation is all-around good and can be used to crank up her Perform checks to boot) and her equipment (MIC's mithralmist shirt is handy and thematically appropriate, any self respecting bard should have some kind of cloak of charismaespecially with offensive bardsong usesplus a circlet of persuasion, and any BBEG should have a vest of resistance in order to, you know, not die - not to mention Ulwai should be packing a Bat-Utility-Belt of scrolls and wands for her souped-up UMD checks).
In combat, Ulwai tosses down fear and/or hammers the battlefield with windstorms while her charmed minions clean house. Those resistant to these ploys get glittered, get confused, UMD-Bat-Utility-Belted, or simply thunderstruck.
Oh, and you know that whole "Ulwai is a masterful liar, especially with Glibness cast" thing on the RHOD text? Well, considering she doesn't actually have any ranks in Bluff, you can presume this as another fine example of a WOTC statblock that matches neither the fluff nor the rules. Trade out Knowledge (Nature) for this skill.
Lastly, if you go with Node Magic as set out regarding the Ghostlord above, don't forget that Ulwai, as an evil spellcaster within the radius of the outermost layer of the node, can access higher caster levels for her spells as per Champions of Ruin. (i.e. she has to make an INT check.)
Restatting Varanthian
Spoiler
Leaving Varanthian as a (half) behir
SpoilerOverriding dragon/behir hatred by making Varanthian a half-fiend is cheesy, but more importantly, V has the same drawback all big solo D&D monsters do: a crippling deficit in the action economy. (Opinions do vary wildly: many campaigns I've seen have Varanthian responsible for at least one PC death or serious injury, but in my own PbP she got one grapple in and then got royally clowned in a fusillade of melee.)
Varanthian's 7d6 line breah weapon is weak, as is her spellcasting, being a few random single-target debuffs. Her flight speed is negligible. Even with 10 HD and Practiced Spellcaster, adding spellcasting is putting an airfoil on a bulldozer. Its better to just ignore those features when considering improvements, and instead lean into her intended build as a grappler.
Vs most eyecatching attacks favour style over substance. Her iconic attack combination is "bite and swallow whole," but it takes more than one round to get through. And leaves her belly exposed to attack, quite literally.
Not so Grapple+Constrict+Rake. She has Power Attack and BAB +9. Improved Grab means AoOs don't block her grapples; with a grapple check of +27 most level 8-9 PCs will end up in her grasp. She can't rake on the same round as she bites and grapples, but this makes her Power Attack more effective -- because it doesn't penalise the initial attack. Attack at +17, Grapple at +27 and do 2d8+10 Constrict damage in the first round. Then, in the second round, use Power Attack and the grappled opponent which has no DEX bonus to AC wears 6 claw attacks at +8, each doing 1d8+14 damage. Get more than two hits from the six and you do more damage than swallowing would. And this assumes you take the full BAB penalty under Power Attack, which isnt necessary.
It has drawbacks, sure. While grappling, V doesn't threaten squares and has no DEX bonus to AC. She therefore can't make AoOs and is open to sneak attack damage. More importantly, if the grappled opponent has Freedom of Movement or some teleportation ability, her damage-dealing ability is negated, at least for that person. Slow cast on you arguably prevents you from raking more than once.
Some changes are therefore recommended:
- Get her Freedom of Movement
- Increase CON to enhance survivability
- Item of Dispel Magic
Alertness is a wasted feat. You could switch it out for Combat Reflexes, and then rely on Varanthians four AoOs from her 17 DEX and 10 foot Reach as a backup strategy to stuffing her face with adventurer hot dog.
Changing Varanthian to a dragon
SpoilerThe omission of a white dragon (or a fifth dragon of any kind) is a rather glaring one in RHOD, and it's not exactly clear why the designers did it, other than subverting player expectations. A dragon makes the encounter far more interesting. Some options:
- Abyssal drake (Draco, CR: 9), and change the Alertness feat. I find the combo: Flyby attack + Powerfull Charge + Power Dive nice: 1d6+9+poison+3d6+2d6+9. The poison has a DC of 20, with 2d6 Con damage. Adding Power Attack gives you a bit of extra damage (max +10). Using this combo: attacking every other round with 6d6+28 damage +poison. I like this option because of the background of the beast (wyvern, demon & red dragon), and it also refers to otherworldly help the RHoD gets, which hits at the portal.
- Draconic Creature/Half Dragon/etc. (Draco; CR varies). Take a creature and slap a template or something like that on it.
- Another Dragon (various books; CR varies). As said. White Dragon, perhaps, or Fang Dragons, Blue Dragons, etc. One option: Young Adult Half-White Fang Dragon.
- Velroc (DM, CR 12), a bit tougher, but the 'Magic Distortion Aura' gives a nice twist on the encounter. Also, the dragon is CN, so not really in line with Tiamat.
One small note: if the players miss Varanthian for some reason, don't forget her. She could make for a rather nice 'end of encounter' boss during the Streets of Blood in the Battle of Brindol itself. RHOD says she rejoins the Red Hand army proper rather than head back to the Fane, so though it isnt explicit, she'd likely be present.
Restatting Red Hand operatives
Spoiler
The Monks: If you've got Tome of Battle, you should change these guys to the unarmed swordsage variant. (Let's leave aside this is a general comment which can be made about monks in general.)
If you don't have Tome of Battle, the builds could still stand improvement per the various guides on monk optimisation. Frankly, the monks in the lion's mouth could stand being turned into straight melee classes like fighters, since their primary purpose is merely to survive for a round while one of them sounds the alarm to Ulwai in the halls below. I'd focus a little more on tactics or items to slow the party down: tanglefoot bags, thunderstones to deafen and tell Ulwai that something's wrong, and so on.
Monks seriously challenging the party will need a lot of levels on them. Monk 4 ain't impressing level 8-9 players, no matter how many uber moves you pick up for them. Personally, I had Unarmed Swordsage 6s against a party of eight and they still were singularly unimpressive.
Bear in mind you can build unique individuals within the unarmed swordsage concept. Consider the monks in the stone lion's "mouth" part of the cave: wouldn't it be nice to build them towards mastering out throws from the Setting Sun discipline, and then start chucking PCs clean off the lions jaw (albeit this isn't likely to happen without serious upgrades and a relocation of the opposition to the lion's mouth itself.)
The Clerics: In theory they don't need major restatting. Clerics are nice right out of the box in D&D for a reason.
The problem is comparative levels. Level 3 hobgoblin clerics are mindblowingly undermatched against a level 8-9 party of PCs. They can't cast Mass versions of any spells; they're down to a couple of level one spells and maybe a second level spell before they're out of action. If your party sets off some sort of alarm and allows the Hand forces here time to prepare, they'd probably be more useful, but with kick in the door parties on Haste there's no time for that.
They have scrolls ... of Summon Monster III which on the text they're required to use to bring hellhounds in against the party. These creatures are underwhelming on the first encounter of the whole campaign; theres no reason to think theyd be less so here. The clerics are also are useless in melee, comparatively speaking; their smite good feature merely gives them a slightly more spectacular means of failure (particularly against the neutrals of the party).
If you use the Blasphemous Incantation ACF from Exemplars of Evil, it gets a bit more interesting. A 30 foot range supernatural ability in place of Rebuke Undead is an acceptable change: these guys aren't meant to last past this fight anyway.
If you're minded to recast their spell selection then Incite and Inhibit from the Spell Compendium mess with the party's capacity to coordinate and manipulate the action economy. Close Wounds might give your NPCs one more round. Resurgence gives another chance at beating a save-or-suck. Hand of Divinity and Faith Healing work on any hobgoblins here since they're all worshipers of Tiamat.
Having said that, two clerics are probably pointless. They just don't cast anything strong enough to warrant both of them being there.
Replacing one cleric:
A Hobgoblin Warsoul (MM 5) with two SRD hobgoblin warriors makes for a much, much more interesting option: it decreases the (weak) divine casting capacity of the Hand forces, but gives the arcane casting capacity one hell of a boost. If you're not minded to add a couple of hobgoblin warriors, a Warsoul gives the useless monks a reason to live for a round or two (i.e. powering him up via Soul Tyrant.)
As for the Warsoul's spell selection and tactics: switch out one of his feats for Practiced Spellcaster; that raises him to CL 10. Go to town with debuffs -- Web-and-Fireball is a sniggerworthy scare for your players, and Dimension Door will be handy if you had a mind to get Ulwai out of there and make an escape. If you want to add more bastardry to the equation, see the Nodezilla section of the Ghostlord sections above: give the Warsoul Node Spellcasting and your Warsoul can now cast 13d6 Fireballs on a Spellcraft check.
Also bear in mind that if your Warsoul lasts more than a round, the RHOD tactics of trying to keep the door shut and whatnot are utterly unnecessary. Have the Warsoul Web the door and the monks stooge around or charge up and then perform as much speedbump duty as possible.Last edited by Saintheart; 2022-07-14 at 12:02 AM.
-
2022-04-20, 08:44 AM (ISO 8601)Ettin in the Playground
- Join Date
- May 2009
- Location
- Perth, West Australia
- Gender
Re: The 3.5 Red Hand of Doom Handbook for DMs - Major Spoilers! - PEACH!
Part Three-And-A-Half: Before the Battle of Brindol
900x613.jpg ) Who said resource management was boring?
Who said resource management was boring?
The Mercenary Gold and/or Marked for Death missions
SpoilerDepending on how your party fares against the timeline, you might be better served setting these later in the piece rather than earlier.
For PbP campaigns, you might consider fusing these two encounters together. Escorting the gold to the Hammerfist Holds, even on the back of giant owls, is going to take about a week there and back. Better still if you have the party escort the gold via caravan, since this makes the party sitting ducks for the assassination squad that might originally be tasked with getting the gold rather than getting the party.
In either event AslanCross recommends replacing the regular hobgoblins with Hobgoblin Duskblades (MM 5). The Barghests usually don't need a big upgrade, with teleportation and greater bull's strength they at least can partially keep up with the party at this stage.
The Hammerfist Holds
SpoilerThe Holds are one of the more inspiring, undeveloped sections of the campaign, and RHOD does leave open the possibility of building the Hammerfist Clan's home out to recruit the dwarves. That said, it's a tricky exercise mainly because - unless your party is well ahead on its timelines - getting the party to spend a substantial period of time out here might not be appealing. I heartily recommend playing up the dwarves - especially the Shining Axes - as hardcore fighters, laying it on thick by saying there's only 300 of them and having them all carrying round shields with a Lambda symbol on them. Other thing to be noted is that Clan Hammerfist has some meaty NPCs in context: their leaders are Cleric 7, Bard 8, Rogue 5, and Fighter 8, all levels in relatively short supply and all pretty valuable to a defense of Brindol, potentially.
Building out the Holds can be as thorough or as short as you like: a straight Diplomacy check and some fluff scenes might do enough to make your players feel like they've recruited a Bad@$$ Army and head on to other things.
For those of you who want to add a little more to it, though, I'd like to humbly present my own mini-build of the Holds and a small-ish 15 room dungeon built around the idea that Miha Serani the aranea has sisters, and their part in the conflict is to keep the dwarves out of the war by holding Othrek Hammerfist, the clan's leader, hostage in a ruined dwarven fort that the Hammerfists shun because of the shame from it. You can find the viewable GoogleDocs document right here.
Training the garrison ahead of the battle
SpoilerAs indicated earlier, savvy parties will probably wind up back at Brindol well ahead of schedule. Sidequests from Brindol and the party's own preparations can take up part of the intervening time, but how do we avoid "Yeah, yeah, yeah, we're out there raising the troops' morale, we're telling the kid with his dad's old sword how to swing it properly, but is there anything mathematically we're doing to help these morons?"
kjones found a way. When the players are in Brindol, awaiting the arrival of the Hand, they'll have the option to train the soldiers and militia, and prepare the defense of the city. They can do so in one of four ways - melee combat, ranged combat, defense and tactics, and first aid. These benefits then apply to any NPC allies you give to the characters as support during the Battle.
For each day of training a character leads, they make a DC 25 check, with the following modifiers.
- Melee combat: Base attack bonus + Strength modifier + Charisma modifier (and must have relevant proficiencies)
- Ranged combat: Base attack bonus + Dex modifier + Charisma modifier (and must have relevant proficiencies)
- Defense and Tactics: Base attack bonus + higher of Int or Wis modifier + Charisma modifier
- First Aid: Heal skill + Charisma modifier
- Magical Defense: Make a check with a bonus equal to caster level + relevant ability modifier.
A successful check means that they can put 1 point into that category. A failed roll means they can retry in the same category at a cumulative +2 DC and use up another day, or change categories (and someone else can take the bonus for that category if they want).
During the Battle of Brindol, they can spend their points on NPCs as follows:
Melee combat:
* 1 point: +1 to hit / +1 damage on a single attack roll* 2 points: Grant the use of the Mobility feat for a single round* 3 points: Automatically confirm a threatRanged combat:
* 1 point: +1 to hit / +1 damage on a single attack roll* 2 points: +1 to the damage of a standard volley per archer (volleys as per Heroes of Battle)* 3 points: +1 to the damage of a concentrated volley per archerDefense and Tactics:
* 1 point: Before a combat, mark a single square as filled with rubble (difficult terrain)* 2 points: Delay the arrival of enemy reinforcements for 1 round* 3 points: Before a combat, place a single 5-foot section of waist-high palisadeFirst Aid:
* 1 point: Automatically succeed on a single DC 15 heal check.* 2 points: An NPC gains the effects of Diehard for one round.* 3 points: A stabilized NPC is disabled instead of unconscious.Magical defense:
* 1 point: Add +1 to any saving throw against a magical effect.* 2 points: An NPC gains the effects of Evasion or Mettle for a round.* 3 points: An NPC gains the effects of Improved Evasion or Improved Mettle for a round.
The DCs are such that a person skilled in that area should have about a 25% chance of making the check any given day. Thus, if they're in Brindol for 20 days, they'll have an average of 25 or so points spread around. There are 5 main encounters in the Battle of Brindol, 3 of which involve NPCs prominently, so we're talking about 8 points per battle - that's enough for 2 or 3 cool things per battle.
The Audience with the Lords
SpoilerThis is the meet-and-greet with Brindol's rulers ahead of the battle, when you're deciding strategy. Its also the big roleplaying opportunity of the adventure; you should be pulling your hardest to make the party care about your NPCs in this meeting, if you havent done so at Drellins Ferry already.
This encounter is also where the players are most likely to come up with wild (or terrifyingly good) plans to defend Brindol. If they do so, honour those plans by having them make an impact on the battle in some way. I can't emphasise that enough. If your players are making those sorts of plans, it means they are invested in your game's world and you're succeeding in your primary job as a DM. I'm not saying let them win the entire battle before it happens, but at least tell them something like "The Red Hand would have fielded chimaeras in the battle, but since you burned up the meat trucks in the Hand's baggage train, the chimaeras left the Red Hand, so you won't be facing any of them in the battle."
There are three big problems with the encounter as written:
(1) Mechanically it's largely insignificant. It comes down to a series of Diplomacy rolls and the party gets a maximum of 8 VP if they choose right. If your party has skipped big sections of the adventure to this point, that will make a difference, but it's entirely possible to pass the "victory" line in terms of VP before the party sets foot in the Great Hall.
(2) The choices here as written make no difference to the given encounters in the Battle of Brindol. Kharn will still try to step on a church in your town whether you stage the clerics there or not. The course of the battle is basically set.
(3) Some of the tactical "decisions" are so obvious you'd have to be a Blathering Idiot 20 to get them wrong. Specifically, (a) whether to station Brindol's entire army outside the walls and engage the Red Hand in the field, and (b) whether the lords have any sort of plan for the wall being breached. By this stage the lords will know they're heavily outnumbered and that the Red Hand is fielding dragons. Jarmaath is an ex-adventurer and fought Regiarix once, so he would be aware of the destructive capacity dragon/s can bring to a battle. Engaging outside the walls breaks all suspension of disbelief, as does the failure to make contingency plans for the walls falling, given the force against them.
So what to do? It seems to me there's three approaches one could take:
(1) Make the consequences of the Audience more strategically significant. Commit that the course of the battle, including where and how the encounters take place, hinges upon the decisions the lords make in this meeting. For example, no clerics holed up in the Cathedral means Kharn doesn't push for the Cathedral, but instead pushes for Brindol Keep, which is where the final battle takes place. Not recommended unless you've got a lot of spare time between making plans and running the battle for the party, but the five encounters can be window-dressed to take place in different locations without a lot of fuss.
(2) Make the consequences of the Audience more personally significant to the party.At Brindol you've got several NPCs that hopefully the characters have come to know and at least be fond of. Set up choices for the players where they have to weigh up putting favourite NPCs at risk against added risks to themselves. The key is to give the players a choice that benefits the party personally but overall detracts from the city strategically (or indeed vice versa).
For example, the cleric decision: if you station all the clerics at the Cathedral, then they can heal people better (+2 VP), and Tredora Goldenbrow survives because she's not exposed to enemy fire, but healing potions available to the party in battle may be cut or entirely lost. The reverse applies if you station out the clerics: the party has more healing potions available, but Tredora Goldenbrow's going to die. (-2 VP)
(3) Make some cosmetic changes to the Audience so the more obvious decisions aren't quite so, well, obvious. For example, the decision whether to fight a field battle against the Red Hand becomes a decision whether or not to send the cavalry out to get a quick punch in against the army before retiring to the city gates. Still gets a -2 to VP if chosen, but nowhere near as asinine as putting Brindol's entire army out in front of the walls.
Things to do ahead of the Red Hand's arrival
SpoilerAs said, a lot of parties get back to Brindol well ahead of the Red Hand. Even allowing for the encounters the book provides, DMs sometimes find themselves having to come up with stuff for the players to do other than sit back and wait. We've talked about preparing the garrison for the battle, but here's some other thoughts and ideas for DMs to suggest or adjudicate on...
- Wizards with Teleport, at least in reasonably well-populated settings, have potential to bring serious outside help for the Vale. 900 miles in a single casting likely gets a wizard and friends to some major population centre where, you guessed it, the party could hire mercenaries to assist in the city's defence. In Faerun, for example, going by the "orthodox" placement of Elsir Vale in Channath Vale, a level 9 wizard at Brindol has virtually anywhere from the Lake of Steam to the Great Rift (with its population of thousands of dwarves) to seek out hirelings. 12,000 gp in spare change is enough on DMG rates to double the size of Brindol's garrison in level 1 warriors for a full month of fighting, even buying a spear for each and every one. Fortunately my guys didn't go looking for mercenaries, but I calculated out that with the time they had left, the wizard could go to the Great Rift, hire out a bunch of dwarves, and have them hoof it on foot to the Vale. On the time they had, that extra dwarf force could have made it to the battle in time. The possibilities are even more interesting if you consider quality over quantity: say, another level 6 wizard or something to help in the battle.
- Digging a moat around Brindol's walls (using the Elsir River that runs on the city's north side) was suggested. I calculated this one out: for a moat about 30 feet wide x 10 feet deep you'd need to move 39,000 cubic tons of earth (and find sufficient manpower to do it). I also ruled the party would need to retain an expert with Knowledge (Architecture and Engineering) so that massive water inflow didn't erode the wall itself. (But experts are also very, very cheap on DMG rates).
- Using Stone Shape castings to buttress the city walls from assault (which could have some consequences for the Saving the Walls encounter).
- Brewing up mass Alchemist's Fire cauldrons to tip over the walls.
- Mass production of caltrops to throw across the Red Hand's path to the wall, dropping their movement speed.
- Using Ulwai's Staff of Stormclouds (if captured) to create thunderstorms over Brindol, thus cutting the movement rate of the hobgoblins advancing on the walls by making the ground muddy.
- Appealing to the Black Knives (Rillor Paln's guild of thieves) to assist in the defence of the city: this could be a nice Diplomacy encounter for the party rogue.
- Getting the clerics of Wee Jas and/or Yondalla to assist in the city defence by casting Consecrate on the city graveyard, thereby preventing undead being raised during the attack.
As for "outings" from the city itself:
- Scouting out the Red Hand's precise disposition as it approaches the city walls. This is one of those aspects that Rich Baker actually alluded to when spruiking the module on release, but it never got any official support in the book as such. I didn't have a specific encounter in mind for this, but it could be a useful rogue-ish sort of thing for the party to do. Another alternative is if the party's got Scrying as a spell, since that's an appallingly easy spell to use and the party has some knowledge of some of the figures in the Red Hand (or should do by now).
- Protecting foraging parties. RHOD refers to the fact Jarmaath orders an early harvest in every town ahead of the Red Hand on the assumption the Hand will either take that produce or burn it outright; they need every piece of fruit or grain they can get against the next winter. I had it that Jarmaath's foragers would cut it pretty fine, trying to harvest everything only about three days ahead of the Hand's arrival in an area. The party is a natural choice to intervene if any of the Red Hand's outriders try to accost the foragers.
- Depending on the timing, guiding the Shining Axes by a safer path back to Brindol if it looks like they're going to run into the Red Hand before they reach the city. Dwarves can move at about 2 miles per hour, so 20 miles per day, which means a good 5 days travel to reach Brindol from the northernmost settlement in the Hammerfist Holds.
- Bloodying the Red Hand's nose: a stealthy or teleport-capable party could very feasibly perform a series of hit-and-run operations against the Hand, especially if they've got Scrying available. A party should never be left with the impression it can personally defeat the massed Red Hand on its own, of course, but it's easy for the party to do a few morale-sapping missions that don't actually change the encounters at Brindol but do have an effect -- for example, the party torching the Red Hand's wagons that contain their divine scroll library. Or destroying supply depots left behind on the Dawn Way. Or assassination (see next heading.) Or (shudder) asteroid strikes by a combination of Major Creation and Teleport.
- Assassination, Wyrmlord Kharn specifically. It's feasible to a party with Teleport and Scrying and who have a method to deal out a big number of hitpoints in a single round. Wyrmlord Kharn tends to wind up as the target a lot. Given the way he's travelling with the Red Hand I would definitely have a contingency plan in place for the party taking him out, mainly because the Red Hand only has one cleric with sufficient levels to cast Raise Dead: Azarr Kul, who's obviously otherwise occupied. Quick workarounds are to have a few Raise Dead scrolls with the Red Hand: warpriests can cast them so long as they pass a CL check, because they all have WIS 16. I opted for a "Nice Job Breaking It, Hero" thing: they assassinated Kharn, but when the warpriests raised him, a spell mishap occurred that brought Kharn back as a Death Knight (MM 3).
Last edited by Saintheart; 2022-05-26 at 08:55 AM.
-
2022-04-20, 08:45 AM (ISO 8601)Ettin in the Playground
- Join Date
- May 2009
- Location
- Perth, West Australia
- Gender
Re: The 3.5 Red Hand of Doom Handbook for DMs - Major Spoilers! - PEACH!
Part Four: The Battle of Brindol
 ...No, we don't know why the giant's throwing rocks at the wall rather than the gate.
Streamlining the battle
SpoilerGlyphstone came up with a novel approach to avoiding having to go through every melee encounter in the Battle and bring home to the party the sense that their decisions count. You can find the full discussion here.
Assume your players have 'done the right thing', by breaking the blockades near Rhest, recruiting the Tiri Kitor and the Dwarven Mercenaries.
There are four 'crisis points' during the Red Hand's initial assault - key attempts to breach the city or cause havoc amongst the defenders. At each point, the party can assign one of the four groups of allies they'd collected to deal with the problem, or go deal with it themselves. Every ally is effective against two of the problems, and ineffective against two - if they picked the wrong matchup, the Streets of Blood encounter becomes a bit harder.
(For this, there's an assumption that the Red Hand first tries assaulting the walls of Brindol with ladders and a big dose of cannon fodder, simply to overwhelm Brindol's troops.)
The dwarven mercenaries are effective against ground-based targets, and useless against airborne enemies.
The northern reinforcements (light cavalry) are best used against big targets, since they have a limited supply of javelins.
The elves are most useful against large numbers of smaller enemies, coordination and formation making up for the smaller damage of their projectiles.
Immerstal the Red is best-used where his ability to fly and use magic would have the most effect.
Dwarven Mercenaries Northern Reinforcements Tiri Kitor Elves Immerstal the Red Loss Effect on Streets of Blood Initial Wall Assault Win Loss Win Loss Extra Wave of Cannon Fodder Hill Giant Battery Win Win Loss Loss Random boulders falling on defenders Manticores Loss Loss Win Win Fewer friendly mooks Abithriax Loss Win Loss Win No barricade
Saving (or not) the Walls
SpoilerThis encounter does need some alteration -- but not necessarily to the monsters. What generates the tension and drama in this encounter is the following question: Is the wall going to break?
On the 'book' RHOD, it won't. 25 rounds of uninterrupted throwing by the giants is never going to happen in a real campaign. Brindol's own troops can statistically beat that time limit with crossbows just fishing for critical hits.
Therefore: inject a real time constraint to the encounter. Two possible ways to do this: make the walls shakier, or make the monsters a bit more capable. (Or both, depending on your party).
Simplest fix: give the Hill Giants a single level in Hulking Hurler (Complete Warrior), use that book's rules on thrown objects, and have two of the giants chuck real boulders at the PCs while the other two concentrate on breaking the wall as you describe audible CRACK noises from the wall as the boulders rain on it. The Hill Giants probably won't last any longer, but the players should sweat more. Indeed, rather than calculate wall hitpoints, just fiat that the walls fall after 15 hits from boulders, and start the countdown.
Other ideas--
Skullcrusher Ogres and a catapult: MM4 Skullcrusher Ogres present a more credible threat than the default ogres here. Combining them with an actual siege engine makes things a bit more interesting. Or consider a Siege Golem out of Heroes of Battle for a living catapult - albeit its challenge rating and immunities mean there'll really be only one or two ways to kill it, which can be unfun.
Spell turrets: From the DMG 2. By RAW, a turret has loads more hitpoints and has to either be destroyed entirely or disabled by a rogue to be stopped. However, also by RAW, spell turrets have a "radar" limited to 120 feet and don't target objects. And that's before you look for four spells, each of a different school, of the same level, that damage objects, at Long range. It's like finding a word that rhymes with "orange."
More troops: Another ten-odd hobgoblin squaddies might function as speedbumps against the big or well-optimised party.
The Batman Gambit: The encounter is the Red Hand's attempt to draw off high level adventurers from the West Gate, which is the Hand's real target -- or as a distraction to get Abithriax above the city unopposed. This makes Abithriax's role a bit bigger in the story and makes his use in the battle a bit less random.
Abithriax's Rampage
SpoilerGeneral dragon advice applies ... maybe. If you're dealing with a big/optimised party you might up his size. Increasing from Juvenile to Young Adult gives Abby Spell Resistance, Frightful Presence, DR 5/magic, second level spells, and raises his main combat stats. Hes a bit stronger than his buddies out of the box.
An easy way to make the fight a little more challenging is to have it in a section of town that's on fire -- not because of the fires as such, but because of the smoke that comes with them. Fort saves for all PCs, starting at DC 15, increasing round by round, imposing no actual condition to be cured, makes things much more interesting. You will fiat that smoky-nosed dragons are immune to smoke as well as fire. And then there's the 20% concealment chance; if you make melee attacks, you'll surely have cast Blindsight from a scroll first.
Leaving aside the fun of building a whole section of a city to have one encounter over, consider changing the object of Abbys rampage. Rather than a random part of town, some DMs have him attack Brindol Keep itself, with the garrison there undermanned or outright scattered, the dragon incinerating people inside the place, Harrenhal style. Since Abby fights to the death, this allows for a nice final death dive by the dragon into the keep itself.
He could use some feat changes. Which ones depend on whether you shift his build from melee-and-breathe to something else.
If youre planning on melee, then even if you dont upgrade his size, Awesome Blow, Flyby Attack, Improved Bull Rush, and Wingover can go. Abby has a full attack pushing 4d6+3d8+38 damage with good attack bonuses -- before incorporating Power Attack, which (assuming you take the full +16 BAB penalty) increases potential damage to 3d6+2d8+134, assuming everything hits with attack bonuses at +8 and five +6s. Although its abundantly cool to carry out, Awesome Blow ties you down to a standard action and mechanically is an unstoppable trip and +1d6 damage. Flyby Attack and Improved Bull Rush also tie you down to a single attack, and Wingover is only useful if the partys nimble.
Replace the feats with Travel Devotion, Rapidstrike, Improved Rapidstrike, and Improved Multiattack. Now Abby can close from 150 feet out as a swift action and then deliver an appalling full attack of Bite +24/Claw +24/Claw +24/Claw +19/Claw +14/Claw +14/Claw +14/Wing +24/Wing +24/Tail +24, for a total of 4d6+6d8+54 damage ... before Power Attack is factored in. (Which raises the maximum possible damage to 4d6+6d8+214).
Your focus should be to close in, cheesegrate a PC, back off to a nearby rooftop, monologue about the doom of men, and repeat. Or just cast Blood Wind, dispense with closing in at all, grate cheese, monologue, and wait for someone to hit you with a Shivering Touch to end the fight.
Which is to say: your weak spots will still be magic. Therefore, cast Wings of Cover, Nerveskitter, Conviction, Scintillating Scales, and anything else that a red dragon with access to both the cleric and arcane lists should use. Alternatively, replace Improved Multiattack with some option that allows a second roll on a failed save, maybe gift yourself a one-off Iron Heart Surge via Martial Study.
If youre planning to turn this into a more classic, Bard-at-Dale, hit the dragon as it flames stuff on the wing, then Awesome Blow, Power Attack, Multiattack, Improved Bull Rush, and Wingover can all go. You wont be meleeing much, so why bother?
By way of replacement, consider Knowledge Devotion, Heighten Breath, Recover Breath, Hover, and Empower Supernatural Ability (your breath, dummy).
Your aim is to skirmish. There's little chance Abithriax will get a full attack off, so just breathe and break contact, or just flyby with a single bite attack. You could annoy the snot out of your players using double moves to best advantage; at least use your 150 foot movement allowance to make huge jumps around the battlefield, and remember you can hide behind buildings since the wall of Brindol is 30 feet high, buildings are between 10 and 25 feet therefore, and you are a 10 foot high dragon at best. No line of sight means no line of effect.
Lastly, if like most of us you're irritated by the "suicide by adventurer" that Abby is required to do on RHOD's text, take Final Strike out of Savage Species for a post-death raised middle finger to the party.
Streets of Blood
SpoilerModifications here vary substantially depending on specific parties. It doesn't necessarily require vastly upgrading monsters; this encounter is meant to include NPC allies including elves, owls, and Lions of Brindol, so one way to increase difficulty is to just cut NPCs. Depending on how effective the party's been, they'll face between three and five waves of troops, though assuming the party doesn't metagame you could just throw five waves at the party even if they've foiled the Hand's efforts in Rhest and with the Ghostlord. The main thing to remember is this: like all the others before the confrontation with Kharn, this encounter is only meant to wear down the party's resources, not TPK them.
A lot of DMs instinctively realise the last wave does well reaching some sort of crescendo with a decent opponent thrown at the party. AslanCross in Eberron went for a Warforged Titan; another popular suggestion is to replace the Bluespawn Thunderlizards with a straight out Bluespawn Godslayer. Whilst a godslayer's certainly thematically appropriate, it's also a pretty powerful option -- perhaps even anticlimactic given the party still has Kharn coming up. Personally, I'd reserve a Godslayer for the Fane of Tiamat, where it has a more dramatic impact.
Another way to enhance the difficulty here is to widen the street a bit and just swarm the party. Have more monsters just running to get to the far end of the street. The party loses this encounter if 20 monsters get to the far end, and if they need to move more than five feet, full attacks usually disappear.
Or consider changes to the location. In my campaign, I put the players at the deserted west gate of Brindol, ordered to hold the gate until reinforcements could be cobbled together.
The Sniper Attack
SpoilerFixing the Kulkor Zhul War Adepts:
SpoilerBearing in mind that the players still have two encounters to go, you might not greatly alter the adepts. Their purpose is to inconvenience the party long enough for Skather to get his buff on, so they don't need to really be rebuilt. The only suggested change is to their spells. One possibility is to replace one of their Lightning Bolts with Shatterfloor -- difficult terrain all around makes thing a bit more interesting. But I suggest you substitute one of their first level spells with Sticky Floor from Races of the Dragon. It has a low-ish Reflex save to prevent being stuck in place, but even if they save, PCs are entangled while they're in the area of that spell: move at half speed, -2 to attack rolls, and -4 to DEX ... which affects Reflex saves, AC, and Initiative, synergising nicely with the casters' lightning bolts. Thematic and appropriate. Coating the open areas of floor with a few of these effects is logical stuff for an emplaced hit squad to do -- it slows down intruders until the hobgoblins have time to beat it.
Another possibility is to replace one of the adepts with a reasonably high level Swordsage for more martial protection. Or: backing up Skather with one or two Ghost-Faced Killer builds equipped with invisibility potions to get them in range. GFKs are generally overlooked for PCs because most opponents you face have more HD than your GFK class level, which cuts down on their fear-blasting features. That may not be the case if you have a GFK 6 or so who has a CHA-boosting item and a couple of bloodline levels -- the PCs should have around 8-9 HD at this point, and generally no items granting fear immunity. Two GFKs overlapping their fear assaults could be devastating.
Fixing Skather:
SpoilerAs written, Skather is just plain old underwhelming: a cut and paste Blackspawn Exterminator from the MM IV, with a CR of 10 and a suck value of A+ since he relies on 6 levels in Ninja for most of his combat skills. He can poison, but it's subpar: at these levels, parties' saves are usually too high or too buffable for sassone leaf residue poison with a DC 16 to make an impact.
The solution is drawn from the Poisoner's Handbook. Take a stock blackspawn raider from RHOD and add one of the following builds:
- Rogue 2/Assassin 5. Feat selections (using 1 flaw): Weapon Finesse, Master of Poisons, Poison Expert, Poison Master, Venomous Strike, Staggering Strike, Terrifying Strike - swap out Power Attack, Track, and Improved Initiative. Replace his poisons with Black Lotus Extract, and an Assassination short sword (along with other refinements the Poisoner Handbook suggests to his weapon).
You now have a character who can reliably apply poisons to his weapons as a swift action. Increased Virulence, Poison Expert, Venomous Strike, and the Assassination properties of the weapon raise the DC by 8, on top of an indirect -4 to saves that Terrifying Strike and Staggering Strike impose. Even sassone leaf residue is looking a bit more impressive at DC 24 rather than DC 16. Black Lotus starts at DC 20, does 3d6 Con damage primary which affects Fort saves...before the Assassin's Death Attack kicks in.
Death Attack is going to be tricky to arrange unless you can keep Skather hidden from the party for 3 rounds while they're in the same room as him. This can be fixed by giving a mostly-spent Wand of Deathsight (Complete Mage). And you've got +4d6 sneak attack damage; spellcasting which includes True Strike and Obscuring Mist; Evasion; Improved Uncanny Dodge; and all the rest. For one more HD than his RHOD default.
- Duskblade 7. This build is more "tank and spank" with a poisonous flavour. Feat selections (again, using 1 flaw): Master of Poisons, Improved Initiative, Power Attack, Draconic Aura (energy: acid) traded for Track, Poison Spell, Smiting Spell, Knowledge Devotion, and Combat Expertise.
Make his falchion a whirling weapon. Give him a few doses of Black Lotus or Darklight Brew. He can still poison his weapon as a swift action, but also channel stuff like Chill Touch with Poison Spell metamagic'd into it, resulting in multiple poisonings on one pass -- from the weapon and the spell. And then Smiting Spell, which gives you one more poisonous touch spell a round. He also has a 7d4 breath weapon at DC 19 if you really needed it.
Did I mention that Dimension Hop can be channelled and that Skather is operating on the second floor of a building? Or that he has Knowledge Devotion, and that Knowledge (Local) covers pretty well every PC in existence since most are humanoids? Or that a falchion's a two-handed weapon and thus synergises with Power Attack?
For a large party, it might actually be worth taking both the above builds: the Duskblade "Skather" engages the party while an "assassin" Skather hides and waits for his moment with the Death Attack.
Built like this, Skather becomes a WBL-heavy opponent. Poisons are expensive, as are custom magic items, so you might want to restrain yourself on equipment elsewhere.
Don't go an archer build. There's no point (and no pun intended, either.) You can achieve the fact of Skather being an archer sniper by throwing a plain old bow and arrows amongst his gear.
Restatting Wyrmlord Kharn
SpoilerKharn seems to need fixing on most people's experiences of the campaign. This is mostly because he gets most of his levels from a "meh" class, and then for an encore goes on to PrC into a similarly "meh" class.
Most obviously, with 68 hitpoints, he's well and truly within possibility of being one-shotted by a half-optimised barbarian build. Rebuilding him isnt all about the hitpoints, but he needs to be a warrior befitting the leadership of a rampaging army. That is, controlling the action economy, decent attack accuracy, and credible damage to PCs.
The general consensus is that Kharn does well as a Ruby KnightWINVindicator: the PrC preserves most of your divine spellcasting levels and advances martial maneuvers.
The two shortest paths into RKV are via cleric or paladin. The difference fundamentally comes down to whether you want to keep full cleric versatility on spells, or go down the path of Battle Blessing from Complete Champion and rely on quick casting of Paladin spells and a somewhat higher baseline BAB.
Builds using Tome of Battle:
- Crusader 1/Cleric 4/Ruby Knight Vindicator 5. (Needs a refluff because RKV is solely a Wee Jas PrC on the prerequisites, but other than that, this is one of the more popular builds. If you really want to make your players cry, give Kharn two more levels to reach RKV 7, which unlocks the PrCs most powerful and possibly most abused class feature: Divine Impetus, allowing you to get additional swift actions per round by expending turn undead attempts.)
- Crusader 1/Paladin of Tyranny 4/Ruby Knight Vindicator 5. (This ones more devoted to getting a higher BAB at the expense of versatility with your spells. Has to be a Paladin of Tyranny because of the alignment issue. I'd strongly recommend Battle Blessing from Complete Champion. The feat lets you cast most paladin spells as swift actions. The Spell Compendium is a must for this build.)
- Cleric 3/Crusader 2/Ruby Knight Vindicator 5. Nice alternate if you want a different feel to Kharn. Domains: Trickery, Domination. Feats: Power Attack, Spell Focus (Enchantment)--Bonus from Domination Domain, Divine Defiance, Divine Vigor, Practiced Spellcaster. Here the maneuvers focus on high-damage blasters, like Divine Surge, which gives Kharn a different focus than just being the most uber fighter on the field.
- Crusader 10 or Warblade 10. Don't make Kharn one of these. Even Kharn in his RHOD "book" form has spellcasting options, and he's the only one in the encounter who's got them.
(In passing, by way of refluffing the Ruby Knight Vindicator to the Eberron world, AslanCross came up with arguably one of the best-sounding alternative titles for an Tiamat-based RKV: the Knight of Five Sorrows, which just sings with High Fantasy and locks in with Tiamat's five ... well, you get it. I thoroughly recommend y'all steal that title for Kharn in your own campaigns.)
Builds not using Tome of Battle:
- Cleric 4/Ordained Champion 5/X 1. (Ordained Champion functions like a Paladin only better. "X", of course, standing for any class you feel like.)
- Paladin of Tyranny 7/Blackguard 4. Extra two levels are in here because Paladin of Tyranny can't qualify for Blackguard until he's got enough Hide ranks on him. (Although a better name for this build is Paladin of Heisenbergs Cheese. A Paladin of Tyranny has levels in paladin and thus qualifies to fall and become a blackguard. Thus on RAW he gets all the extra benefits ex-paladins get. But in doing so, a Paladin of Tyranny never commits a good act and does not contravene his code of conduct. Therefore he never falls, thus retaining all his Paladin of Tyranny class abilities and spells and adding in all the blackguards abilities, which effectively means double the normal spells per day, and several more Smite Goods than he should otherwise have. He keeps all his paladin abilities, gets bonuses for not being a paladin anymore, and gets blackguard levels.) Vorteld teamed one of these guys up with a Redspawn Firebelcher, and it apparently made for an interesting fight.
- Favored Soul 10. (Nothing that fantastic to write home about, but its an improvement on splitting his levels up between Favored Soul and Talon of Tiamat.) For building better Favored Souls, consider these two GITP threads.
- Cleric 10. (CoDzilla being the operative build here. And strictly speaking more powerful than at least two of the options above. It would maybe rate higher if only for the fact this doesn't make Kharn that much different to Azarr Kul, and it's important to keep the Wyrmlords distinct from one another.)
Here's a sample Kharn build, from kjones' campaign:
SpoilerWyrmlord Hravek Kharn, CR 9
Male hobgoblin Crusader 1 / Cleric 4 / Ruby Knight Vindicator 4
LE Medium Humanoid (goblinoid)
Init +4
Senses darkvision 60 ft., low-light vision; Listen +3, Spot +3
Languages Common, Draconic, Goblin, Infernal
AC 24, touch 10, flat-footed 24 (29)
HP 66 (9 HD)
Resist fire 5 (cold 10)
F/R/W +12/+6/+7
(+17/+11/+12)
Speed 20 ft.
Melee +1 wounding heavy pick +12/+7 (1d6 + 4 + 1 Con / x4)
(+16/+11 [1d6 + 7 + 1 Con / x4] )
Base Atk +8/+3 Grp +11 (+13)
Maneuvers
7 known 2 readied 2 stances
4th: White Raven Strike (+4d6 damage, target becomes flat-footed)
3rd: Revitalizing Strike (You or ally heals 3d6 + 7)
2nd: Shield Block (+8 to AC for adjacent ally)
Tactical Strike (+2d6 damage, adjacent allies move 5 feet)
1st: Vanguard Strike (allies gain +4 bonus on attacks against target)
Stone Bones (DR 5/adamantine)
Crusader's Strike (heal 1d6+5)
Stances
Leading the Charge (+7 damage to charges)
Martial Spirit (+2 HP / hit)
Spells (CL 7, domains Destruction, Evil)
4th (1 + 1, DC 17):
Unholy Blight*, Air Walk
3rd: (3+1, DC 16):
Magic Circle Against Good*, Wind Wall, Invisibility Purge, Dispel Magic
2nd: (4+1, DC 15):
Shatter*, Bull's Strength+, Resist Energy (cold)+, Bear's Endurance
1st (5+1, DC 14):
Protection from Good*+, Shield of Faith+, Conviction+, Remove Fear, Divine Favor+, Bless
*: Domain spell
+: Already cast, currently active
Other Special Attacks
Smite (+4 to hit, +4 to damage) 1/day
Divine Recovery (Recover a maneuver as a swift action 6/day)
Furious Counterstrike
Steely Resolve 5
Equipment 2 potions of cure serious wounds, potion of fly, potion of remove blindness/deafness, potion of lesser restoration
Abilities Str 16 (20), Dex 8, Con 14, Int 10, Wis 16, Cha 16
Skills Concentration +15, Intimidate +11, Knowledge (Religion) +8, Hide +3
Feats Power Attack, Survivor's Luck, Unbelievable Luck, Lucky Start (4 luck rerolls, apply to init, saves)
Possessions combat gear, +2 red dragoncraft full plate, +1 light fortification heavy steel shield, +1 wounding heavy pick, masterwork light crossbow with 20 bolts, gauntlets of ogre power, cloak of resistance +2, ring of protection +1
Bear in mind this "Kharn" template is down one level on the RHOD standard because he was resurrected from a PC-led assassination earlier in the campaign. Even so; you get CL 7 and maneuvers as a 7th level Crusader - that is, just access to level 4 maneuvers & spells (remember, classes other than martial adepts count for 1/2 an IL). Even though it gets him slightly fewer skills and HP, it'll give him ability to pick 2nd level maneuvers on level 1 of Crusader (as he only gets 2 new maneuvers out of Ruby Knight, bulk of his maneuvers are going to come from level 1 of Crusader so not being limited to level 1 on them is very good).
No rebuild, spells/equipment/feats alterations only:
- Replace Gauntlets of Ogre Power with Amulet of Health +2 CON.
- Replace Ring of Protection with a 25% charged Ring of the Ram.
- Trade Heavy Pick for Dragonbone Longbow
- Trade Air Walk for Freedom of Movement, Mass Shield of Faith, Imbue With Spell Ability, Greater Magic Weapon
- Trade Searing Light for Mass Lesser Vigor, Magic Circle Against X, or Magic Vestment
- Trade Death Knell for Close Wounds or Spiritual Weapon
- Trade Endurance, Diehard for Point Blank Shot and Travel Devotion.
Kharn becomes a primary buffer/secondary ranged attacker rather than the most uber melee guy on the field. Imbue With Spell Ability and Greater Magic Weapon are used on the hill giants before the battle to give them some minor healing or similar. He hits from range with his bow, repositions using Travel Devotion, and keeps players back using the Ring of the Ram.
Modify the hill giants: trade in Improved Sunder for Awesome Blow. Now the PCs are sent flying all over the battlefield, or into the path of Kharns breath weapon. Indeed that breath weapon is better with CON-boosters rather than STR boosters, i.e. another reason the +2 CON item replaces the Gauntlets of Ogre Power.
He needs some support!
If the Battle's been going right, then hopefully your divine or arcane spellcasters will have largely shot their bolts on other challenges, bringing this fight down to a real grind of low-level spells. But generally parties are savvy enough to hold back at least one nuke in the backpack to mess with what seems to be the End-Of-Level boss, and Kharn is pretty much the definition of that. Having extra melee combatants helps a little -- I like Hill Giants with levels in Hulking Hurler and War Hulk -- but melee combatants are woefully underprepared for Will-blasting spells in particular. Against a large party in particular and against an optimised party, Kharn needs some spellcasting backup to make up for a distinct disadvantage on the action economy, be it a couple of cleric casters or an arcanist or two -- someone who can at least intercept the party's Ray of Stupidity with a Dispel Magic or similar. (Some potential candidates for this spellcasting backup are actually Kharn's lovers, who are mentioned earlier in the module - Pash-Kari and Ruven).Last edited by Saintheart; 2023-03-18 at 08:43 PM.
-
2022-04-20, 08:46 AM (ISO 8601)Ettin in the Playground
- Join Date
- May 2009
- Location
- Perth, West Australia
- Gender
Re: The 3.5 Red Hand of Doom Handbook for DMs - Major Spoilers! - PEACH!
Part Five: the Fane of Tiamat (and beyond)
Ya think they got her best side?
Just why the hell did he do all this?
SpoilerOne question that might have occurred to your party over the adventure is: wouldn't you prefer to have demons from Avernus buttressing your army? Why wouldn't Azarr Kul delay his campaign against Elsir Vale until he had completed the month-long ritual?
One answer DMs have come up with: tell the players that the Battle of Brindol was part of the ritual.
Kuls portal-in-progress is not your Daddy's Gate. Kul isn't high level enough to cast the latter spell, and sure as hell isn't powerful enough to persist let alone make permanent a door to Avernus. Therefore: the ritual creating the portal requires a very, very large blood sacrifice in Tiamat's name. That sacrifice was made in the Red Hand's assault on Brindol: win or lose, many hobgoblins lose their lives on the city's wall, and every drop of blood shed was part payment of the price to open the doorway. This then partially explains the Red Hand's fanatical devotion to Tiamat: not because the Hand at large knows Kul's plan, but because only a massive sacrifice of followers is sufficient to complete the ritual. (Also compare the Eberron adaptation, which raises the stakes of the conflict much, much higher by dint of the setting's lore.)
This solution is a nice if cruel twist on the characters' expectations of victory at Brindol. Whether they lost or triumphed, they still played into Azarr Kul's plans. It also plays into Kul's role as a priest of Tiamat, whose domains include Trickery -- he deceived his entire people, who did not realise they were being thrown into battle for ulterior motives. As to how this information is revealed, it might be best to give Kul a monologue on the subject, or some helpful soul at the Fane who can be locked down to disclose this development. Ulwai shouldn't know this aspect of the plan, since it all but invites the players to run straight to the Fane and bust the door down.
Rebuilding the Fane of Tiamat
SpoilerThe Fane is a bit of a weird postscript to the Battle of Brindol. Some DMs just sling Azarr Kul directly into the Battle of Brindol and leave the overall climax of the adventure right there. Others literally run it back to front - allowed the players to rip up the Fane entirely and then run back to finish off the Red Hand's main force at Brindol.
There's any number of reasons why (the chief one being that the Battle of Brindol is a pretty powerful climax all on its own) but one of the campaign journalists put their finger on it: compared with the rest of the "dungeons" in the game, the Fane is very large and contains a number of encounters that don't really add anything to it. One example (and usually first up for DMly deletion) is Laryssa, the Night Hag the party encounters in the kitchen. Yeah, it shows the Fane is a "working environment"; yeah, it's a Night Hag; yeah, you might get a laugh if a dumb PC brews up a tea out of her nail clippings, but, well, so what?
Another element making the Fane a little cheesy is the modules dictum that set monsters only trigger when you enter their room. It's like bad videogame AI, whatever suspension of disbelief the writers were going for gets smashed. These are meant to be the most elite troops Azarr Kul's got, and they're all "Lugz only get paid to stare at doorway. Lugz don't care if dragon yelling 'intruders!'"
Of course there's a balance issue to be considered since swarming the PCs with every guard in the place is also most likely to be fatal to them. (On the other hand, if your party's optimised, swarming them with every guard in the place, in an appropriate spot like the temple, might turn out moderately awesome.)
One solution: cut down the size of the Fane and streamline it, and play up more forcefully the countdown to doom, accelerating the timetable before the portal opens and making it known to the players.
The entire dungeon then draws suspense from the urgency of the PCs' mission. As with the 'Saving the Walls' encounter back in the Battle, and RHOD as a whole, the countdown should be apparent and inexorable. It turns the "15 minute adventuring day" against the party, because the players won't (or shouldnt) have time to stop and fully recharge their batteries for better wading in blood.
The following things could be included:
* Tyrgarun and the trap on the front door
* The foyer, more heavily defended
* The torture chamber, more or less unchanged
* The barracks and the priest's chambers, merged into a single area somehow
* The temple, guarded by the dragonspawn from the cave
* The treasury, guarded by the barbed devil, combined with the bedchamber - put the erinyes in the Inner Sanctum with Kul himself
* The inner sanctum
This leaves out the kitchen, eliminates the altar beneath the Inner Sanctum, removes the cave, and merges the barracks and the priest quarters. Think should result in a much tighter, more satisfying Chapter V.
Here's some other funky ideas that folks came up with for redesigning the Fane:
- Make the Fane itself mostly deserted. Maybe every so often the PCs could encounter a band of guards, but they'd be terrified and probably just refuse to fight. Reason being: knowing the PCs are coming, Azar Kul has sped up the ritual. And so the portal has begun to spit out fiends at random points throughout the Fane. Because of DM handwavium ("unpredictable magical energies, whatever), these fiends are mostly demons, which means they've pretty much been tearing the place apart.
- Some parts of the Fane just lead straight into Hell. The PCs would have to navigate the infernal environments. Although I realize it's cliche as hell, I can see them having to pass through several gates, each of which requires defeating a guardian in a battle that revolves around some gimmick, be it mental environment manipulation, riddles, whatever. The guardians would be devils, hyped up superhobbos, teams of spawn of Tiamat assassins, hordes of raving goblin cultist, bugbear ninja, etc.
- The final gate leads back to the Material Plane. Azar Kul and the actual portal exist in a sort of "eye of the storm" situation. The PCs can see crackling hellish energies within spitting distance as they fight Teh BossMonster.
- If you keep the cavern, increase its size and throw a Bluespawn Godslayer at the party here.
One significant element: as written, the Fane and Azarr Kul are wide open to scry-and-die tactics. RHOD is meant to top out at level 10. By that stage Scry and Teleport have come online. There is no mechanical element that keeps the party from teleporting in and nova'ing Kul. While this can be rather useful if you'd honestly rather cut past all of the Fane encounters and go direct to Kul himself, if you want to take the party through the Fane you're going to have to come up with some kind of funky handwavium to keep the casters out (and it'll need to be a more solid piece of handwavium than teleport errors ... since the cure for a Teleport error is invariably just to cast another Teleport.)
And because they're just awesome and specific, AslanCross's changes made to the Fane:
I really dislike the Night Hag encounter. It seems to me like a half-hearted attempt at levity in the final leg of the adventure. I prefer to keep the Fane spooky and very intimidating. I took it out and replaced it with a Naztharune Rakshasa assassin (it fit the story of one of my party's characters: his wife was murdered back home by a Rakshasa that was working with Azarr Kul).
As for what to add, I had the battle with Tyrgarun happen along a bridge that crosses the canyon. Naturally, a narrow, rickety, hanging bridge.
I also threw out the Blackspawn and replaced them all with multiple devils: mostly legion devils and chain devils. Chain devils are FANTASTIC for the barracks room due to the large number of meat chains hanging from the ceiling.
I also dramatically increased the power of the Bone Devil by giving him class levels, though in my run he wasn't meant to be a combat encounter. He gave the PCs a deal, offering to step out of the way if they took out the Glabrezu at the other end of the complex (I put the Glabrezu's prison chamber beyond the priest cells).
I also added a very annoying spell turret in the center of the main hallway of the Upper Fane, along with an Iron Golem (had to challenge my party due to it being fairly optimized and having 5 members; I do not recommend this for weaker parties). The Iron Golem was draconic in design (shaped like a Large half-dragon humanoid) and dealt slashing damage instead of bludgeoning thanks to enormous claws. It was actually left there by the original creators of the Fane. Thanks to a couple of deadly run-ins with it, the Red Hand squatters decided to just leave the golem alone and chose paths that circumvent it instead (there are many).
I also disliked how empty the council room was. I piled up lots of books on the table and had a very large map of Eberron pinned onto it. The giant Pentagram depicting the planar seal was drawn on it, with the Fane of Tiamat as one of the star's points. The map meant that there were other Fanes, and thus more locations for Azarr Kul to raid and perform his rituals at.
To make this room more interesting, I added a very large throne in a corner. It was big enough for an ogre. What for? You'll see later.
To round off the council chamber, I added a fire summoning trap (DMG 2). It basically incinerated the entire room along with the documents, and dropped a Fire elemental on the PCs. The trap was in Azarr Kul's throne.
Instead of wyverns, I put in a single Abyssal Drake in the Great Temple of Tiamat, along with mezzoloths and canoloths. Cloudkill as a spell-like ability is AWESOME.
What's a final dungeon populated by Spawn of Tiamat without a Bluespawn Godslayer? I replaced the razorfiends with this single butt-kicker. I dramatically increased the size of the Cavern of the Guardian Spawn, putting the eastern half on a rock shelf 200 feet up. The PCs had to scale a rickety, dangerous ladder to get up to the tunnel to the Outer Sanctum.
This ladder had a Blackspawn Stalker's web all around it. The Stalker itself was waiting on top beside the Godslayer.
Remember that throne in the council chamber? The really big one? For the Outer Sanctum, I added one last Rakshasa in it along with the lesser clerics and a hobgoblin crusader of Tiamat. (In Eberron, Tiamat's cult is primarily run by Rakshasas; particularly favored ones undertake a ritual that turns them into powerful half-dragon rakshasas.) This one was one of them: A large, half bronze-dragon Naityan rakshasa with swordsage levels. (Dragons in Eberron aren't alignment-color coded.)
Restatting Tyrgarun
SpoilerBy this point you shouldn't need to upgrade this dragon. He's older and has more abilities than the youngsters, so the fight with Tyrgarun shouldn't need a lot of reworking to the dragon himself.
Even so, there's an intriguing opportunity for bastardry available here. Remember how the module says that if you haven't been diligent in killing dragons, they'll show up again here? Well, suppose the party has been killing dragons but hasn't been doing much damage to the corpses...
Consider having zombie Ozyrrandion and zombie Regiarix showing up to support Tyrgarun in battle.
Restatting Azarr Kul and/or the Aspect
SpoilerAzarr KulSpoilerSimilar considerations as Kharn here. The final battle is a in a killing jar and hands the party a significant advantage in the action economy: Kul gets no guards to defend himself. For a party that has access to fifth-level spells (given they'll be level 10 or 11 at this point) a single Antilife Shell isnt going to hold back a party long enough for Kul to buff up.
So how to deal with these?
One option -- which my DMing partner and I roughed out but never got down to figures or playtesting -- was to make the five dragon heads of the room have more functions than just supplying geysers of energy. We'd thought they themselves could have damage, buffs, or debuffs for Kul based on the colour of the head: the red head might supply [fire] immunity, and so on. The heads, though, could be dispelled or disabled, thus giving some party members something to do in the battle other than cast or kill things. As the heads came down, Kul's vulnerability increases.
Another option we came up with was to toss a bunch of Legion Devils (FF 2 I think) into the room every few rounds to keep up the melee pressure, and throw a Cornugon at the party as well. Kul himself I tried to change from an ordinary cleric into a wand wielder themed on elemental damage to get the whole "five heads of Tiamat" going, but for various reasons this was never tested in combat.
And one other choice is to fiat your way through it somewhat by giving Kul a 'super potion' of some kind that lets him put all his buffs on in one round, and support him with five lower-levelled copies of himself, each focusing on blasting and Dispel Magic with an elemental theme to each.
I think it's important to prepare for and take account of fifth-level magic and yet make Kul unique and memorable. That may well take both spellcasting and melee support for him: even as a Cleric 11 (and realistically there aren't many better builds than this for him) there is no way he can face off on his own against four or more level 10 characters. I think this is one of the hardest tasks in D&D to make the fight close and interesting: fifth level magic whether arcane or divine has a fair amount of rocket tag to it, and you need to bear that in mind as you go.
The Aspect of TiamatSpoilerOne thought here is rather than have the Aspect drop through the portal, to rather do the whole 'This isn't even my final form' thing with Azarr Khul and have him morph into the Aspect.
But again: for all its finery, it's still a big, solo monster. With all that entails. Some people have complaints about how weak the Aspect actually is, in which case upgrading or using Endarire's rebuild (linked further down) may well suit your recipe a lot better.
Me, I stole a moment from the climax of the Dragonlance novel Dragons of Spring Dawning: let the PCs get a glimpse of Tiamat Herself as she desperately tries to claw her way onto the Prime Material Plane, let them think they've failed and then the portal slams shut.
And The Adventure Continues
SpoilerAs something of a postscript, what are some thoughts for where characters can go after having killed Azarr Khul and/or the Aspect of Tiamat?
Some suggestions people have made based on a 10th to 11th level party by the end of the adventure:
- Scales of War, being a 4e adventure path that follows on from RHOD, although obviously it would require back-conversion.
- Rise of Tiamat, a 5e AP thats set a generation on from RHOD, although again, requires back-conversion.
- Expedition to Castle Ravenloft. Roughly level-appropriate, and if you wanted to pull some kind of "the planes themselves are put out of alignment as the Aspect dies and the portal to Avernus closes, and with a sudden darkness, you find yourself ... somewhere..." Ravenloft is a cute place to wind up. :)
- Someone with a very sick sense of humour suggested the Tomb of Horrors.
- Expedition to the Demonweb Pits. Jair Barik had some good thoughts on the transition to this: go with an ending of "the players jump into a portal and end up in Sigil", which allows you to segue into EttDP with the motive of getting home rather than just being out to get evil -- or alternatively, just give the players some downtime after RHoD and let their climactic battles there fade back a bit, since EttDP just starts off with fairly deadly opposition to begin with. There are some nice thematic concordances with the two campaigns - notably, more Aspects, and the players dealing with Demons rather than Devils from the RHoD Fane and consequently some plot intrigue stemming out of the Blood War.
- Return to the Temple of Elemental Evil.
Other plot hooks you could draw from:
- Clean up. While Azarr Kul and Hravek Kharn may be dead, the Horde is far from gone: while scattered, hobgoblins and other monsters are still rampaging across the Elsir Vale, causing a great deal of havoc. If any Wyrmlords survived, they might reorganize the troops and prepare another assault; even if none did, a powerful Red Hand warpriest might seize control and begin their own invasion (or they might find a way to resurrect a fallen Wyrmlord).
- The fifth
Beatledragon. Why were only four dragons present in the invasion? Simple. Azarr Kul had, in fact, made an alliance with a powerful white dragon from the frosty mountain peaks north of the Endless Plains, but he simply didn't have time to delay the invasion long enough for the dragon to arrive. Instead, the plan was that the white dragon would help him solidify his rule across the Elsir Vale, crushing any remaining resistance. So now, unaware that the Red Hand horde is in fact routed, this dragon arrives on its own...followed, of course, by a retinue of enslaved soldiers and monsters - and finds, while not perhaps the easy victory he had expected, a decimated land ripe for the picking. - The Fane of Tiamat. Azarr Kul didn't quite manage to complete his infernal gate, but his work and the arrival of the Aspect of Tiamat significantly injured the fabric of the Material Plane within the inner sanctum. If they can, remaining Red Hand warpriests might try to complete the ritual - or the hordes of Baator might break through themselves. Either way, Elsir Vale now finds itself under a new threat: ravening armies of Hell swarming out of the Wyrmsmokes, bent on destruction.
- Vraath Keep. The PCs are heroes of the Elsir Vale, and as such Lord Jarmaath might see fit to grant them lordship over Vraath Keep and Drellin's Ferry. If they accept, the PCs will not only have to cope with rebuilding and repopulating the town and castle, but also clearing the shadow-filled eaves of the western Witchwood and driving back raids by remaining Red Hand warriors. To be sure, it will become a game that's quite different from the standard campaign, but nonetheless an interesting one. If you're prepared to do some work, it could even be a nice opportunity to segue into Pathfinder's Kingmaker adventure path, since the themes of "own a piece of the rock" are the same.
- Lady Kaal and/or Rillor Paln, being the shifty powers in Elsir Vale. These two can easily cause problems fossicking in the ruins of the Fane and cause a further major threat to the Vale themselves.
-
2022-04-20, 08:49 AM (ISO 8601)Ettin in the Playground
- Join Date
- May 2009
- Location
- Perth, West Australia
- Gender
Re: The 3.5 Red Hand of Doom Handbook for DMs - Major Spoilers! - PEACH!
Other Resources, Campaign Journals, etc.
Very much under construction. Yes, even 12 years later.
Maps:
Spoiler
- Courtesy of the hardworking Antariuk, a gorgeous series of maps of:
- Elsir Vale
- Brindol
- Vraath Keep
You can find this wonderful set of pictures at his DeviantArt page.
- A well-done colour Dundjinni map of The Causeway (i.e. the hydra encounter) can be found here.
- A well-done colour Dundjinni map of Skull Gorge Bridge can be found here.
- A well-done colour Dundjinni map of The Roadblock can be found here.
- A very well-done Dundjinni colour map of the Bell Tower and Town Hall of Rhest can be found here (scroll down the page a bit).
- An adequate map of the bell tower at Rhest: here.
- An adequate map of the Rhest town hall: here.
(If these links have timed out, Google image searches with these titles do turn up either copies of the maps or stuff that can function as substitutes.)
On printing these out at 1" format: the easiest way is to use graphics software that can display measurements (often called "rulers") and then just scale the image to fit the 1" square measurements. Many programs, including Paint.Net (free and very powerful) do this. Remember to adjust your printer settings as well, very often people forget that standard settings use borders around images and then the final print doesn't fit.
Campaign Journals
SpoilerHosted here on GITP:
AslanCross's RHOD campaign journal, set in Eberron.
Saph's RHOD campaign journal, set in the Forgotten Realms.
kjones' RHOD campaign journal, set in a generic (?) campaign world.
Jon_Dahl's campaign journal, which is one of those rare instances where Brindol is in fact destroyed.
One of my RHOD campaigns, played in PbP format:
http://boards.theforce.net/threads/a...ture.28108372/
Many of the posts are truncated due to a board error transferring from IGN to Xenforo, but the last quarter or so of posts are normal and readable.
The Caligula journal:
https://web.archive.org/web/20150917...hreads/1061626
This journal gets a lot of fond mentions in the wreckage of the old gleemax boards; it's a very, very long campaign thread and Caligula apparently put a lot of work into sidequests and making his players care about the campaign. You'll find a lot of familiar tactics here. May be the read if you're not already familiar with it.
Alternate builds for various NPCs or opponents in RHOD:
Spoiler
From Inkeyes, using Tome of Battle, in an Eberron setting - hobgoblin rank and file
SpoilerHobgoblin Regular
Hobgoblin Archer
Goblin Worg Rider (Uses Dragon #336 variant)
Warbeast Wolf
Hobgoblin Sergeant & Hobgoblin Veteran
Hobgoblin Chain-bearer: Instead of being a blade-bearer Inkeyes thought it'd be funny to make him a spiked-chain tripper.
Super Cheerleader: This build uses the Sublime Way Marshal which seems to have disappeared from the web. Here's the full fix in a word doc. I also made a weaker version as an alternative to archers with the Regulars.
Doom Fist Monk: He's an unarmed Swordsage.
Kulor Zul Mindbender: I rebuilt him into a telepath Psion. I went with this so the Ardent in my group would have the chance to find some nice psionic items.
From Inkeyes, again in Eberron - dragons and Wyrmlords
Spoiler
Dragons:
Ozyrrandion is a mercury dragon. He comes out to the same CR as before, but if anyone thinks he needs upgrading I'd love input. I figured that a glittering metallic dragon would throw the party off since most of them probably forgot dragons can be any alignment. It's also very likely they'll mistake him with a Silver dragon and attack him with fire spells (which he's immune to).
Regiarix is a Topaz Dragon from the Monster Manual 2. He's the same CR as well, according to the 3.5 update of the book.
Vaaranthian is a dragon now! My first party was confused and disappointed in the end when there was no fifth dragon to fight; facing the draconic servants of Tiamat meant five would show up, right? Feel free to ignore this one if you prefer the Fiendish Behir. I think Fang Dragons are pretty awesome, though. She comes out to the same CR, and gets a bunch of interesting goodies. Due to their nature, fang dragons get larger damage die, Con drain (instead of a breath weapon), and cool SLAs. The source I used was the Draconomicon, but they're in Monsters of Faerun too.
Abithriax is a half-white brass dragon. I picked a brass as a base creature because the idea of a Beige Dragon always amused me. According to the MM, he actually comes out to a CR 12 with the template on top, but all it really gives him is some stat boosts and a cone of cold 1/day. If anyone thinks he needs downsizing feel free to speak up.
With Tyragun I'm undecided. I statted up a CR 10 Ethereal Dragon, but I'd only have half a chromatic dragon to fight the party with if I used that. They might also be completely baffled by a dragon that can go ethereal 3/day and hit them with a breath weapon on another plane. I'd also have to rework the five talking heads thing, but that's not hard.
Wyrmlords:
Wyrmlord Koth is a Wizard focused on debuffing. His strategy is to go invisible and cast as many non-direct damage spells as possible before he has to hit anyone. If cornered, he'd try to escape. Like any good batman wizard he has prepared for the possibility of being captured with several escape spells on his Spell Mastery feat.
Wyrmlord Saarvith is a Martial Ranger with Fax's Falling Star Discipline. He's meant to hop on Regiarix and rain arrows down on the party while airborne.
I should also note that the last three Wyrmlords each have one flaw. At that level I figured that unique NPCs deserved the extra feat to rival my party. I give PCs 1 flaw and 1 trait.
Ulwai Stormcaller is a sunscorched Hobgoblin Bard. Her strategy is to go invisible, pump her inspire courage, then belt out Dragonfire Inspriration so her allies hit enemies with +4d6 electrical damage.
Wyrmlord Hravek Kharn is a Cleric/Ordained Champion. There's not much to his strategy other than buff and smash.
High Wyrmlord Azarr Kul is a Cleric/Crusader/Ruby Knight Vindicator. He makes liberal use of Divine Meta Magic to pile big buffs on himself and rip and tear in combat. His build could also be adapted for Kharn and vice versa if you prefer. This version of Azarr Kul assumes that his father is an Ethereal Dragon (like above), but the only difference is what energy his cone uses and what he's immune to.
From Endarire, a, shall we say, more challenging Aspect of Tiamat Its Right Here.
Other miscellaneous but handy links, lists, etc
Spoiler
- List of all Spawn of Tiamat, to vary up those encountered in the campaign.
- A Work-In-Progress attempting to turn Elsir Vale into a solid adventure path for 5e. May be of use to those who want to hang out in Elsir Vale ahead of or after their adventuring careers.
Couple of links I did manage to salvage from the WOTC Archive and which still work:
RHOD Errata!
SpoilerMostly stolen from ENWorld, there appear to be the following mistakes on the RHOD text, which were never corrected by official errata of any kind:
- p. 113, Wyrmlord Hravek Kharn, male hobgoblin Favored Soul 6/Talon of Tiamat 4: Dexterity should be 10, not 8. Hobgoblins receive a racial stat of +2 DEX which doesnt appear to have been incorporated into the base stat array, raising the modifier to +0, not -1. REF save should be +8 (+5 Favored Soul, +1 Talon of Tiamat, +2 Cloak of Resistance, +0 DEX). His AC and flat-footed AC should be 25 (10 +10 (Red Dragoncraft Full Plate +2) +4 (Heavy Steel Shield +2) +0 [DEX] +1 (Ring of Protection +1)). His Touch AC should be 11 (10 +1 (Ring of Protection +1) +0 [DEX]). Listen and Spot are listed as being +1 on the "Senses" line, but under "Skills" they're not listed at all, so presumably he has no ranks in either; however, with a Wisdom score of 10, they should be at +0 each, not +1.
- pp. 113-114, Wyrmlord Saarvith, male goblin ranger 7: +1 longbow damage should be 1d6+1/×3, not 1d6+1/19-20.
- p. 114, Eagle Animal Companion: Touch AC should be 14, not 15 (+1 size, +3 Dex). Flat-footed AC should be 14, not 13 (+1 size, +3 natural). Talon attacks should be at +6 melee, not +7 (+2 BAB, +1 size, +3 Dex with Weapon Finesse). Bite attacks should be at +1 melee, not +2 (+2 BAB, +1 size, +3 Dex with Weapon Finesse, -5 for secondary attack).
- pp. 114-115, Varanthian, female half-fiend behir: Rake attacks should be at +17 melee, not +15 (+9 BAB, -2 size, +10 Str). AC of gizzard (when PC is swallowed whole) should be 16, not 15 (10 + half of the creature's natural armor; behir has +11 natural armor, and half-fiend adds +1 natural armor, so 10 + [.5 × 12] = 16).
- p. 115, Abithriax, male juvenile red dragon: Fort should be +15, not +11 (+10 as a 16-HD dragon, +5 Con). Ref should be +10, not +8 (+10 as a 16-HD dragon, +0 Dex). Will should be +12, not +8 (+10 as a 16-HD dragon, +2 Wis).
- p. 117, Blood Ghost Berserker, bugbear barbarian 2: When raging, flat-footed AC should be 16, not 14 (due to uncanny dodge). When not raging, flat-footed AC should be 18, not 16 (due to uncanny dodge).
- p. 118 Doom Fist Monk, hobgoblin monk 4: Masterwork light crossbow damage should be 1d8/19-20, not just 1d8. Should have either Combat Reflexes or Deflect Arrows as a bonus feat instead of either Improved Grapple or Stunning Fist (he should get only one of these last two as a 1st-level monk, and then one of the first two feats as a 2nd-level monk).
- pp. 118-119, Doom Hand Warpriest, hobgoblin cleric 7/warpriest 1: Under "Senses," Listen and Spot should each be "+3" instead of "+3x".
- p. 121, Ghost Brute Lion: Strength should be "21 (ethereal only) or ?" (since he'll use his Strength modifier when attacking ethereal foes). Blood Curdling Roar doesn't give a Will save DC; it should be DC 14.
- pp. 121-122, Ghost Dire Lion: Will should be +8, not +4 (+6 as a 8-HD dire animal (since dire animals have all Good saves), +0 Wis, +2 Iron Will).
- p. 122, Lesser Bonedrinker: Ref should be +4, not +6 (+2 as a 7-HD undead, +2 Dex). Tentacle attacks should be at +7 melee, not +6 (+3 BAB, +1 size, +3 Str). Claw attacks should be at +2 melee, not +1 (+3 BAB, +1 size, +3 Str, -5 for secondary attack).
- p. 123, Old Warklegnaw, venerable male forest giant: Greatclub attacks should be at +12 melee, not +15 (+9 BAB, -2 size, +5 current Str). Rock attacks should be at +6 ranged, not +7 (+9 BAB, -2 size, -2 Dex, +1 racial bonus), or +4/+4 ranged with Rapid Shot, not +5/+5.
- p. 123, Killiar Arrowswift, male wild elf ranger 4: +1 longbow damage should be 1d8+1/×3, not 1d8/×3 (+1 magic weapon bonus).
- pp. 123-124, Trellara Nightshadow, female wild elf bard 4: Masterwork longbow damage should be 1d8-1/×3, not 1d8/×3 (-1 Str).
- p. 125, Crimson Tiger Thug, human rogue 4: Flat-footed AC should be 18, not 16 (due to uncanny dodge).
...And that's all ... again ... take it away guys!Last edited by Saintheart; 2022-06-24 at 01:23 AM.
-
2022-04-20, 08:55 AM (ISO 8601)Ettin in the Playground
- Join Date
- May 2009
- Location
- Perth, West Australia
- Gender
Re: The 3.5 Red Hand of Doom Handbook for DMs - Major Spoilers! - PEACH!
Remixing RHOD
And to launch this new edition of the RHOD Handbook, here's my first big old slab of thoughts for tinkering with RHOD.
For a full introduction to the mindset and assumptions behind the following post, I encourage DMs to have a read of two or three webpages first:
- MDA: A Formal Approach to Game Design and Game Research.
- Eight Kinds of Fun, by Angry GM, here and here.
- Jaquaying the Dungeon, Part 1 here, but the whole series is worth reading.
Indeed I encourage DMs who arent familiar with these ideas to read these pages even if you dont read anything that follows.
Now, I know you likely wont have read any of that stuff, so let me try and imperfectly summarise the salient points from those pages.
Rubbish Summary of Assumptions:
Adventure modules are to RPG systems as software to hardware. D&D 3.5 is the ruleset, the roleplaying game is the adventure itself. Typically, when playing games, we're in pursuit consciously/unconsciously of one or more kinds of enjoyment/fun/pleasure.
MDA theory, puts forward 8 different kinds, summarised by the Angry GM as follows:
- Sensation: The fun of having your senses stimulated.
- Fantasy: The fun of losing yourself in an imaginary world and being something youre not.
- Narrative: The fun of experiencing a well-told story.
- Challenge: The fun of overcoming obstacles.
- Fellowship: The fun of interacting with others and working together.
- Discovery: The fun of exploring and uncovering things.
- Expression: The fun of leaving your personal mark on the world.
- Submission: The fun of turning your brain off and doing effortless things.
Of course, (a) different people enjoy different things in different measures (shock horror) and (b) different people sometimes/often dont know what kind of fun theyre looking for.
MDA theory holds that fun is found by interaction with a games aesthetics, which are dictated by the games dynamics, which are dictated by the games mechanics. So if we want to help a player have fun, we need to know the type of fun were trying to deliver, the aesthetic that delivers that, the game dynamics that create the aesthetic, and the mechanics that create the dynamics.
We try to divine what our players enjoy in an adventure, then work out the dynamics (and therefore the mechanics) that best deliver that type of enjoyment to them.
If our players enjoy narratives, we (possibly) lean on backstory and perhaps a more linear, three-act-ish adventure which adheres to worldbuilding. Railroad tracks may be more tolerable in this case.
If our players enjoy fantasy, we de-emphasise mechanics and work in well-built settings where we can easily produce answers to questions about how a world works.
If our players enjoy challenge, we lean on hard crunch, RAW, and tough combat encounters.
If our players enjoy fellowship (i.e. company and interacting among themselves) we lean on cooperative encounters and go easier on OOC discussion, since the players are here for the company as much as the game.
And since people often enjoy more than one thing at a time, we endeavour to provide a balanced mix of one or more of these.
Moving on to Jaquaying now.
Jaquaying is a concept named after the early D&D module (and, later, CounterStrike, and Quake and Halo Wars level) designer Jennell Jaquays. Ms. Jaquays excelled at non-linear dungeon (and level) design. Which is to say: she was appallingly good at designing the opposite of the stereotypical railroad dungeon where theres only one meaningful path in or out of the dark and musty place you and your three propellerhead colleagues insist on walking into looking for trouble.
Theres a raft of techniques for design falling under this one verb, from multiple entrances and exits to multiple looping paths between areas. Its too many to get into here. The overall intent of Jaquaying is to deliver a complex and dynamic dungeon environment, where the partys chosen approach to the dungeon changes how they experience that dungeon. Going into different areas at different points recontextualise the dungeon and provide an experience unique to the party.
A way of illustrating the point visually: draw a circle, and mark a point on the perimeter, A. Starting at point A, how many paths can be taken via a drawn line in the circle which get back to point A? Two: follow the perimeter clockwise or anticlockwise. (Technically 3, if your journey has 0 distance.)
Now draw a diameter through the circle. How many individual paths can be taken along a drawn line in that circle to get back to point A?
Now add a point B to anywhere in that circle, on the perimeter or on the diameter. How many individual paths can be taken along a drawn line in that circle to go through point A, point B, and back to point A?
Go ahead, count them up, Ill make myself a coffee in the meantime. You could be here a while.
Thats the point of non-linear design: it delivers a ton more choice for relatively little investment. And choice is the coin of the RPG: not the stats, not the CRs, not the second rate amateur drama (IC or OOG) it is meaningful choice that is the engine of a roleplaying adventure.
A simple example, one I mean to use on RHOD later: suppose a dungeon with three basic zones: one controlled by faction X, one controlled by faction Y, and a midground contested by both. Assume two entrances to the dungeon: one in faction Xs area, one in faction Ys.
Immediately there are three different, obvious experiences a party can have in the dungeon:
(1) enter at either doorway and mow through everyone regardless of which faction theyre in to the other entrance/exit;
(2) enter through faction Xs area, ally with them, and assault faction Y, and thus on to the exit;
(3) enter through faction Ys area, ally with them, and stomp faction Xs face into the curb, and on to the exit.
(And theres at least several other experiences: enter at faction Y, ally with faction Y, exit the dungeon and go through faction Xs entrance and stab faction X in the back. And so on.)
All it took to create this set of unique experiences in the one place was to add a second entrance and two factions.
(This is not to say, against what seems to be the default OSR assumption, that adding choices is always superior. Jaquaying, and to a lesser extent OSR philosophy, strikes me as appealing to certain kinds of fun: Discovery and Challenge in the main, with Narrative, Expression, and Fantasy as distant seconds. But different kinds of fun appeal to different people. Easiest way of illustrating this? Players making like Buridans Ass when put in an open world game. Yes, insufficient information creates this problem, but even then some people are just in it for the story, friendship, beer, and pretzels (Narrative, Fellowship, and Submission). Which is a longwinded way of saying: Jaquaying aint for every dungeon and it aint for everyone).
Now, where this starts to get interesting is that the concept of nonlinear dungeon design doesnt have to be confined to dungeons. It can be applied to adventures, because, to steal off Angry GM, every adventure is a dungeon.
Dungeons ultimately come down to entrance/exit points, transition areas (passages), and encounter areas (rooms.)
Adventures ultimately come down to introductions, transits between scenes, scenes in which encounters happen, and then to transits to the next scene.
Transits between scenes, like passageways between encounter areas, dont have to be in one direction.
Just what the hell are you on about and what does this have to do with RHOD?
Bear with me for one more long preface: what Im proposing is to slightly remix, or hack, or whatever, the structure of Red Hand of Doom using a couple of Jaquaying techniques. But before I do so, we need to understand the software we are working with. Red Hand of Doom is a great adventure, but we need to analyse why thats so. And tell ourselves some home truths about it.
When you get right down to it, RHOD has a highly linear structure. It has limited elements of open world, free choice adventure in it, but in reality a party has to swim pretty hard against the tide to get through the major areas other than via the expected way: Vraath Keep -> Skull Gorge -> Rhest -> Ghostlord -> Battle of Brindol -> Fane of Tiamat. After Drellins Ferry falls, players are pointed almost directly at Rhest, and if they skip that area entirely, the only way players can cotton onto the Ghostlords existence is via one word on Koths map from Vraath Keep. And if they do realise he exists outside the default sequence -- say at Drellins Ferry by asking a local about the phrase -- it takes a sidetrip over to Brindol to search through its bookshops and merchants for a map pointing to the stone lions location.
We can also see this intended structure in the CRs of the various encounter areas basically ramping up as the party gains levels and goes from one place to the next and most obviously in the structure of the book itself, which encourages the party to pursue the intended default course.
How do I know all this?
Because the authors said so. While out spruiking RHOD during its initial release, in an interview thats still available on WOTC, Rich Baker was explicit about it:
This is not a set of criticisms, but a series of observations. It allows us to better define what, if any, changes we might want to make. Structured as is, designed to deliver the types of fun it does, RHOD works well for specific kinds of enjoyment. It delivers Narrative and Challenge in spades, Fantasy in medium amounts. Its story is clear, easy to understand and visualise stop the approaching army, youre on the clock and so are they and serves up a variety of encounters and locales with decent tactical challenges. Originally Posted by Rich Baker
(It also delivers Discovery. In small doses. The area that most feels like an open world, or dynamic adventure site, is the Witchwood in Part 1. Drellins Ferry is your exploration hub, you can traipse around the Witchwood all you like, choose different paths to Vraath Keep and/or Skull Gorge, and indeed visit them in different orders if you wish.
Certain areas also have dynamic elements. Vraath Keep can be assaulted from at least two entrances: the front gate or the hole in the wall. Sounds minor, but remember what we can do with two entrances to a dungeon, above. Rhest can be tackled underwater or over the surface, by frontal assault or delaying ones attack until Regiarix and Saarvith are away, by taking the Town Hall first or the Bell Tower first. The stone lion has two entrances, meaning either the Ghostlord or Ulwai can be confronted first. These differences in potential approach deliver part of the fun. They trigger players Discovery, Expression, and Challenge buttons. Indeed, I would argue the main problem with the Fane of Tiamat, what makes it a rubbish dungeon, is that of all the dungeons in the game, it doesnt have a dynamic structure. But I digress and I will come back to the Fane in a separate post.)
When we look at the game through that lens what types of fun were emphasised, what types had to be compromised we can see more clearly why tradeoffs were made. And know what damage were going to do with our hacks. (And we will do damage. Why do you think they call it hacking?)
The biggest compromise was a consequence of the countdown to destruction, the slow advance of the Red Hand across the landscape. This is the primary narrative hook of the campaign. The designers wanted a big, climactic battle in which the players actions across the campaign influenced the outcome of that battle and the war. The closer the Red Hand gets to Brindol, the closer you come to failing in your Big Damn Heroes moment which is really the whole point of RHOD.
To cater to this type of fun Narrative and Challenge, turned up to 11 they had to turn the volume down on Discovery and Expression, which is to say, non-curated exploration. The arch-enemy of exploration isnt dwindling resources, its time. And in RHOD, the whole campaign is constrained by time. If youre in the middle of an action-suspense movie, theres not really the room for characters to say Hey, whats over that hill? It wont matter that much if we lose two days down an unexpected deep pit with the Red Hand three days from the gates of Brindol.
I think thats why the smaller towns and villages of Elsir Vale get statblocks and brief written sketches, but not much is made of any location except for Drellins Ferry and Brindol. Its not just reasons of space exploration was probably thought to take away from what the authors had chosen as the main drive of the campaign. So the authors compromised: they left the tools there if DMs needed to flesh out an area on the fly, but they werent going to draw attention to it.
Just as significant is the second biggest compromising element the narrative sequence of RHOD. The authors had you get around to three major encounter areas and then fight the Battle of Brindol. The authors clearly believed the partys level would have a massive impact on clearing any given encounter area, so they mapped out the sequence of encounters and encounter difficulty accordingly. Hence why the CRs creep slowly upward as you move from Vraath Keep to Rhest to the Ghostlord to the Battle of Brindol. They envisioned a linear campaign, envisioned the party actually getting to Brindol to have its Big Damn Heroes moment, which meant the difficulty of encounters had to be governed accordingly.
Please, Garyx, Io, all the hundred existing gods of Faerun and the uncertain ones of Eberron, get to the point, Saint
If we want to make RHOD into a more nonlinear adventure, make it more explorable, make it a more unique experience for any given party that plays it, while still getting the experience of being captains of good running around impacting the course of the war then we now know some things we have to watch for. We must consider the time limit the adventures on and the fact theres an intended sequence of events reflected in a concrete set of CR ratings. Fixing all of them will involve compromises.
These changes may or may not be a good thing. This is why theres such a massive preface. What Im proposing is not essential, or a necessary fix, or tried and true, or best practice. It is hacking the game, interfering with the basic structure of RHOD to see if a good adventure can be made any better by breaking the railroad. My suspicion is that it will for the right party. But if youre going to adopt any of the stuff I have in mind, take all of whats said above and proceed with caution. Because they dont pay me for this stuff.
All right. Get on with it.
In summary: we bring the Fane of Tiamat into play earlier and add more plot-based connectors between the different areas. Where previously youd have to stretch hard to get the party to the Ghostlord or the Fane ahead of time, they are now all but freely available from the start. We also add consequences for how different areas react to developments in the different regions. And finally, we consider our encounter difficulty with this new structure.
Where previously the players followed a predefined event sequence, the sequence is now fluid. We now have a structure where the players can, if they wish, go first to the Fane of Tiamat and then the Ghostlord area and then Rhest if they want, ending up at Brindol after all of these areas are played out. Or they can retain the default sequence. Or most other combinations in between. That is they can have a unique experience with RHOD.
It still channels back to Brindol, of course. This cant, and shouldnt, be avoided -- because we want to retain the Battle and the big confrontation in there; the adventure ultimately is about stopping the Red Hand. This design retains the shadow of a narrative structure, but also explicitly does what a lot of DMs intuitively do: make the Battle of Brindol the climax and end of the adventure. The Fane of Tiamat remains in this structure, but it is relegated to become another adventure site like Rhest or the Ghostlords lair.
Narrative changes to the module
Drellins Ferry:
-- De-emphasise or flat-out dont mention the possibility of evacuation. The module as written makes standing and fighting equate with stupidity; the option is cleverly associated in the players minds with an unsympathetic NPC, Iormel.
-- If its mentioned at all, evacuation now becomes the option Iormel supports, and standing becomes the option most of the Council supports.
-- The preferred method of defending Drellins Ferry becomes guerrilla warfare in the Witchwood while they wait for reinforcements from Brindol we know that country well, better than any miserable hobgoblin, itll give us time for help to arrive from Brindol, etc.
-- Theres more information directly available at Drellins Ferry about the story of the Ghostlord. Once the party raids Vraath Keep, theyll likely come asking questions about him even if they know the location of the lair. The information source for more about the Ghostlord strikes me best to be Avarthel, keeper of the druid circle at Drellins Ferry. The Ghostlord being a blighter, and therefore an ex-druid, is a tale of caution and seduction by dark forces, known and spoken in whispers among druids. The ones in Elsir Vale allow inaccurate legends of the Ghostlord to proliferate because it keeps people from inquiring into a very dangerous monster, and therefore keeps the people safe. How much of the actual story you want to tell them is for DM discretion, but something might be made of the fact the Ghostlords been dormant for hundreds of years, rejecting all visitors to the Thornwaste, and the Red Hand must have something to do with it if hes now suddenly interested in working with them in anyway.
The change in defence methods doesnt mean the Ferry can be saved. It just slows the Red Hand down somewhat. Fighting in the Witchwood delays the fall of Drellins Ferry about 7 more days but it becomes apparent fairly quickly that guerrilla tactics simply wont work against a force of the Red Hands size, and the decision is eventually made to evacuate, deciding the only way to beat the Red Hand is to fight a pitched battle at Brindol. Better yet, the plot could be twisted when the Ferry decides to hold, but later is told no help is coming from Brindol because Jarmaath knows that a good wall is the best place to fight the army. This allows our hub to shift from Drellins Ferry to Brindol.
I do this because I think Drellins Ferry has to be a crossroads for the players for longer under this model. Three of our main adventuring locations Vraath Keep, the Ghostlords lair and the Fane of Tiamat are in the western end of Elsir Vale, and distances between encounter areas matter when players are deciding what to choose to visit in an open world environment. Having a friendly stopping point roughly equidistant from them encourages the players to stay here for longer than they normally would. It also makes an earlier side trip to the Hammerfist Holds more plausible, if were minded to build out that section of the campaign. If the players have a reliable method of getting around faster, this change might not be needed.
It also has the advantage of not wasting all the significant NPCs that we meet early in the adventure, and making us care a bit more about them.
Vraath Keep:
Changes to the information are all thats needed.
-- Koths notes have more details:
--- The location of the Ghostlords lair, Rhest, and the Fane of Tiamat are contained within, though there are still no notes on who or what the Ghostlord is.
--- Wyrmlords are described as normal but are vague on the assignments and locations of Kharn and Azarr Kul. (This is because Kharn becomes the major-domo and guardian of the Fane, and Azarr Kul will be travelling with the Red Hand army itself, allowing him to become the final boss at Brindol.)
--- The notes say each of the dragons has a token that opens the front door of the Fane of Tiamat. This is important because otherwise theres no safe way into the mountain other than the password, which only Ulwai (and any other random passerby in the Wyrmsmoke Mountains) knows. Telling the players the dragons have a token to open an area of the map encourages them to go dragon-hunting and look for dragon hoards, as well as playing up the significance of the Fane.
--- The Fane of Tiamat is described as a significant spiritual support for the Red Hand: agents of the Red Hand are working on creating a breach between planes, to Avernus, to make their clerics (and Azarr Kul) more powerful via the direct connection to their goddess. If the portal is completed itll make their clerics stronger, so destroying it is a significant goal to pursue.
These changes are mainly required to open up the availability of adventure locations. We want people to make choices about which areas to visit and when. NPCs could speculate that the Keep might make for a useful forward command post for anyone who wanted to conduct guerrilla operations in the Witchwood, which might prompt a return visit or two, but once knocked over the Keep isnt intended as a major site to return to.
Rhest and the Ghostlords lair:
These shouldnt need substantial changes except for general CR adjustments further below, and recapitulating the locations of the Fane, Rhest, and the Ghostlords lair as appropriate.
If the PCs visit the Ghostlord before they visit Rhest, the only change needed is that the Ghostlord is more inquisitive about the people whove kicked over his enemies in the place, and the Ghostlord makes the offer of breaking his alliance with the Red Hand if his phylactery is recovered and returned. He knows where it last was the drowned city of Rhest but not much more beyond that. This puts a greater time pressure on the PCs because they have to get there and back, or alternatively the Ghostlord could give the party a one-use teleport item (rune, wand, single-charge staff, whatever) to get them back to the lair fast. Also in this case, the Ghostlord can be clear that hell continue supporting the Red Hand unless the phylactery comes back hes happy to devastate Brindol and the rest of the Vale.
The Fane of Tiamat:
This needs the most significant changes since were turning it from an end-of-adventure dungeon to a site able to be visited freely. Separate from the CR changes to the opposition, the following alterations need to be made:
- Kharn is now the level boss, not Azarr Kul. Otherwise details remain much the same.
- Any dragons defeated but not killed are here as well per the original rules. Otherwise theyre in their original locations.
- Eliminate the Aspect of Tiamat.
- The time scale for the opening of the portal to Avernus should be changed to become similar to that of the Red Hand on the march, e.g. completed around the point where the Red Hand army is about three quarters of the way to Brindol. As set out below, the purpose of the portal is now to provide spiritual strength (i.e. a caster level or two) to the Red Hand's clerics, rather than being any sort of effort to open a doorway to Avernus as it was in the original module. (Alternatively, fiat it that this portal is actually complete but needs clerics and/or Kharn around to maintain it. Killing Kharn means the portal collapses which weakens Red Hand clerics from there on in.)
- The Fane contains additional intelligence on the Red Hands plans in the other adventure locations, i.e. details that greenspawn razorfiends are being bred over in Rhest and the Ghostlords assistance is being sought in his lair, with both locations identified. Again, the idea is that we make the other locations able to be visited.
- Kharn is the boss overseeing the Fanes purpose. He doesnt surrender but if by some chance is captured alive, then at high DCs he might be convinced to indicate Azarr Kul is with the Red Hand army as it heads for Brindol.
Consequences of assaults
Leaving these alterations to one side, players should be noticing or have drawn to their attention differences in how things play out in the wider campaign as a result of going after one place versus another. There are, however, way too many potential combinations for me to comprehensively fit out how a DM might address these in the campaign. Some suggestions, however:
- While the Fane is operating, Red Hand clerics caster level if not ECL is one or two levels higher. After its knocked out, not so much.
- Hunting parties pursuing the PCs out of areas theyve visited refer to the destruction the PCs have wreaked thus far.
- Random encounter chances alter when the partys finished out an area no more Red Hand patrols from that district, or maybe Red Hand patrols between that area and the Red Hands current position are neutralised (since the area isnt supplying troops anymore).
- Red Hand army position slows based on partys assault on one or more areas (they were waiting for troops from that area who never showed up).
Otherwise the consequences of dealing with these areas are played out in who shows or doesnt show at the Battle of Brindol.
CR changes:
This is probably the most complex element to consider simply because RHOD is built for a party thats slowly getting more powerful as the levels go by, to the point where you can theoretically go with fixed level up points and lose nothing. This isnt anywhere near as easy in a nonlinear structure for RHOD since you cant guarantee a party is going to show up at a given adventure site when its ready to meet the EL of the opponents its originally meant to. And therefore how you answer this issue is going to depend on your philosophy as a DM. With consequences that flow from it.
The difference comes down to the following 2 philosophies, which are currently at war to such a point that supporters of each side have gotten to the point of insanity such that they ascribe political leanings to each other not that were going to get into that rubbish here:
(1) Old school D&D, expressed most clearly in the open world hex crawl, leans into the approach that the world is not curated to your current level, encounter difficulty is as is and it doesnt matter if you run into an elder red dragon based off the random encounter tables, sucks to be you and the encounter is about survival, not success. If you are getting your tail kicked, then retreat, level up a bit, and come back again later. Which is an approach that is arguably easier to incorporate into nonlinear adventures because you just set the encounters like jellies and leave them for the players to run into them and make of them what they will.
(2) Narrative D&D, expressed maybe most clearly in, well, the default RHOD module that the idea isnt emergent story but to trail along with a predefined narrative assuming that your players will run into encounters that present a challenge, but are not lethal. In order to keep the players on the narrative path, theres funnelling the story path down to a single alternative, but nowhere are the encounters clearly and visibly designed to be overwhelming to the players at least, not without a clearly available retreat option or (as with the default Ghostlord) set up with a big, blinking sign saying DO NOT ACTUALLY FIGHT THIS GUY over the head to tell the players exercising freedom here is actually extremely dangerous.
So which one is right for your party?
I have no idea.
But each one has consequences with this method of rebuilding RHOD.
If you take philosophy (1), then theres less work to do. Redesigning the encounters in a nonlinear narrative is just setting up tenpins and not caring whether theyre made of plastic or plutonium. But you take a higher risk of a TPK and whining players if they dont understand this possibility. Philosophy (1) arose in a context where characters were plentiful and easy to build and easy to replace arguably, not so in 3.5 world with dozens of sourcebooks and people who get attached to their creations some insanely so.
If you take philosophy (2), youre all but required to adjust the ELs of the different encounters depending on where your players go and when. Otherwise, unless the players are very experienced, its a pretty hard ask for a party of level 5-6 characters to take on a dungeon that was designed to challenge level 10 characters. And if your players find out youre doing this, some just as insane as the players in philosophy (1) accuse you of invalidating their choices or railroading or various other insults that really, really miss the timber for the foliage.
There isnt much of a solution, or rather a resolution, of these philosophies in rewriting the module to nonlinear shape.
If you are minded to rework the CR of the encounter areas, though, with the above warnings, then some suggestions:
- For Rhest and the Ghostlords lair: as a general rule of thumb, if the party gets to Rhest later than on the default module, its open to you to push the CR up or leave it unaltered depending on the level of desperation/assurance you want out of the players.
- For the Fane of Tiamat:
-- If the party takes out Rhest and the Ghostlords lair before visiting it, it can be slightly adjusted down with hobgoblin dragon devotees/shamans/disciples/clerics in place of all the various abishai and planetouched opposition. Kharn gets adjusted to something slightly stronger than his book version but is otherwise not altered.
-- If the party goes to the Fane before either or one of Rhest and the Ghostlords lair, the opposition gets adjusted down to low level hobgoblins consistent with those at Rhest or the Ghostlords lair, with one or two major opponents. Kharn is run more or less as he appears on the book.
- The Battle of Brindol remains more or less unchanged except for Kharn being swapped out for Azarr Kul, and the battle becomes the climax of the whole campaign. Aspect of Tiamat shows up here either as Azarrs last summoning on his defeat, or its what he morphs into after his mortal form takes a mortal blow. That said - you're likely getting the party after they've trashed everywhere else trashable in Elsir Vale, so if you're going to tweak the CR, this is a place to think about doing it.Last edited by Saintheart; 2022-08-18 at 09:46 PM.
-
2022-04-20, 12:07 PM (ISO 8601)Bugbear in the Playground


- Join Date
- Dec 2013
Re: The (New) 3.5 Red Hand of Doom Handbook for DMs - Major Spoilers! - PEACH!
I've always appreciated this and its ancestor threads, back to when I first played the adventure (read afterwards of course) and the one time I ran it.
I'll just say this though for all the "here is what you do to beef up the monsters" portions of this guide.
Start with a 4 person level 5 party of whatever (doesn't have to be iconic). The adventure can be run pretty much as written if you enforce that they only level at chapter breaks, and only level 1 level (don't add up experience, award it by chapter milestones, unless the party actually fails a chapter objective, then add up what they accomplished). I guarandamntee you that 4 level 9 characters will struggle with the Aspect of Tiamat if they've blown their wad figuring out how to fight Azak Kharn in a silence-enforced room (so no command word magic items, few spells, etc) and whatever survivors of the fane have retreated there. 4 level 8 characters will have moments in the Battle of Brindol that seriously challenge them too. 4 level 7s are less likely to try to face off against the Ghostlord (any lich is a minimum EL+4 encounter, and most PCs will assume the ghostlord isn't a minimim-power lich, even if he is. Add in those corrupting-gaze lions in whatever numbers you need to make him intimidating).
I played it with 6 level 5 Living Greyhawk characters, who leveled exactly 1 level between chapters (although level loss via death tended to be made up by sneaking in other LG adventures inbetween for 1-2 characters if memory serves). My L8 character died in the climax of battle of Brindol and I just swapped in a L9 alternate character for the final chapter rather than limp into it at L7. (we'd failed to kill 2 of the dragons, so the first final chapter battle was...challenging. I was very glad I'd made that call). We felt under time pressure after initial interrogation of prisoners in the Fane and pushed hard without resting and were so tapped by the end that we fled from the Aspect of Tiamat, leaving an unrecoverable body behind.
These were veteran players with moderate optimization, if within the limits of what was allowed in Living Greyhawk for class/spell/item choices. (significantly no Tome of Battle, no MIC stuff or anything else from 2007-2008 really out yet and most of the obvious Charop abuses like DMM/Nightsticks not allowed)
For a 6 person party, the GM bumped the first 2 dragons to large, bumped some ogres to skullcrusher ogres, added an extra Greater Bhargest in Marked for Death and had the hobgoblins release the Greenspawn Razorfiend at Rhest early on (who escaped with the eggs causing Streets of Death to end in us fleeing when that wave hit). There were a few other upgrades here and there (like worg-riders and an extra Ettin in the Missing Gold, rather than 1+ordinary goblins) Otherwise he pretty much ran it straight, if with better tactics and coordination than the book suggests (which seemed reasonable as Rhod is a reasonably elite army, especially the parts PCs tend to fight).
I ran it for a four person party of Pathfinder characters pretty much straight - at L5 the extra abilities aren't as significant, although by chapter 3 you should be beefing up the opposition a bit as if they were a level higher. Mostly though I adapted tactics, not statblocks, not even spell mixes. Things like shooting mounts out from under players at every opportunity with the scrubs, focusing fire while maintaining dispersion, having leaders favor caution and hit/run and being absolutely brutal with what arcane casters I had, nearly always pulling off an ambush and often moving again before most parties could react. And exploiting action advantage at every opportunity (any RHOD soldier not killed in a single round started drinking healing potions while buddies engaged. They found that very frustrating, especially in missile duels). These again were veteran players with solid builds and itemization, but the party wasn't iconic, which sometimes was helpful and sometimes bit them in the rear.
When I look at journals, I tend to see a lot of deaths with parties played "in level" even pretty large ones. The parties that seem to need a lot of GM intervention seem to average a level or two higher than the 5-9 progression and have 5-6 party members. The extra action economy and level seem to matter more than exactly how the characters are built. Parties without significant ranged offense will be weaker than expected, even if they're brutal in close, unless the party is unusually tactical at keeping ranges close (lots of teleport magic+air walk or unusually effective at fog/illusion/similar to let them close range without being noticed or without enemies able to target them effectively).
If your Wyrmlords and Dragons flee at first significant opposition, the later chapters also get a lot more challenging. It isn't till chapter 8 that the RHOD leadership has skin in the game enough to fight to the death. People like Miha or Ulwai coordinating encounters like Bhargest Reavers or Marked for Death can also make those sorts of ambush scenarios really scary. Something our GM did in Streets of Blood was have Kharn phone in an area Dispel Magic any time the battlefield control spells interfered with the assaults (he has lots of unused spell slots, and that is a long range spell. It explains what he's doing that portion of the fight, and all he needs is a scrub spotter and he can do it from total safety out of LOF/LOE of any PC)Last edited by Seward; 2022-04-20 at 03:06 PM.
-
2022-04-20, 01:46 PM (ISO 8601)Ogre in the Playground

- Join Date
- Apr 2019
Re: The (New) 3.5 Red Hand of Doom Handbook for DMs - Major Spoilers! - PEACH!
Thanks for the hard work keeping this thread alive and compiled. It's inspired me to run this campaign in the future myself, using this as reference.
-
2022-04-20, 04:35 PM (ISO 8601)Ogre in the Playground

- Join Date
- Feb 2019
Re: The (New) 3.5 Red Hand of Doom Handbook for DMs - Major Spoilers! - PEACH!
Reposting my story tweak from a recent thread.
Originally Posted by Elves

-
2022-04-21, 06:44 PM (ISO 8601)Bugbear in the Playground

- Join Date
- Aug 2010
Re: The (New) 3.5 Red Hand of Doom Handbook for DMs - Major Spoilers! - PEACH!
Nice to see this revisited, Saintheart. It was always a pity when the first handbook fell off the front page.
I was with a group that played RHoD shortly after it came out. We had 5 PCs, not really optimized, so the module didn't need any real fix-up for us. There was warlock, a sorcerer, and I had dwarf fighter/cleric...I don't remember the rest. I remember it being a tussle, but a well-enjoyed campaign.
Highlights:
-Smashing the first few waves at Drellin's Ferry, and realizing they were just still coming. That's when we realized the magnitude of the Horde.
-Rhest: being savaged by the razorfiends; making nice to the elves, despite some players' best efforts; a sneak into the belltower turning into a running battle when we go a little fire-happy.
-Summoning 3 celestial griffons to help in the battle against Abithriax; they didn't last long, but showed me minions were a valid 3E tactic...
-Bull rushing the Fane; reconning Azarr Kul and actually buffing before a battle; it took awhile, but the fight was never really in doubt.
-Ending that session with the Aspect of Tiamat coming through; the DM saying, "To be continued..."; and me saying, "Wait. I cast Banishment." What?! DM digs around, realizes it's a valid tactic, and rolls a save. He succeeded by 2, dagnabit. Still being buffed, we dogpiled it next week and made our escape.
I *STILL* want to know if anybody ever made a last stand at Drellin's Ferry or gamed out an optimized party versus the horde at that point.I have a blog; come see what I've created: https://thewhiteminotaur.wordpress.com/
-The 2024 Character Creation Challenge (#charactercreationchallenge):
https://thewhiteminotaur.wordpress.c...tionchallenge/
-
2022-04-23, 11:38 PM (ISO 8601)Dwarf in the Playground
- Join Date
- Nov 2019
Re: The (New) 3.5 Red Hand of Doom Handbook for DMs - Major Spoilers! - PEACH!
So, this is a bit of a random thought while re-reading the handbook, but has anyone proposed replacing Koth's vacant familiar with the Divine Companion ACF from Complete Champion? It's a more light weight change than Spell Shield, lasts 6 turns (if you don't Practiced Spellcaster his CL), gives +6 deflection and +6 resistance (ditto), should be chargeable off a wand, and gives a metaphysical connection to Tiamat for the lowly bugbear sorcerer.
It also gives him a self-heal, but that's probably less important given the scale and nature of the fight.
-
2022-04-23, 11:46 PM (ISO 8601)Ettin in the Playground
- Join Date
- May 2009
- Location
- Perth, West Australia
- Gender
Re: The (New) 3.5 Red Hand of Doom Handbook for DMs - Major Spoilers! - PEACH!
Building out the Hammerfist Holds
Introduction
Everyone wants more adventures out of the Hammerfist Holds, virtually nobody does it. I'm going to try and redress that.
Caveat: this'll be more of a broad structure, not a full mechanical buildout ... unless someone really wants it. I want to keep new material at a minimum. More material means the DM's job gets even harder. Also, I wanted to keep the scale of the sidequest low so it doesn't overshadow the default sections of the adventure. The solution to me seems to be, rather than start interpolating drow or other involved parties, to make more of Miha Serani, who otherwise isn't used a lot in RHOD generally. I'm also aiming at avoiding long plot or narrative sequences since the idea's to give the players a problem/situation to interact with and come up with solutions for it, not specify a railroad as such. Below is what I've come up with so far.
Background:
The 'statblock' of the Hammerfist Holds as a whole is on page 10-11 of RHOD. Half a dozen dwarf clanholds, each a hamlet or village, taken together their authority figure is Othrek Hammerfist, a dwarf fighter 8, and a cleric 7 (Thaardin Ironhand), bard 8 (Uldrina Flamehair), and a dwarf rogue 5 (Derra Copperfist) as the important people in the place.
Othrek's elite guards are 1 x fighter 6, 6 x fighter 4, 17 x fighter 3, 22 x fighter 2, 26 x fighter 1. Also, the Holds can put together a militia of 2 x cleric 4s, 5 x cleric 3s, 16 x cleric 1s, 55 x warrior 3s, 105 x warrior 2s, 240 x warrior 1s.
The Holds are not identical with the Shining Axes. The Axes are a mercenary company 200 strong led by a Captain Ervath Helmbreaker who apparently is contactable in the Hammerfirst Holds. So it's not clear whether they're actually part of the Holds, or passing through, or what.
So the Hammerfist Holds and the Shining Axes could add a total of about 650 troops to the Vale's defences if they threw everything at Brindol. Not to mention that clerics and bards at those levels are thin on the ground in Brindol. It can be assumed the Red Hand knows full well the dwarves are a threat to their plans of conquest. Unlike the Tiri Kitor in the marsh, dwarves loves to kill giants, goblins, and hobgoblins and can march straight overland to assault the Red Hand's flank. The Red Hand also presumably knows it'd cost a fair amount of time and resources to assault the Holds directly and remove the dwarves, since the dwarves remain miners and have very solid defences just by retreating underground (if indeed the Holds aren't already underground).
Hooks for the players out of RHOD drawing them to the Holds:
- Alter the Mercenary Gold encounter to become Jarmaath offering generous diplomatic terms to Clan Hammerfist if it assists in the defence of Brindol, i.e. calling out the whole clan.
- Alter the Mercenary Gold encounter as a request from Jarmaath: "since Othrek Hammerfist's clan has rebuked all my offers, without explanation, to join this fight, I beg you, Ervath, here's 6,000 gold, please bring the Shining Axes here. I wish Othrek were with you or if you could intercede with him on my behalf."
- Players have it indicated by Norro, or Jarmaath, or Morlin Coalhewer, that the dwarven clans should be brought into the fight.
The Problem/Situation:
Azarr Kul has neutralised the dwarven threat via Miha Serani, the aranea sorceress who's their master spy in the Vale. Miha is a member of a colony of araneas in the Wyvernwatch Mountains. Her people have been enemies of the dwarves for centuries, but the Hammerfist clan had driven them back deep into the mountains. The colony remained in hiding there, until Azarr Kul, guided by Miha Serani and Tiamat's insights, contacted them.
Skather, the Red Hand's master assassin, helped the aranea colony kidnap Othrek Hammerfist, the leader of the Holds, and brought him to the colony. The araneas have imprisoned Othrek. He's unconscious, in stasis, close to death, cocooned in their webs. The Red Hand made a simple deal with Clan Hammerfist: stay out of the war, make no attempt to defend Elsir Vale, and Othrek Hammerfist will live, as well as the Holds remaining untouched Without their leader, and with no immediate successor able to influence the clans otherwise, the clans have been paralysed with inaction.
Othrek is imprisoned in an abandoned dwarven fort on the southern edge of the Holds, in a position where the araneas can keep watch over the Holds and check for any signs of mobilisation. The araneas have a number of spider monsters to protect the abducted dwarven leader - phase spiders, tomb spiders, as you please. The place is also trapped heavily and festooned with webs that convey warning of intruders to the aranea colony. Worst of all, Azarr Kul has placed a contingent Death Knell spell cued to fire against Othrek Hammerfist if a dwarf sets foot in the fort, meaning the dwarves of Clan Hammerfist can't assault the place to get their ruler back.
There's division among the dwarves about whether Othrek Hammerfist should be rescued.
- The Cleric 7 doesn't like the situation but thinks it's too risky for the Hammerfist Clan to attempt any sort of rescue effort.
- The Rogue 5 sees this as his best opportunity to rise above Othrek's sclerotic leadership and bring the dwarves back to greatness, so he'll ask the party to ensure Othrek dies, and bring back proof, and he'll ensure the Hammerfist Clan goes to war (the drawback being that the Shining Axes don't trust him and so will refuse to defend Brindol, preferring to stay and defend the Holds).
- The Bard 8 is all for a direct assault for the pride of Clan Hammerfist even if it risks Othrek's life and the lives of many dwarves taking the place back. So the players have several different ways they could handle the approach and the outcome of the sidequest.
If Othrek is rescued, he'll commit the whole clan to war. Naturally. And command the Shining Axes to assist, which they'll accede to.
Or the players can just hire Ervath Helmbreaker as the leader of the Shining Axes and leave it at that, meaning the Holds stay out of the war and the mercenaries only come to Brindol's defence.
Rough setup and opposition:
- Find a simple ruins/crypt map, ideally with a couple of different entrances or modes of assaulting the place (e.g. by air, underground, secret doorways). The dwarves can't attack the place but know its layout enough to suggest entry paths, though they won't have much idea about what the araneas' defences are like.
- The "Level boss" of the ruin is actually three araneas (Miha's sisters) working as a unit: one set up martial as a swordsage, one set up as a Warshaper, one set up as a better sorcerer emphasising cold magic (take Metamagic Specialist, araneas have a massive INT score that allows lots of uses of the ability). Or more conventional araneas and have a Spawn of Tiamat buttressing them, e.g. a Blackspawn Stalker which is quite literally a dragon/spider crossbreed.
- Rest of the place is spider-based: Tomb Spiders, Phase Spiders, Spider Swarms
- Place is trapped with a heavy focus on Poison, Web traps, and lots of spidersilk strands letting the monsters know the PCs have arrived or are in given areas of the dungeon.
- Idea is to give a couple of different approaches to the place: stealthy rogue-style assault, or direct confrontation.
What do people think of that, and does anyone want a more detailed buildout?
EDIT: I built it anyway. Here's the link to my GoogleDocs document with my build: https://docs.google.com/document/d/1...Vt2LKEcqA/editLast edited by Saintheart; 2022-07-13 at 07:35 AM.
-
2022-04-24, 12:02 PM (ISO 8601)Bugbear in the Playground
- Join Date
- Dec 2013
Re: The (New) 3.5 Red Hand of Doom Handbook for DMs - Major Spoilers! - PEACH!
I have a hard time imagining 6 level 5 or 4 level 6 characters winning a standup fight at Drellin's Ferry. Leaving aside dragon, manticores and hill giants, enough arrows flying your way and the 20s will kill you, and enough hold persons aimed at you and you will roll a "1" and Kharn has enough dispel magics on tap to frustrate any attempt to defeat those numbers with just L3ish spells. Originally Posted by thorr-kan
With the right kind of party you could have them whittling away at the horde's numbers all the way to Brindol, maybe assassinating some of the stronger members and being enough of a PITA to do real damage. Doing that though makes it a lot less likely you deal with Rhest and/or Ghostlord though, which means you might have Marked for Death backed by a half dozen greenspawn or ghost lions as your reward, even before the impact on Streets of Blood and whatever victory points you don't get, plus all those leaders showing up for the final confrontation. So for most parties, if you weren't able to destroy the horde as a fighting force in that time, you'll pay for it later.
Lets say though they figure out a way, and survive the various attempts to root them out, assassinate them etc, drawing in Rhest and Ghostlord resources (either the original garrisons if they do it quickly, or the greenspawn/undead troops added later if it takes them most of the horde's march to Brindol) and manage to take out enough of them to make it implausible that the horde can do much of anything to Brindol. There are after all many, many ways to do damage with hit and run tactics that never let the horde effectively use its numbers.
That could be a pretty damn fun campaign in its own right, a giant running battle of ambush, tracking, counterambush, gutting the high level leadership of the horde by getting them mad enough to hunt the players and then losing, maybe with a final triumphant L8-9ish party attacking a weakened, demoralized, mostly leaderless horde and shattering it in a gigantic climactic battle showcasing how badass the party has become.
Bonus badass points if Brindol defenders offer to help and the party goes "Nah, we got this, you'll only get hurt. Shut the gates and keep the civilians safe."
You still have Chapter 5 after all, even with that outcome, especially if you go with the "RHOD deaths are the fuel for the ritual" adjustment , with surviving leadership/dragons/etc to stiffen the resistance there if the party needs more opposition.Last edited by Seward; 2022-04-24 at 12:09 PM.
-
2022-04-24, 12:27 PM (ISO 8601)Bugbear in the Playground
- Join Date
- Aug 2010
Re: The (New) 3.5 Red Hand of Doom Handbook for DMs - Major Spoilers! - PEACH!
I don't expect them to win. I just want to see the attempt. Somebody, somewhere, has to have tried to make a stand at Drellin's Ferry. But nobody ever reports what happened when they did. I've asked for years. Originally Posted by Seward
Sometimes, it's fun to play that forlorn hope, and just lay it all down without any worry about what comes after.
When we played it, we did try to make a stand at Drellin's Ferry, to cover the evacuation. And we did pretty good for awhile. But the horde just kept coming, and we started getting frustrated as players. But it was at that point that the DM impressed on us exactly what we were up against. So we put on our big-boy pants, escaped out of there, and proceeded to the rest of the module. It ended up being an epic run, and one of the high-points of that gaming group's existance.I have a blog; come see what I've created: https://thewhiteminotaur.wordpress.com/
-The 2024 Character Creation Challenge (#charactercreationchallenge):
https://thewhiteminotaur.wordpress.c...tionchallenge/
-
2022-04-24, 11:53 PM (ISO 8601)Bugbear in the Playground
- Join Date
- Dec 2013
Re: The (New) 3.5 Red Hand of Doom Handbook for DMs - Major Spoilers! - PEACH!
When I played and when I ran it, the party scouted Cinder Hill and was damn sure this was out of their league, so the emphasis was to get the townsfolks to stop thinking about fighting and planning to run (and in our case we didn't exactly tell them we dropped the Skull Gorge bridge in the most diplomatic way, so they weren't inclined to listen to us...and Ozzie got away so we didn't have a dragon head to drop on the table. We actually bribed them to leave, we'd been very diligent about hauling out every masterwork longsword or suit of hobgoblin chainmail, it had been piling up in a warehouse, nearly 10k in random weapons and armor and we said "you can just have that crap if you leave for Brindol with it tomorrow...use it to arm your militia or compensate the refugees, we don't care, as long as you GO"). The staff of life alone would have kept us in WBL for a couple levels so we weren't feeling poor. Later in Brindol we saw the guard captain wearing the +1 banded mail and one of the +1 shortswords from the first Maurader encounter, and her militia companions were sporting str+1 comp longbows, masterwork swords and chainmail instead of crossbows, leather and spears. Unfortunately it didn't save them from the Bluespawn wave in Streets of Blood.
My Pathfinder players had a better plan for Ozzy, and a better diplomat, so with dragon as proof and less council members irritated with them, they got the townsfolk out with less drama.
I'm trying to imagine a party choosing to fight for any reason other than trying to cover the retreat of late-leaving townsfolk....if you are covering a retreat each wave you beat off is a victory of sorts. This is a situation you are more likely to get into if the party also is discounting the magnitude of the threat.Last edited by Seward; 2022-04-25 at 11:11 AM.
-
2022-04-26, 12:13 PM (ISO 8601)Barbarian in the Playground

- Join Date
- Feb 2015
Re: The (New) 3.5 Red Hand of Doom Handbook for DMs - Major Spoilers! - PEACH!
I'm toying with expanding the adventure in a slightly different way. I've run and played it and we followed the clues to the right path. When I ran it, I expanded a little bit on Miha Serani and the spying since the players didn't catch her initially and I expanded a little bit on running hit and run raids to slow the Red Hand's advance, but that was mostly the NPCs. When the PCs tried it, Immerstal's teleport to get behind enemy lines went off target and the PC wizard got eaten by a barghest.
But now that the adventure is done, I'm toying with the idea of running some B team adventures. The heroes of Bova went to deal with the fane of Tiamat, and the siege of Bova was lifted but while the Red Hand army was defeated, it was not annihilated and was able to reform some of their units in Tarrelton and tried to hold out while waiting for Azzar Kul to complete his ritual. The armies of the vale still had to push them back to the foul mountain dens from which they came, retake the land from them, and securely rebuild. This is the story of the soldiers and adventurers who did the work and made that happen.
-
2022-04-27, 02:47 PM (ISO 8601)Pixie in the Playground

- Join Date
- Sep 2017
 Re: The (New) 3.5 Red Hand of Doom Handbook for DMs - Major Spoilers! - PEACH!
So I only recently got back into D&D (3.5 and Eberron in particular) after a lengthy hiatus.
RHoD has always held a special place for me ever since I first ran it as a DM many moons ago.
So I've been busy reading through the module again, as well as slowly working on adapting various NPCs and monsters both to provide a bit more of a challenge and to better fit Eberron where necessary.
I was already familiar with AslanCross' Eberron RHoD campaign journal, but in the past few days I've also found this as well as the previous handbook and I have to give massive props to both the author and all involved who have been pitching ideas and sharing experiences of their own. These handbooks have turned into amazing comprehensive resources and I will definitely be incorporating plenty of ideas into my own adaptation, even though it might be a long time before I'll be able to run it again, both due to limited free time and currently only one person in my group of friends with an interest to participate. Oh well, one can always hope, right?
-
2022-04-28, 10:40 AM (ISO 8601)Spamalot in the Playground

- Join Date
- May 2008
- Location
- Orlando, FL
- Gender
Re: The (New) 3.5 Red Hand of Doom Handbook for DMs - Major Spoilers! - PEACH!
My only experience playing RHoD ended on a sour note when the lich TPK'd the party during the Wyrmlord Kharn fight.
I found the lich's section a bit confusing with motives and what we were doing, and the wyrmlord Ulwai ended up leaving with the phylactery before we reached them due to how long it took us to get to the final chamber (oops on our part). The problem is that there doesn't seem to be any other opportunities to try and take back the phylactery.
During the siege we were told Ulwai had the phylactery on them at all times, so when we reached Kharn, we concentrated on taking Ulwai down quickly so that we could get the phylactery and tell the lich to go home so he would leave the fight. However, turns out that no, Kharn had the phylactery and when we were just a blow or two from killing him, the lich saved him by raising all the bodies on the map as zombies. The staggering number of hits this army of undead managed to land make short work of the party.
I feel that if the players fail to secure the phylactery at the desert ruins, there should be a second chance somewhere. There seems like there is time enough to try, either by scouting the army as it slowly makes for the city or during the siege somewhere. If not that, then I think the players should have a way to get reliable info on who has the phylactery in the Kharn fight, because I could see many players thinking that securing the phylactery and giving it back to the lich would allow him to end his involvement in this battle.
-
2022-04-28, 02:36 PM (ISO 8601)Pixie in the Playground
- Join Date
- Sep 2017
Re: The (New) 3.5 Red Hand of Doom Handbook for DMs - Major Spoilers! - PEACH!
From what I remember from when I ran RHoD (it's been over 10 years) that was probably the part of the campaign that was least clear to my players and I had to drop some pretty heavy hints bordering on metagame knowledge to get the point across during this encounter. Originally Posted by DigoDragon
It's definitely one of the things I want to tackle if I run RHoD again by leaving some additional clues throughout the adventure preceding the introduction of the phylactery and/or Ghostlord, and leave an opening or two to come to an agreement of sorts for the party to return the phylactery within x amount of days for example.
Provided the party doesn't have any 'purge the undead' type of characters of course.
-
2022-04-28, 03:33 PM (ISO 8601)Pixie in the Playground
- Join Date
- Sep 2017
Re: The (New) 3.5 Red Hand of Doom Handbook for DMs - Major Spoilers! - PEACH!
Regarding the subject of dragons, I've been toying with the idea of adding more dragons to include all 10 species of true dragons in a RHoD campaign set in Eberron, since in Eberron metallic dragons are just as likely to have an evil alignment as chromatic dragons.
Due to the link with Tiamat I still want to include all 5 chromatic dragons and not just replace a few of them with metallic dragons though, so all the 'colors of Tiamat' will still be present in the adventure.
However, I'm not quite sure where to squeeze in 6 extra dragons in total (since a White Dragon is also missing in the adventure as written) while keeping them all relevant to the plot in one way or another and not just being there for the sake of getting a full bingo card so to speak.
Some initial thoughts:
-At first I was thinking of upping Ozyrrandion one age category to bump his size to Large to increase the challenge surrounding Skull Gorge Bridge a bit. Now I'm thinking about keeping him at medium size (though I'll still shuffle his feats and the like around to turn him into more of a strafer) and pairing him up with another medium size dragon, probably a young Copper dragon.
-Regiarix might go up one age category and size and I've rebuilt him as more of a ranged skirmisher to pair well with Wyrmlord Saarvith using mounted archery. Other than that he's staying as is.
-Abithriax might go up one age category and size as well and be rebuilt (still not sure if I want to turn him into a strafer/flyby attacker or more of a direct melee brute to fit his 'fight to the death'-attitude), but other than that he'll stay where he is in the adventure.
-Tyrgarun might get bumped up a bit and be rebuilt similar to Regiarix and Abithriax.
-Varanthian gets replaced by a Brass dragon of similar CR, probably built as a pseudo-spring-attacker abusing its burrow speed (Travel Devotion leading to whack-a-mole with dragons anyone?).
So that's 2 dragons added, but 4 more to go.
-I was thinking that perhaps I can add another guardian style dragon at the entry to the Wyrmsmoke Mountains before the party makes their way to the Fane of Tiamat proper, hopefully without it feeling forced. This is probably where I'd add the White Dragon.
-Another idea I had was to use a Bronze/Silver/Gold Dragon's Alternate Form ability to let it infiltrate in one of the settlements of Elsir Vale. My first plan for Miha Serani was to replace her with a Rakshasa agent (thanks to AslanCross' suggestions), but perhaps a dragon would work for her as well. Alternatively I could replace one of the lords of Brindol with a dragon in Alternate Form, most likely Lady Kaal.
-Lastly I might be able to use a dragon, either using Alter Self or in its natural form, in a new initial encounter that serves as a lead in or hook to get the party started with the adventure, but I'm not sure yet how I'd want to do that exactly.
Does anyone else have any thoughts or experiences regarding this subject?
-
2022-04-29, 12:45 AM (ISO 8601)Bugbear in the Playground
- Join Date
- Dec 2013
Re: The (New) 3.5 Red Hand of Doom Handbook for DMs - Major Spoilers! - PEACH!
Ok lets see - first be aware that if you are a 4 person L5 party, even Ozzy's pretty tough. Scale the dragons up to your party's strength, they should be tough, have a good chance of getting away but a party with a good plan should put them on the defensive pretty quick, where one with no plan will probably run screaming from the first encounter and maybe lose somebody especially if properly supported (ie not lured away from its supporting minions).
That's the feel for those encounters you want. Beyond that, tune it to suit your taste. Also try to equip them with loot your party might want to use, at least for permanent items. Your suggested change to the 5 dragons (or near dragons) in the basic 5 chapters seem fine if scaled properly for those encounters.
Adding a white dragon to the final chapter's initial dragon guardians is probably a good idea if the party smoked everybody in earlier chapters, as that encounter can be otherwise underwhelming. If, however, a lot of dragons got away be careful not to TPK them by adding in another dragon (or maybe downgrade it a bit, make it younger being "Shown the ropes" by its older companions). If there is just the blue dragon, you can put in a pretty beefy white dragon and not unbalance the encounter vs most parties at that point.
Replacing Miha with a polymorphing dragon is just plain a good idea. She's a weird entry (kinda like Varanthian) so if you can find a polymorphing dragon with appropriate challenge rating, that would be cool. Again, she'll show up in the final Brindol battle if not discovered, so be a bit careful how strong you make her, to avoid overshadowing the Boss Wyrmlord.
The idea of having a good dragon or two working against Tiamat is also a pretty neat idea. That could help with the whole "how do we get the party to do the phylactery thing" or "they need a stronger pointer to Rhest to want to go there". If the party is about to TPK, having one blow their cover to rescue them should be an option but should cost victory points, or if in final chapter, something else meaningful. (Marked for Death especially can be very swingy, as can its little brother Barghest Reavers. If the party leaves a ton of Wyrmlords alive, maybe help out in the final Brindol battle, but not earlier. Likewise chasing off one of the dragons with one of the ringer dragons might help balance the Fane approach if they've left too many dragons alive)Last edited by Seward; 2022-04-29 at 08:36 PM.
-
2022-04-29, 05:30 PM (ISO 8601)Ogre in the Playground
- Join Date
- Mar 2004
- Location
- In eternity.
- Gender
Re: The (New) 3.5 Red Hand of Doom Handbook for DMs - Major Spoilers! - PEACH!
May we have this thread reposted on the handbook board of Min Max Forum?
Originally Posted by GPuzzle
My Complete Tome of Battle Maneuver/Stance/Class Overhaul Originally Posted by Flickerdart
Arseplomancy = Fanatic Tarrasque!
-
2022-04-29, 11:14 PM (ISO 8601)Ettin in the Playground
- Join Date
- May 2009
- Location
- Perth, West Australia
- Gender
Re: The (New) 3.5 Red Hand of Doom Handbook for DMs - Major Spoilers! - PEACH!
I've never been a member over there, and I don't know if I'm sufficiently hardcore to dare post it over there ;) Originally Posted by Endarire
Happy for it to be mercilessly linked to over there if you want, though!
-
2022-04-30, 03:20 AM (ISO 8601)Ogre in the Playground
- Join Date
- Mar 2004
- Location
- In eternity.
- Gender
Re: The (New) 3.5 Red Hand of Doom Handbook for DMs - Major Spoilers! - PEACH!
You needn't be 'hardcore' - whatever that means - to post it there. Considering the size and worth of this guide, I want others to be able to easily reference it!
Thankee!
(And your signature and old RHoD guide should link to the new Red Handbook of Doom!)Last edited by Endarire; 2022-04-30 at 03:20 AM.
Originally Posted by GPuzzle
My Complete Tome of Battle Maneuver/Stance/Class Overhaul Originally Posted by Flickerdart
Arseplomancy = Fanatic Tarrasque!
-
2022-04-30, 04:09 AM (ISO 8601)Ettin in the Playground
- Join Date
- May 2009
- Location
- Perth, West Australia
- Gender
Re: The (New) 3.5 Red Hand of Doom Handbook for DMs - Major Spoilers! - PEACH!
I'll go and have a poke around in there and give it some thought. Updating links in my sig and the old guide (the latter of which involves a request to the Gods, er, Mods.) :) Originally Posted by Endarire

 Reply With Quote


 RSS Feeds: